
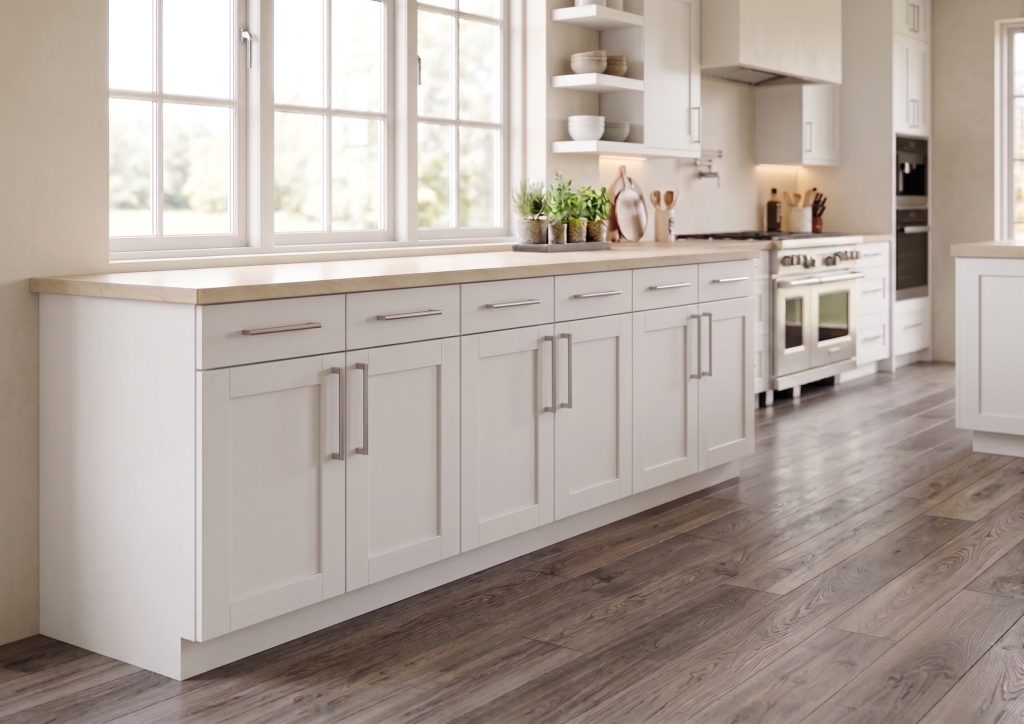
Building your own kitchen cabinets might seem intimidating at first, but once you understand the process, it becomes one of the most rewarding DIY woodworking projects you can tackle. Not only can you save a significant amount of money compared to buying pre-made cabinets, but you also gain complete control over the cabinet size, materials, layout, and finish. In this cabinet building tutorial, you’ll learn how to build a durable frameless kitchen base cabinet featuring double Shaker-style doors and two functional drawers using common woodworking tools and cabinet-grade plywood.
One of the biggest advantages of building your own cabinets is customization. Whether you’re remodeling a kitchen, upgrading a workshop, building garage storage, or creating a custom laundry room setup, these DIY cabinet plans can easily be adjusted to fit your space and storage needs. The frameless cabinet design provides a clean modern look while maximizing interior storage space, and the Shaker-style doors give the cabinet a timeless appearance that works well in both traditional and modern homes.
What You’ll Learn in This Cabinet Building Tutorial
In this woodworking project tutorial, you’ll learn how to:
- Cut and assemble a frameless cabinet box
- Build and install drawer boxes with drawer slides
- Construct Shaker-style cabinet doors and drawer fronts
- Install concealed hinges and cabinet hardware
- Build a strong and durable DIY cabinet using pocket hole joinery
- Finish and customize the cabinet to match your space
This project is beginner-friendly for woodworkers who have basic experience using tools such as a table saw, drill, pocket hole jig, and router. More experienced woodworkers can also use these woodworking plans as a foundation for creating fully customized kitchen cabinet systems.
Download the Printable PDF Woodworking Plans
If you’d like a more organized version of this project, be sure to download the printable PDF woodworking plans. The plans include detailed measurements, cut lists, diagrams, and step-by-step instructions that make the cabinet construction process easier to follow in the workshop.
Having printable woodworking project plans nearby can help reduce mistakes, improve efficiency, and simplify the entire cabinet-building process from start to finish.
Before You Start Building
Before starting this DIY cabinet project, take time to review the material list, tools, and cut dimensions carefully. Accurate measurements and proper assembly are essential for building cabinet doors, drawers, and frames that fit correctly and operate smoothly.
Now let’s get started with the step-by-step tutorial on how to build a frameless kitchen base cabinet with double doors and drawers.
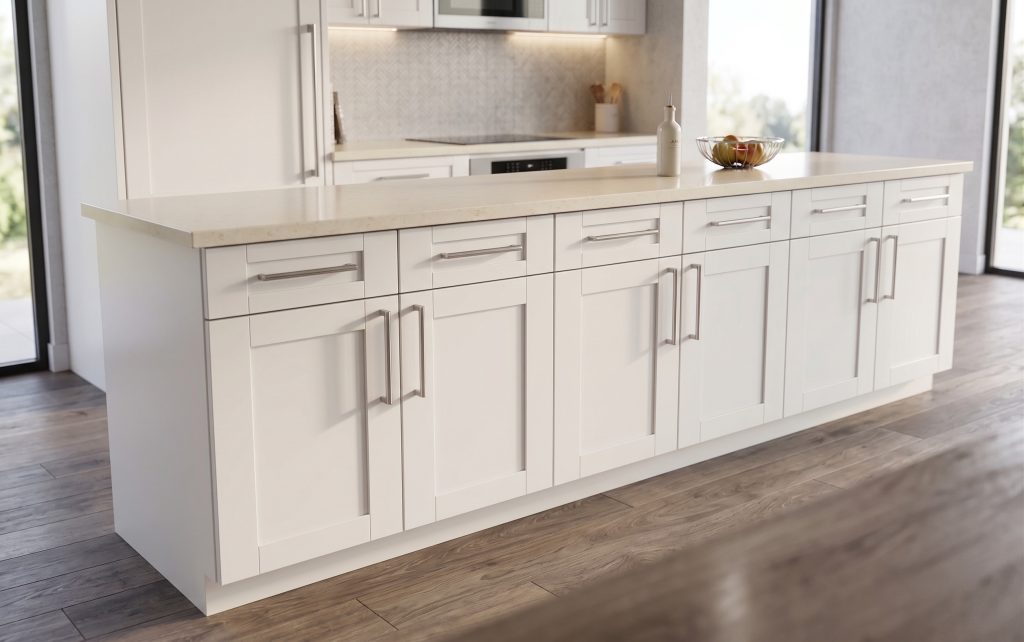
Related Cabinet Plans
If you’re building a full set of cabinets, these other plans may help:
- Frameless Garage Base Cabinet with Drawers and Double Doors, Slab Style
- Frameless Base Cabinet with Drawers, Slab Style
| Time to Complete | Total Cost | Skill Level |
|---|---|---|
| 8 Hours | $160 per section (36″ wide) | Beginner to Intermediate |
Download Printable Plans in PDF
DIY Frameless Kitchen Base Cabinet Plans PDF
$12.97
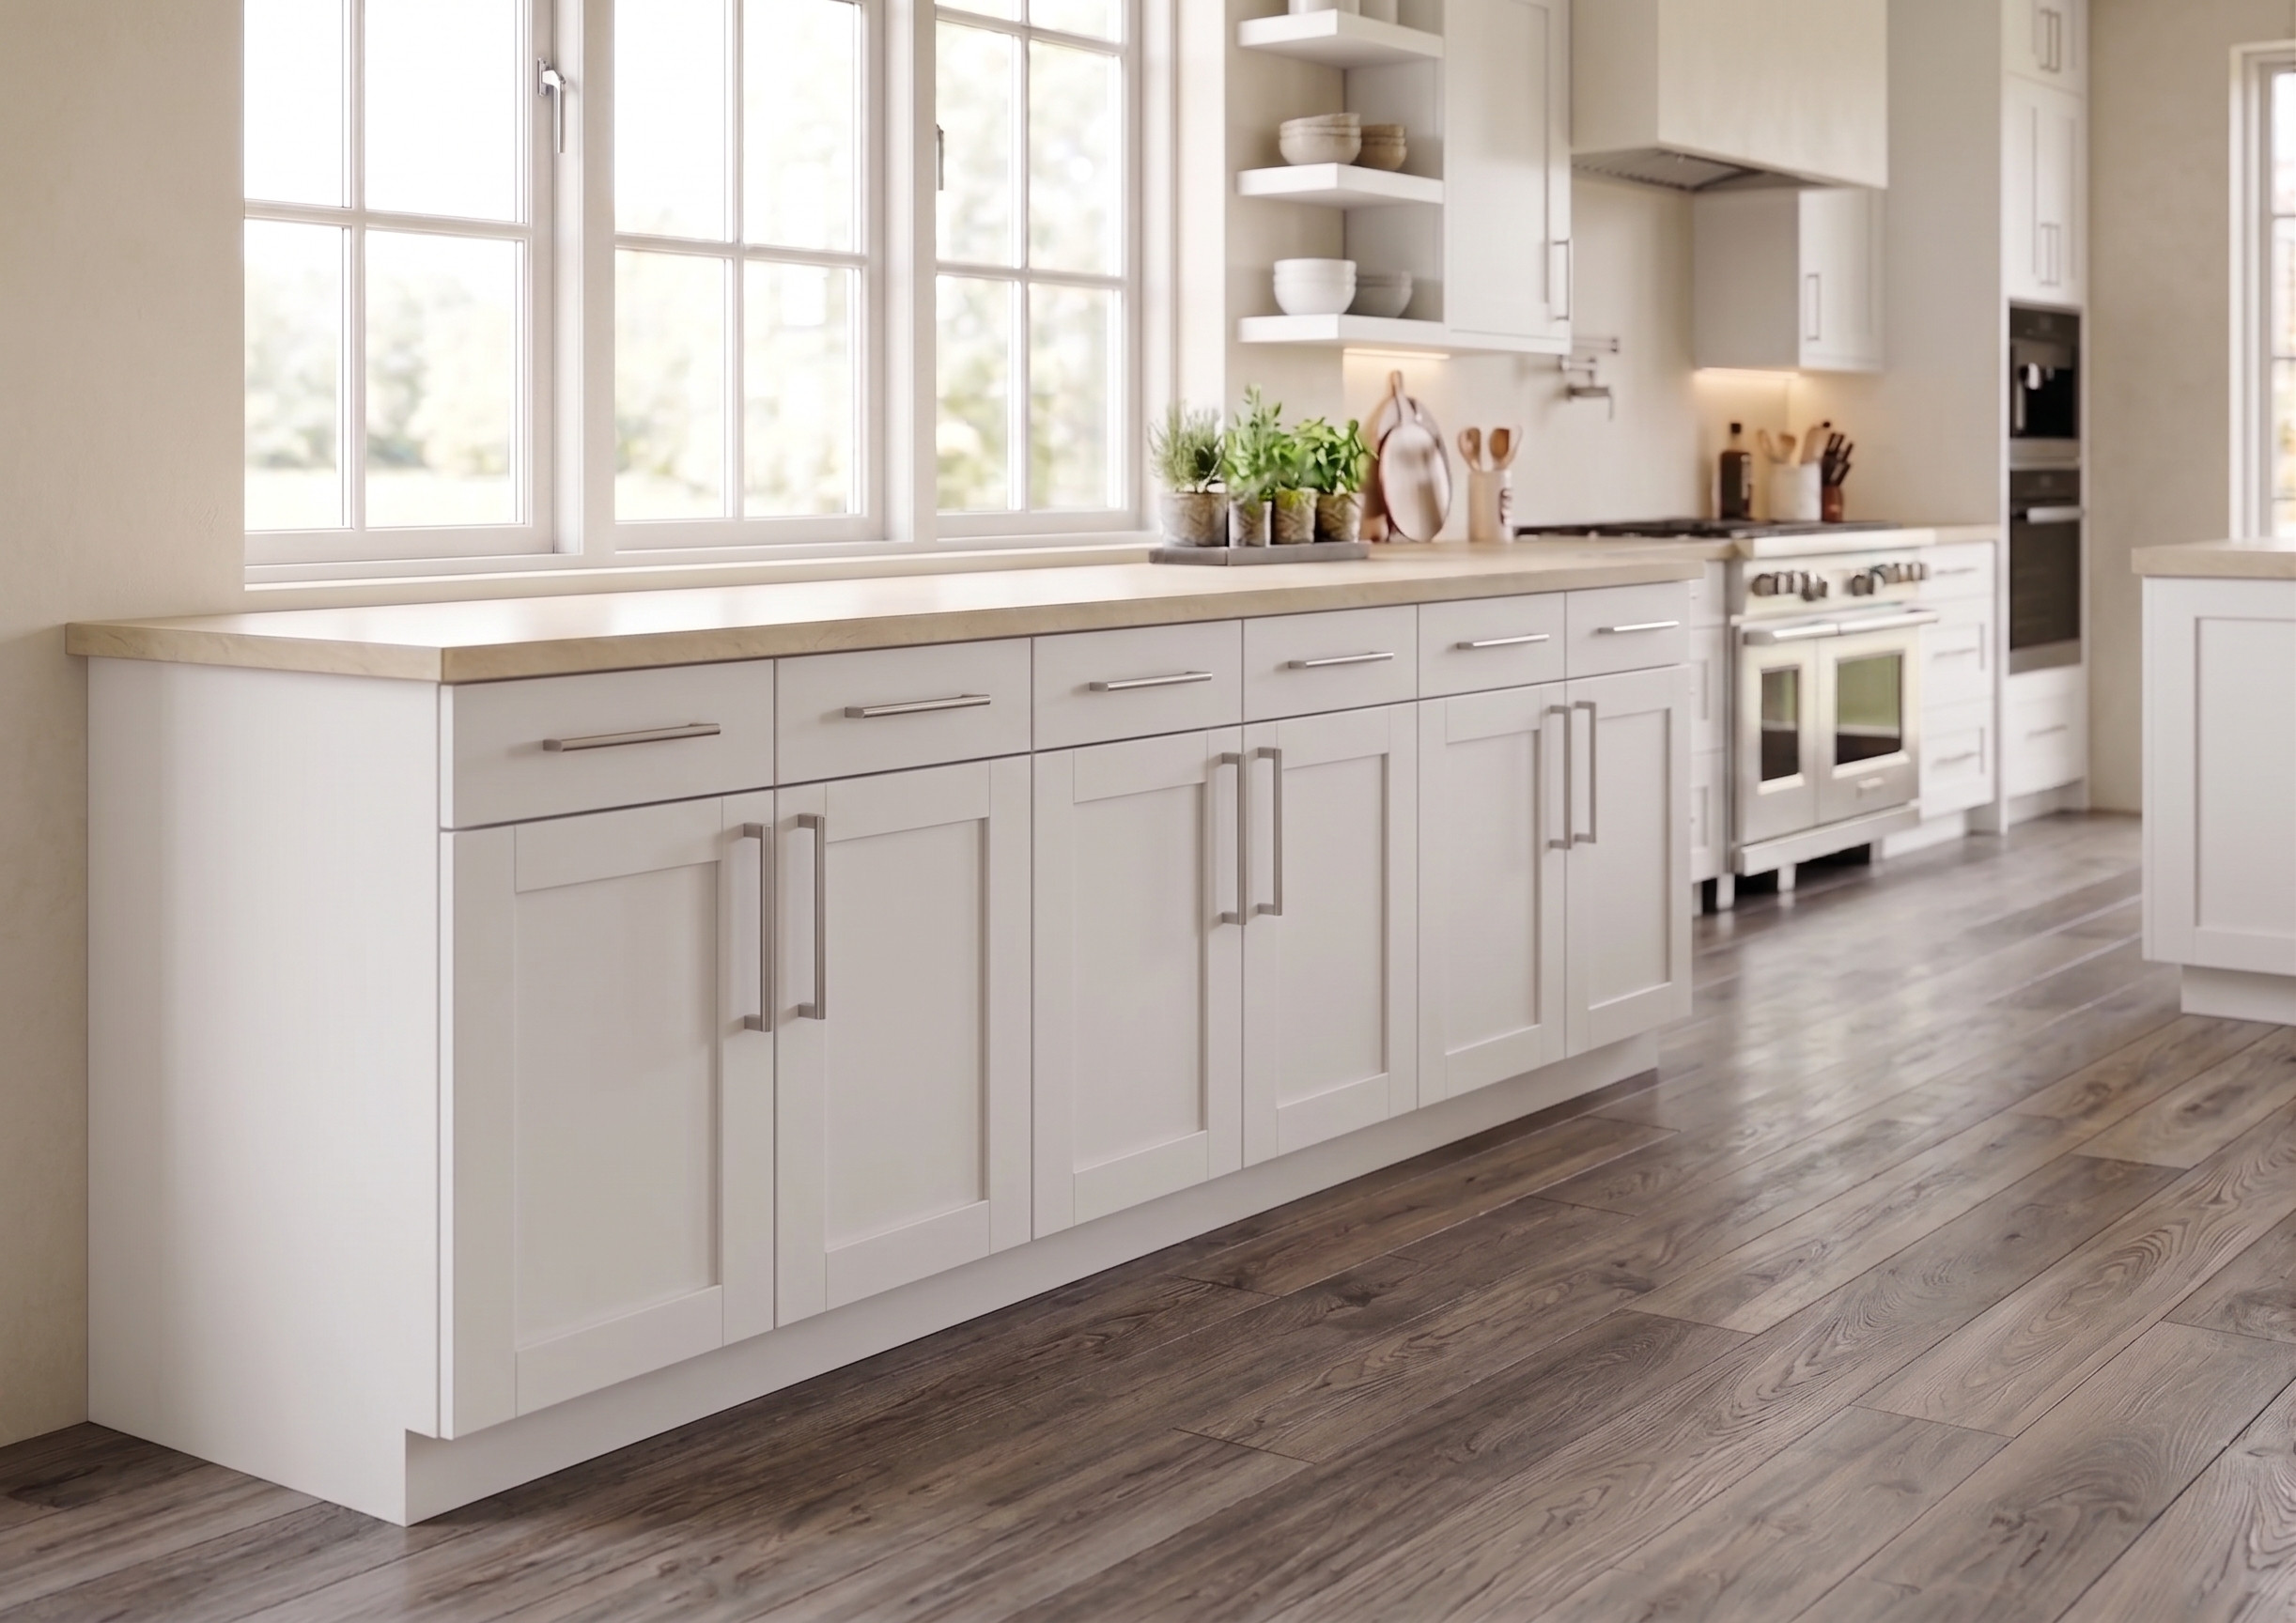
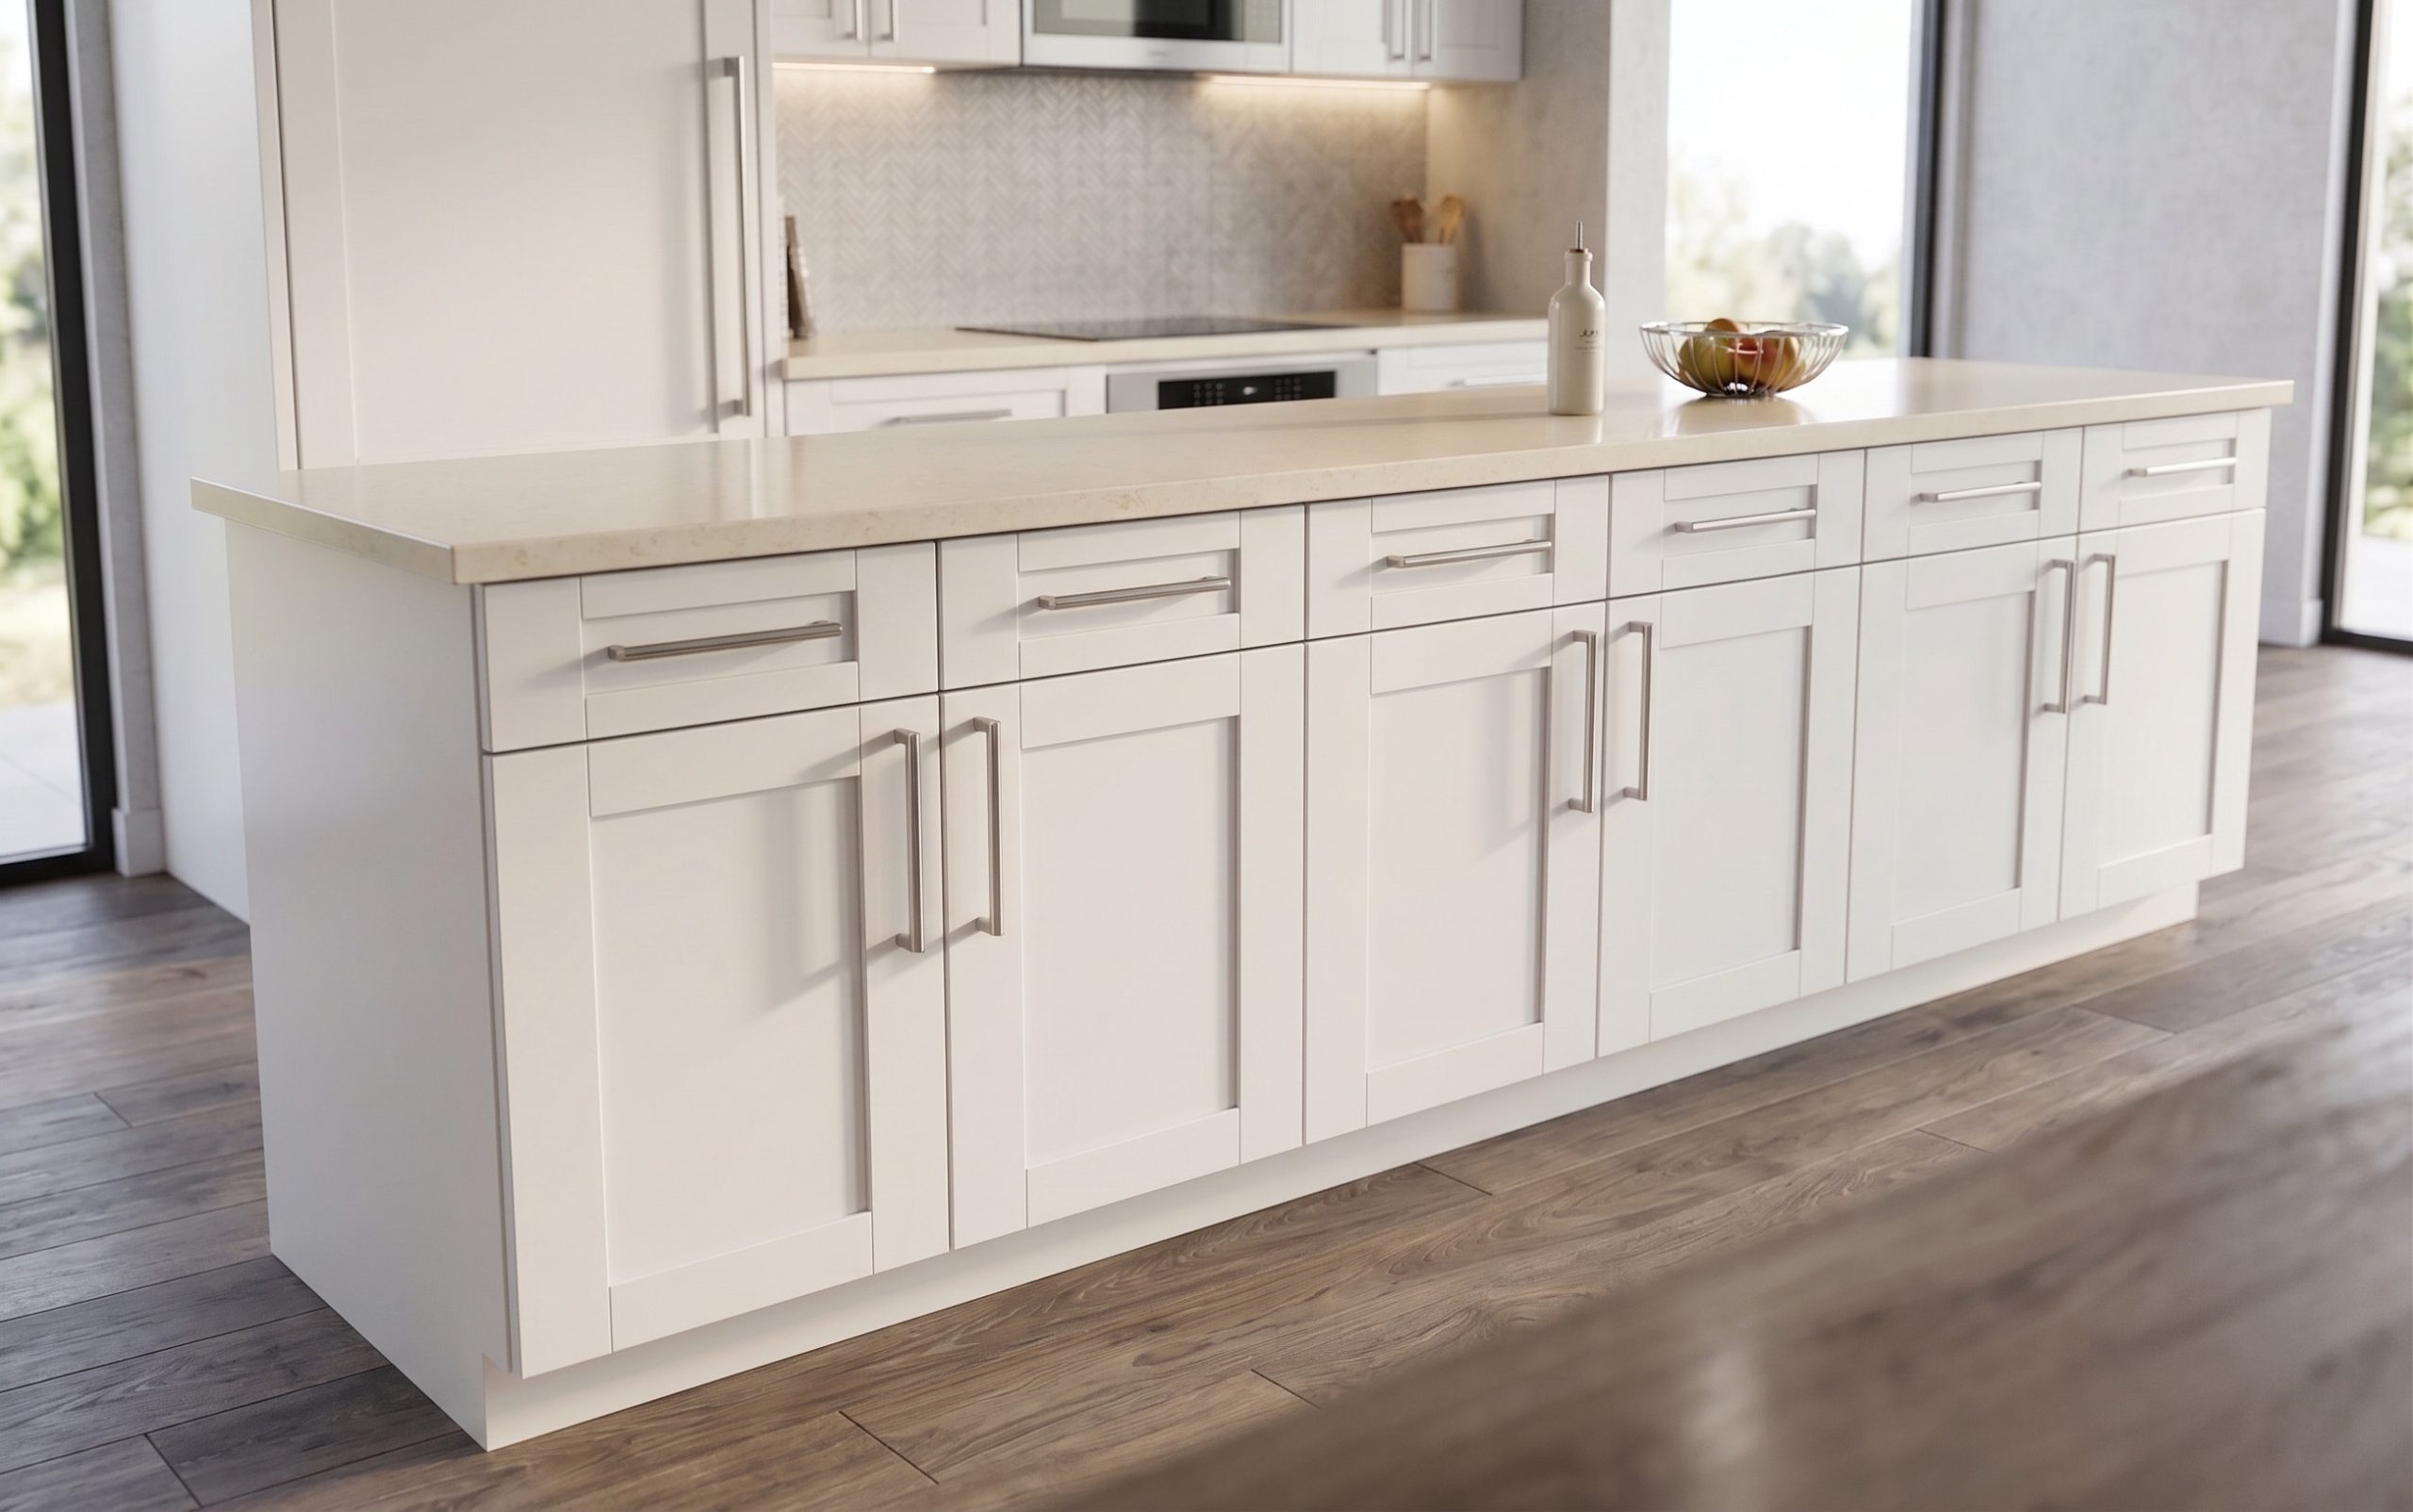
Build your own frameless kitchen base cabinet with these detailed DIGITAL PDF woodworking plans. Includes step-by-step instructions, cut list, measurements, material list, drawer construction, and Shaker-style door plans. This downloadable cabinet building tutorial is designed for beginner and intermediate woodworkers looking to build durable DIY kitchen cabinets with double doors and drawers.
Instant PDF download after purchase. No physical product shipped.
Description
Build Your Own Frameless Kitchen Base Cabinet
Create a professional-looking kitchen cabinet with these detailed DIY woodworking plans. This project walks you through how to build a frameless kitchen base cabinet featuring double Shaker-style doors and two drawers using cabinet-grade plywood, pocket hole joinery, and common woodworking tools.
These woodworking plans are designed to help simplify the cabinet-building process while still producing a durable and clean-looking finished cabinet suitable for kitchens, garages, workshops, laundry rooms, or custom storage spaces.
Whether you’re building a full kitchen or just one cabinet, these plans provide a straightforward step-by-step approach that helps reduce mistakes and improve accuracy during assembly.
Who These Woodworking Plans Are For
These DIY cabinet plans are ideal for:
- Beginner to intermediate woodworkers
- DIY homeowners remodeling a kitchen
- Anyone learning how to build a cabinet
- Woodworkers building custom storage cabinets
- Garage or workshop cabinet projects
- DIYers looking for affordable cabinet construction plans
The plans are written in a clear and easy-to-follow format while still including the important details experienced woodworkers expect.
What’s Included in the PDF Plans
Your digital download includes:
- Step-by-step woodworking instructions
- Full cabinet cut list with measurements
- Material list
- Required tools list
- Cabinet assembly instructions
- Drawer box construction steps
- Shaker-style door building instructions
- Drawer slide installation guide
- Assembly diagrams and illustrations
- Printable PDF woodworking plans
- Instant digital download after purchase
These plans provide more detailed information than the free blog tutorial and are designed to make the entire cabinet construction process easier to follow in the workshop.
Project Details
Cabinet Style
- Frameless kitchen base cabinet
- Double doors with two drawers
- Shaker-style cabinet doors and drawer fronts
Difficulty Level
- Beginner to Intermediate
Estimated Build Time
- 1–3 days depending on experience and finishing time
Estimated Project Cost
- Varies based on plywood type, hardware, and countertop material selected
Why Choose These Cabinet Plans
Building kitchen cabinets from scratch can feel overwhelming, especially when trying to work from incomplete tutorials or rough sketches. These woodworking project plans are designed to provide a clearer and more organized building experience.
Benefits of these DIY woodworking plans include:
- Accurate measurements and dimensions
- Easier material planning
- Cleaner cabinet assembly process
- Reduced cutting and installation mistakes
- Printable workshop-friendly format
- Step-by-step guidance for drawer and door construction
- Helpful for both first-time cabinet builders and experienced DIYers
If you’ve been searching for “DIY cabinet plans,” “how to build a cabinet,” or “step-by-step woodworking plans,” these plans were created to help make the process easier and more manageable.
Digital Download Information
Please note that this is a DIGITAL PRODUCT ONLY.
No physical product will be shipped.
After purchase, you will receive instant access to download the woodworking plans PDF file. The plans can be viewed on:
- Desktop computers
- Tablets
- Mobile devices
You can also print the PDF and use it directly in your workshop while building.
Start Building Your Own Kitchen Cabinets Today
If you’re ready to build durable and professional-looking DIY kitchen cabinets, these detailed woodworking plans will help guide you through the entire process step by step.
Download the PDF plans today and start building your own frameless kitchen base cabinet with confidence.
Other Woodworking Projects
Tools for this project
Material List
- Available with the purchase of PDF plans.
Note: Lumber dimensions are listed as nominal size. See lumber sizes for actual dimensions vs nominal.
Disclosure: Some of the links on this page as well as links in “tools for this project” and “material list” sections are affiliate links.
Dimensions
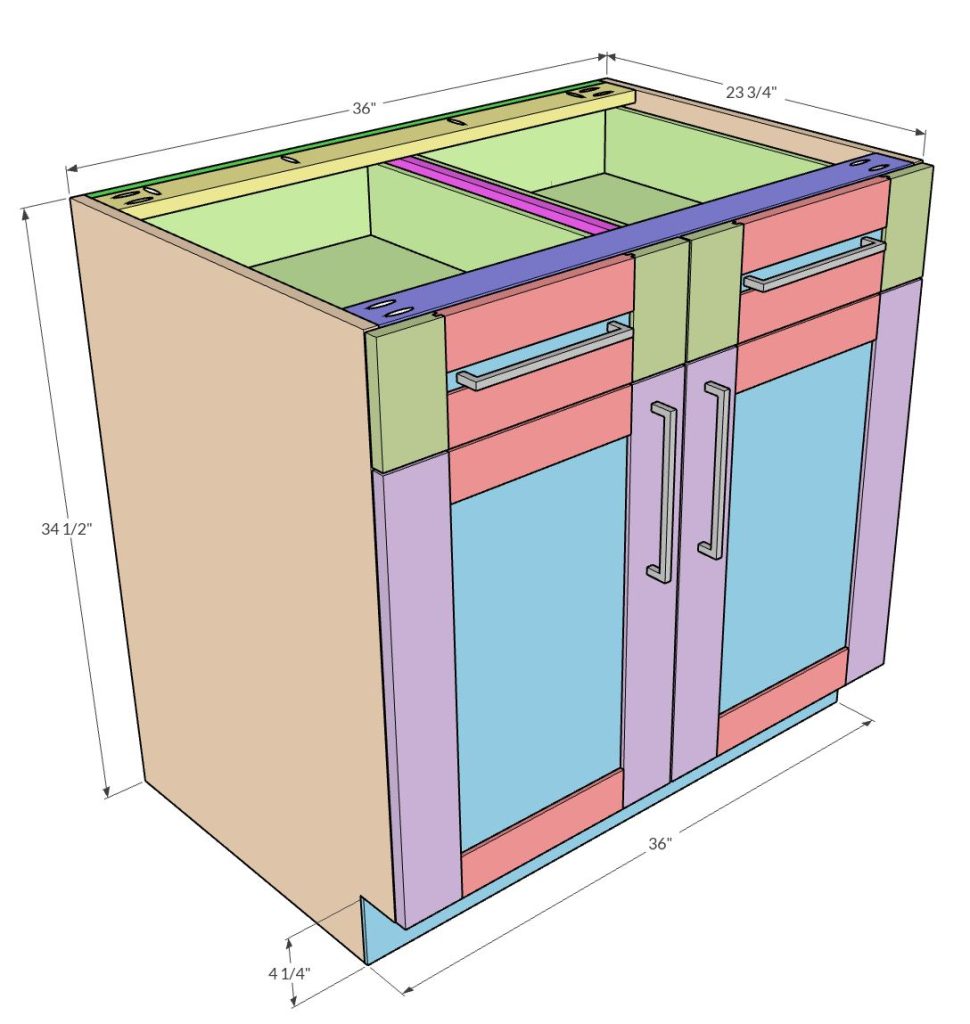
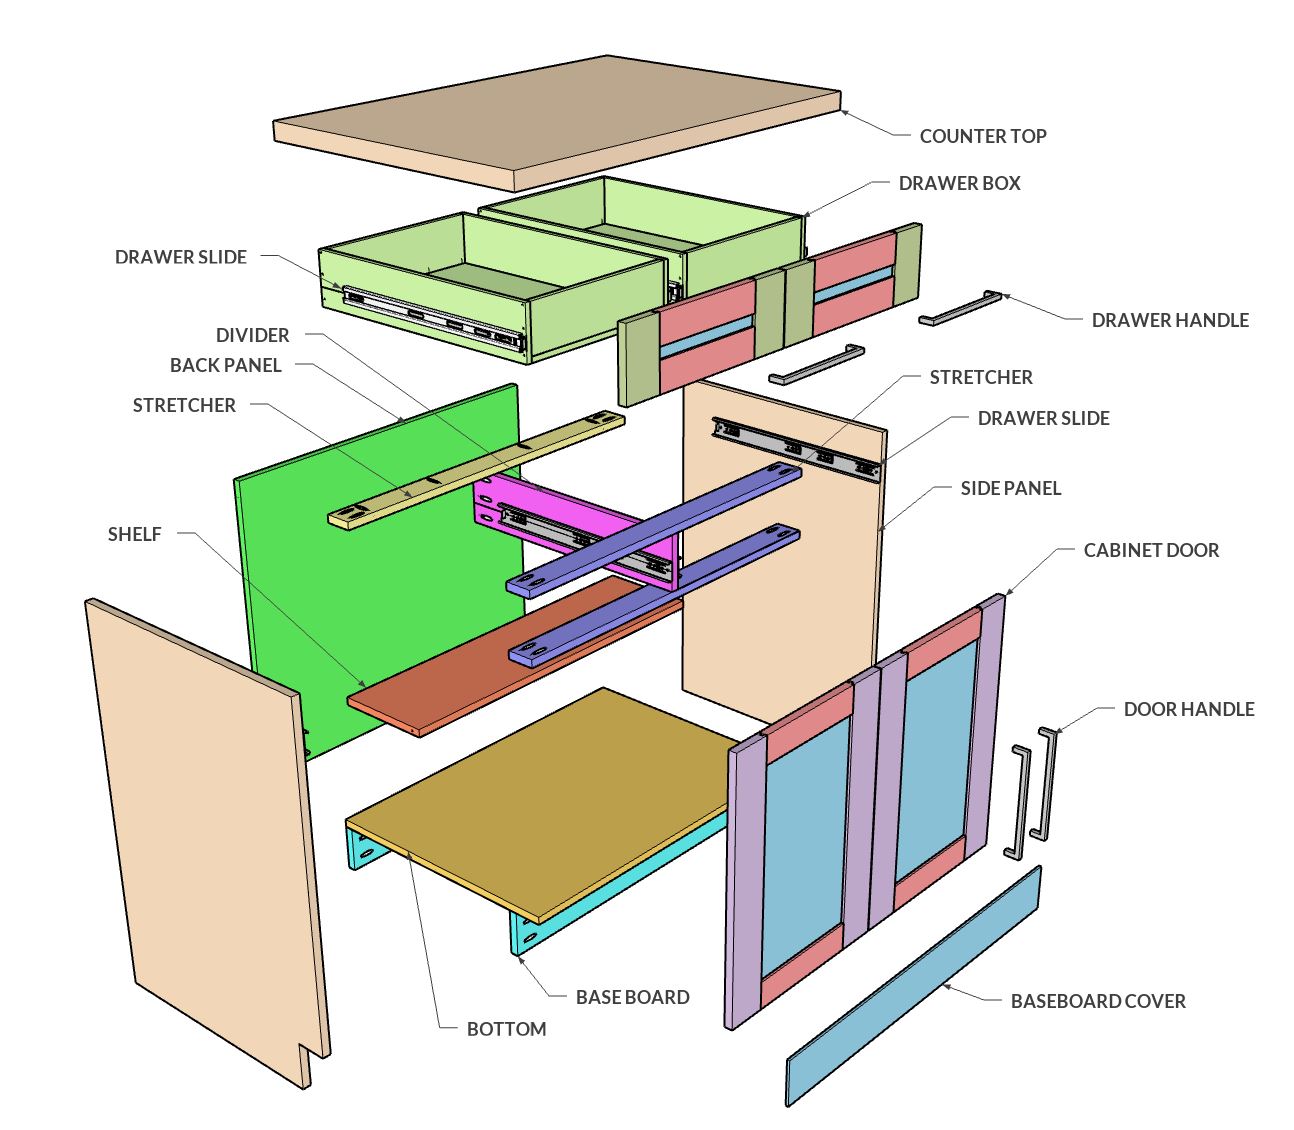
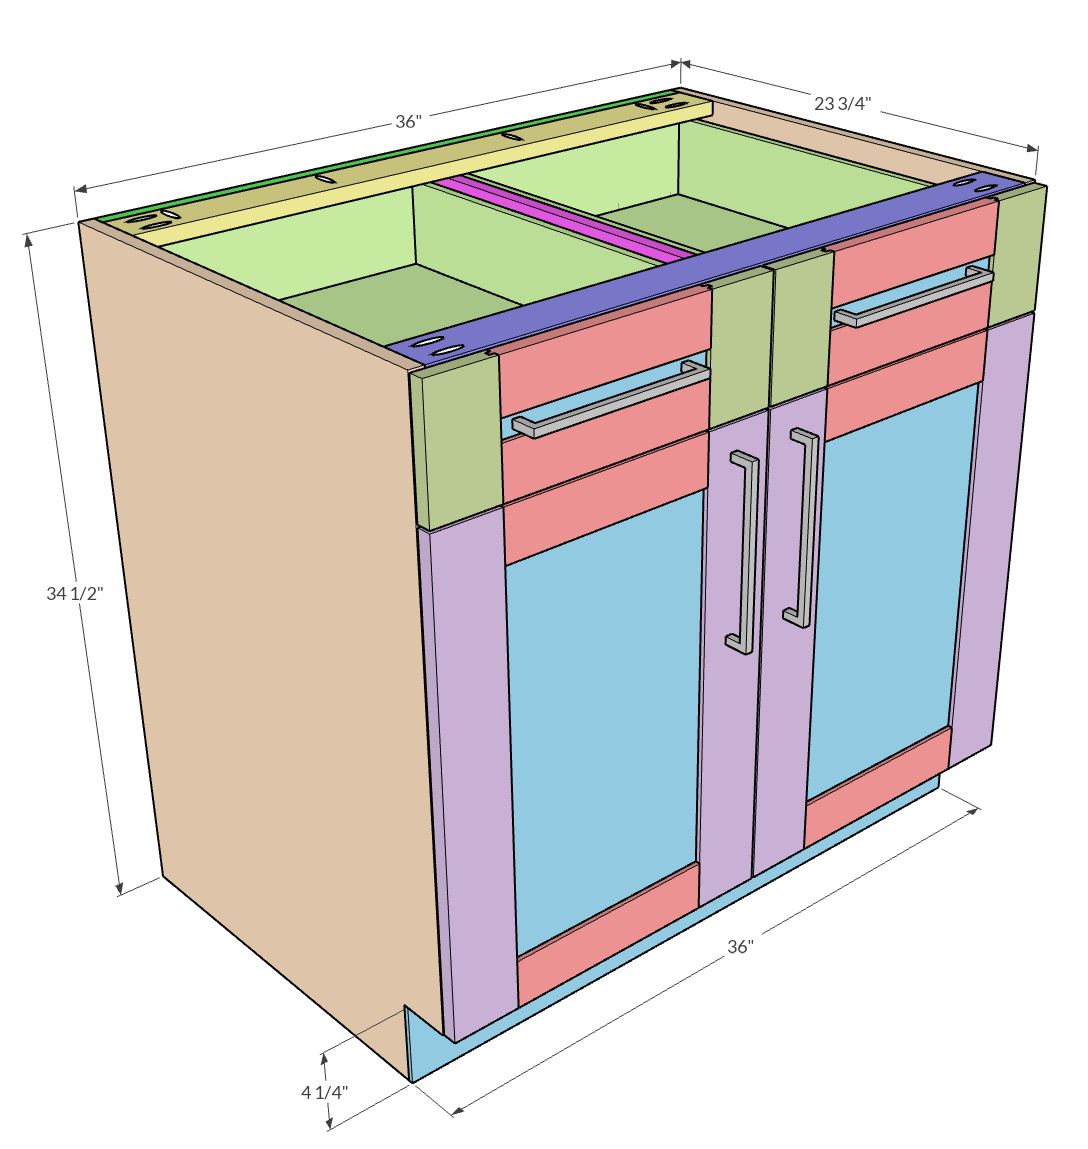
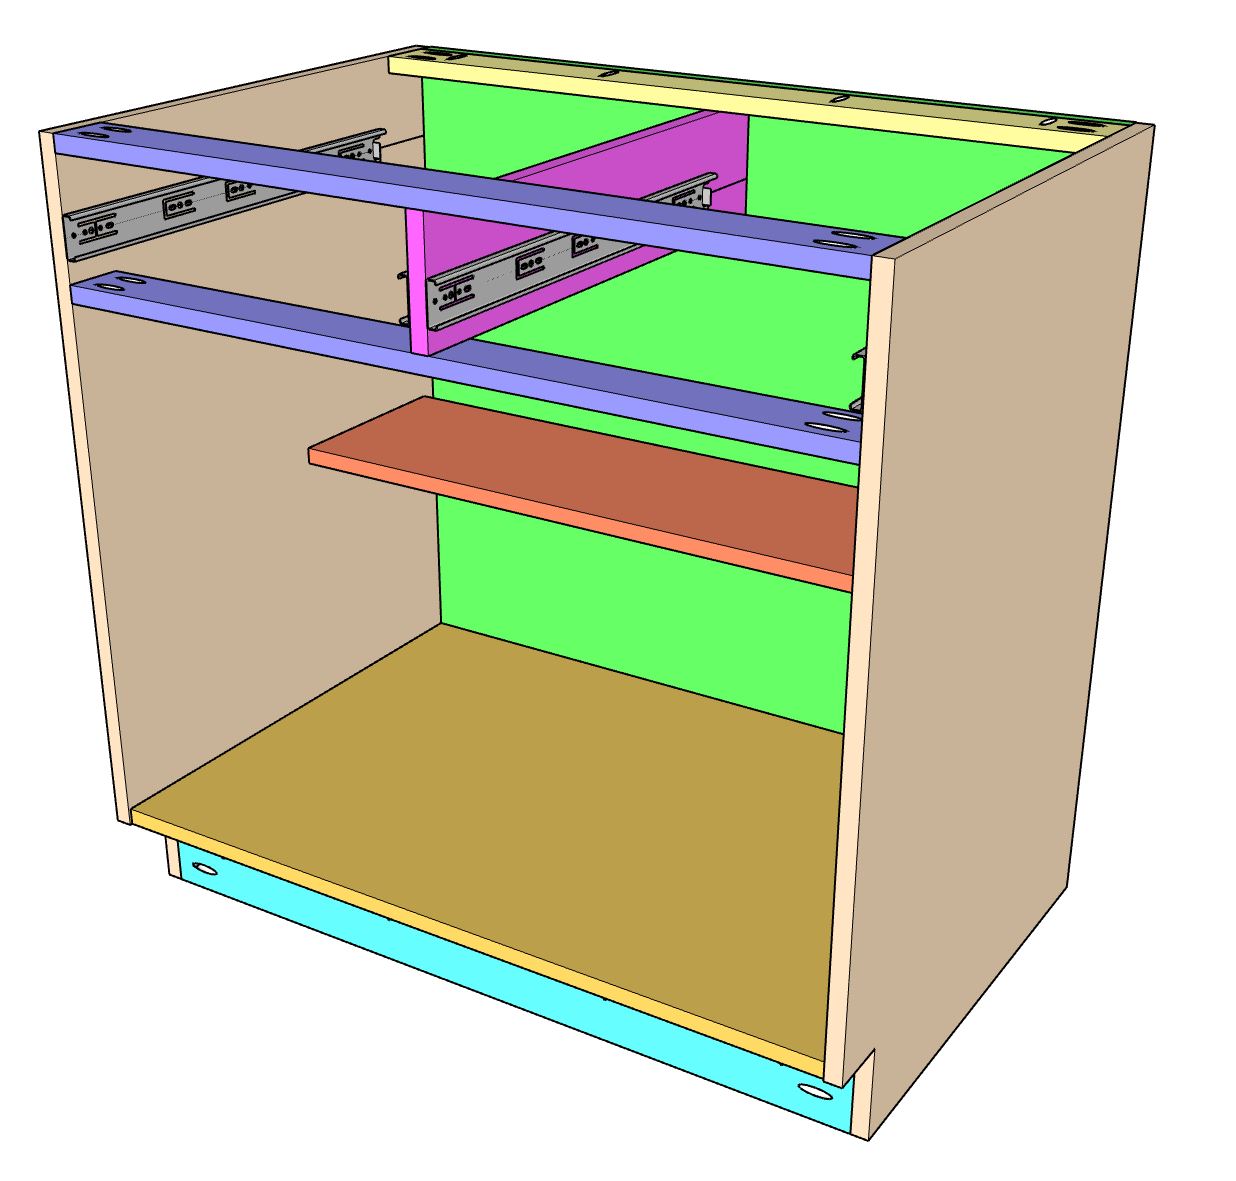
Base Cabinet Diagram
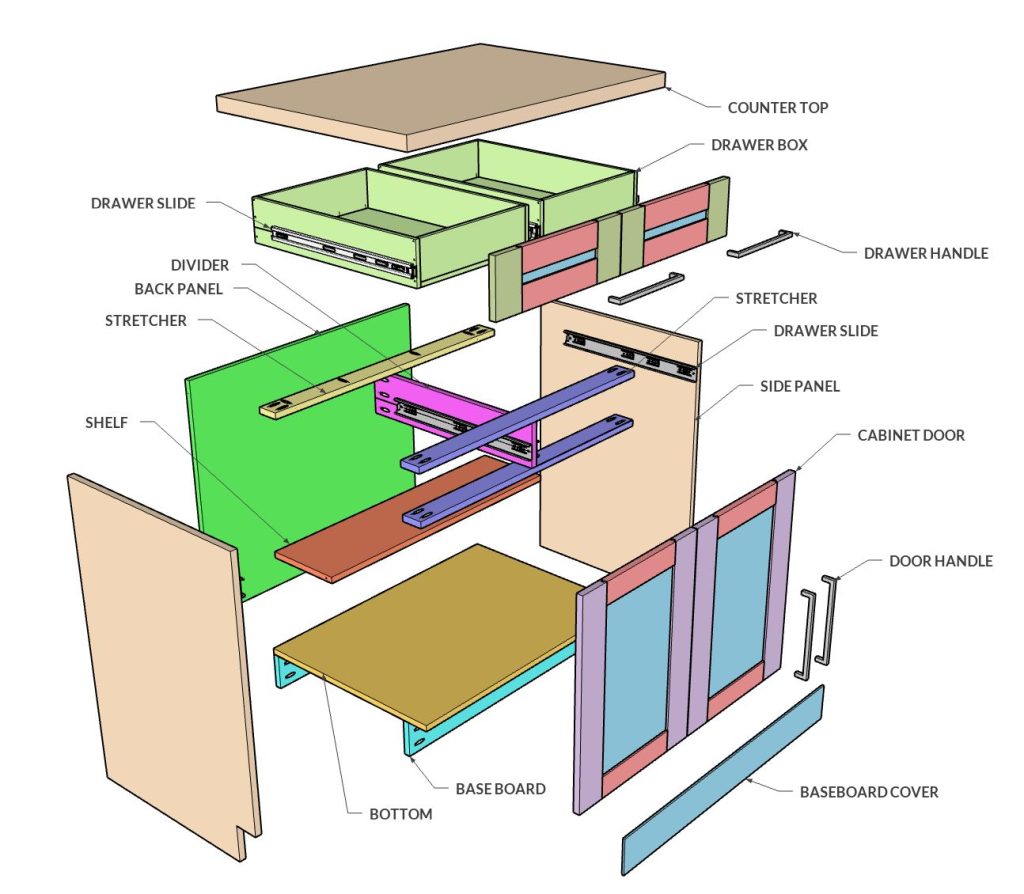
Note: When building kitchen cabinets, it’s important to be precise when measuring and cutting each piece. Using the proper woodworking tools will help ensure the cabinet components are cut accurately and assembled correctly for a professional-looking result.
The basic tools needed for this DIY cabinet-building project include a tape measure, drill, table saw or Kreg Accu-Cut circular saw, miter saw, Kreg Jig, nail gun, random orbital sander, clamps, Kreg Concealed Hinge Jig, and a dovetail saw. Having the right tools will improve both the quality of your work and the efficiency of the cabinet construction process.
When choosing plywood for kitchen cabinets, there are several important features to consider. One of the most important factors is the plywood grade. A-grade cabinet plywood is generally more durable, reliable, and visually appealing than lower-grade plywood options. It’s also recommended to use rotary-cut plywood, which provides more consistent strength and typically contains fewer knots and imperfections.
For cabinet construction, 3/4-inch cabinet-grade plywood is commonly considered the best choice. Thinner plywood may flex or warp over time, while thicker material can add unnecessary weight and cost without providing much additional benefit.
For the best appearance and durability, consider using plywood with a birch veneer face on both sides. Birch plywood offers excellent structural stability and provides a smooth surface that works especially well for painted or finished cabinets.
Step 1: Cut the Cabinet Side Panels and Toe-Kick Notches
Start by cutting the largest cabinet parts from the plywood sheet according to the cut list layout. The layout and grain orientation are designed to help reduce material waste and improve efficiency during cabinet construction.
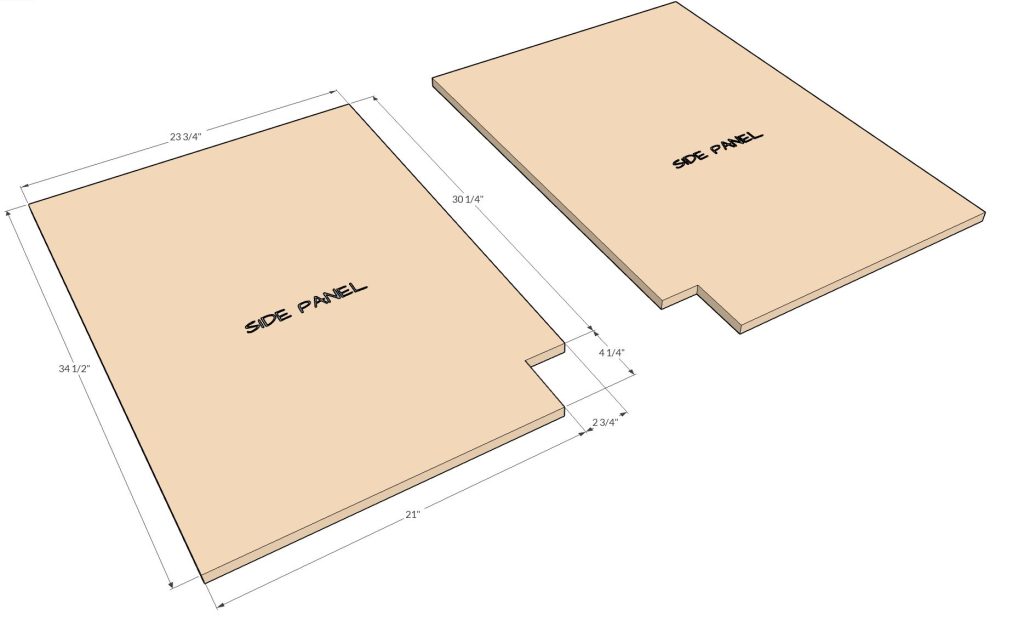
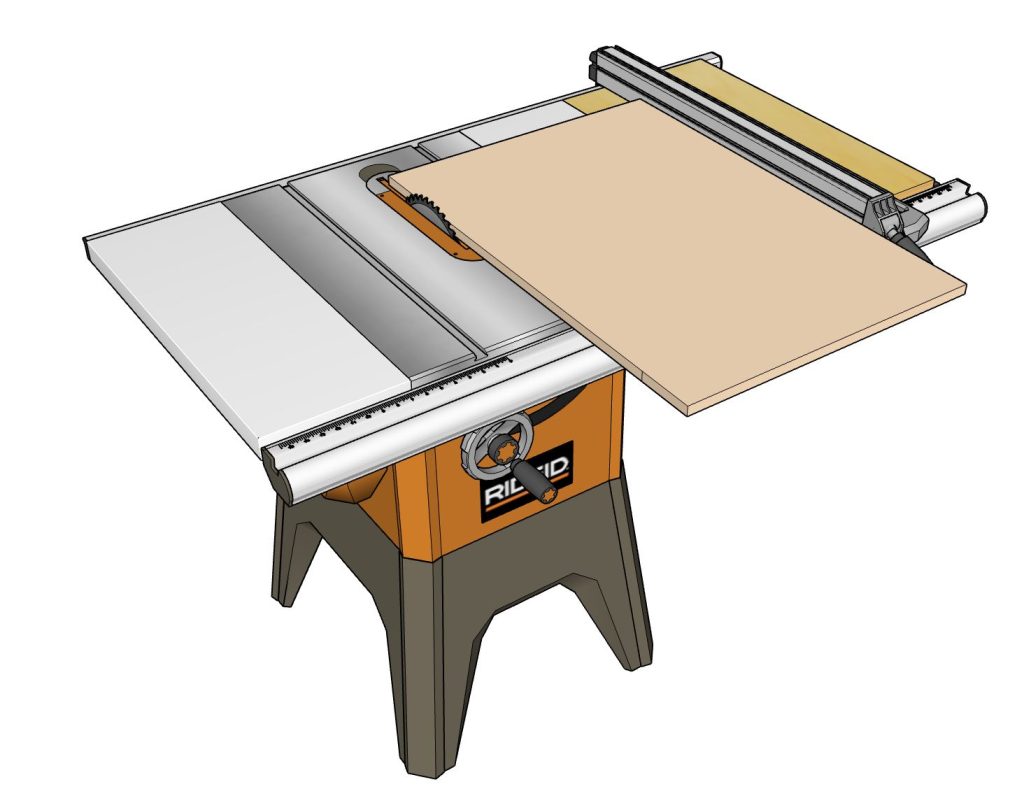
Using 3/4″ cabinet-grade plywood, cut two side panels to 23 3/4″ x 34 1/2″ using either a table saw or a circular saw with a Kreg Accu-Cut guide system.
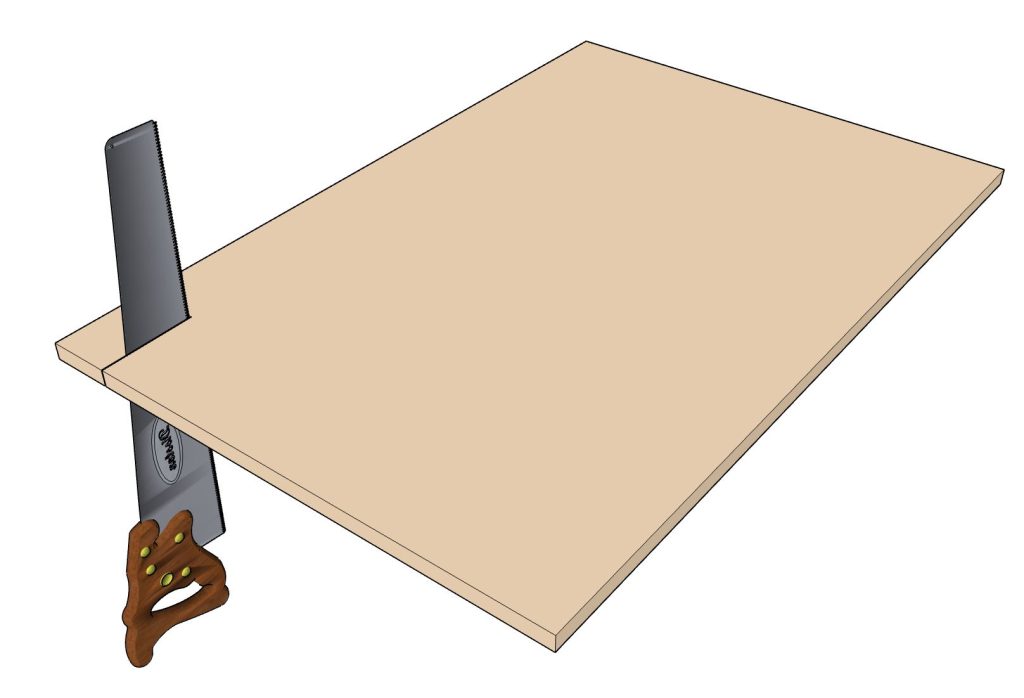
Next, cut a 4 1/4″ x 2 3/4″ toe-kick notch from the bottom front corner of both side panels, as shown in the illustration. This toe-kick cutout creates recessed space at the bottom of the cabinet for comfortable standing access once the cabinet assembly is complete.
If you’re building multiple DIY kitchen base cabinets, it’s worth making a simple toe-kick template. A template allows you to quickly trace identical cutouts on every panel, saving time and improving consistency throughout the project.
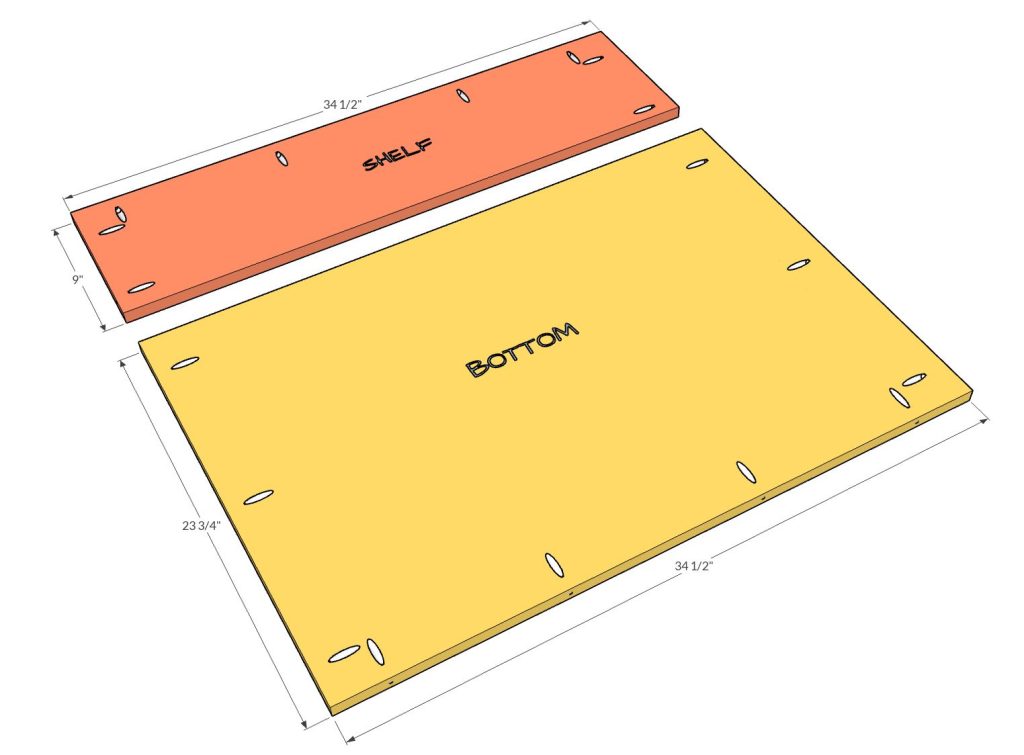
Step 2: Cut the Bottom and Shelf Panels and Drill Pocket Holes
Using the same 3/4″ plywood, cut the following cabinet pieces:
- One bottom panel: 34 1/2″ x 23 3/4″
- One shelf panel: 34 1/2″ x 9″
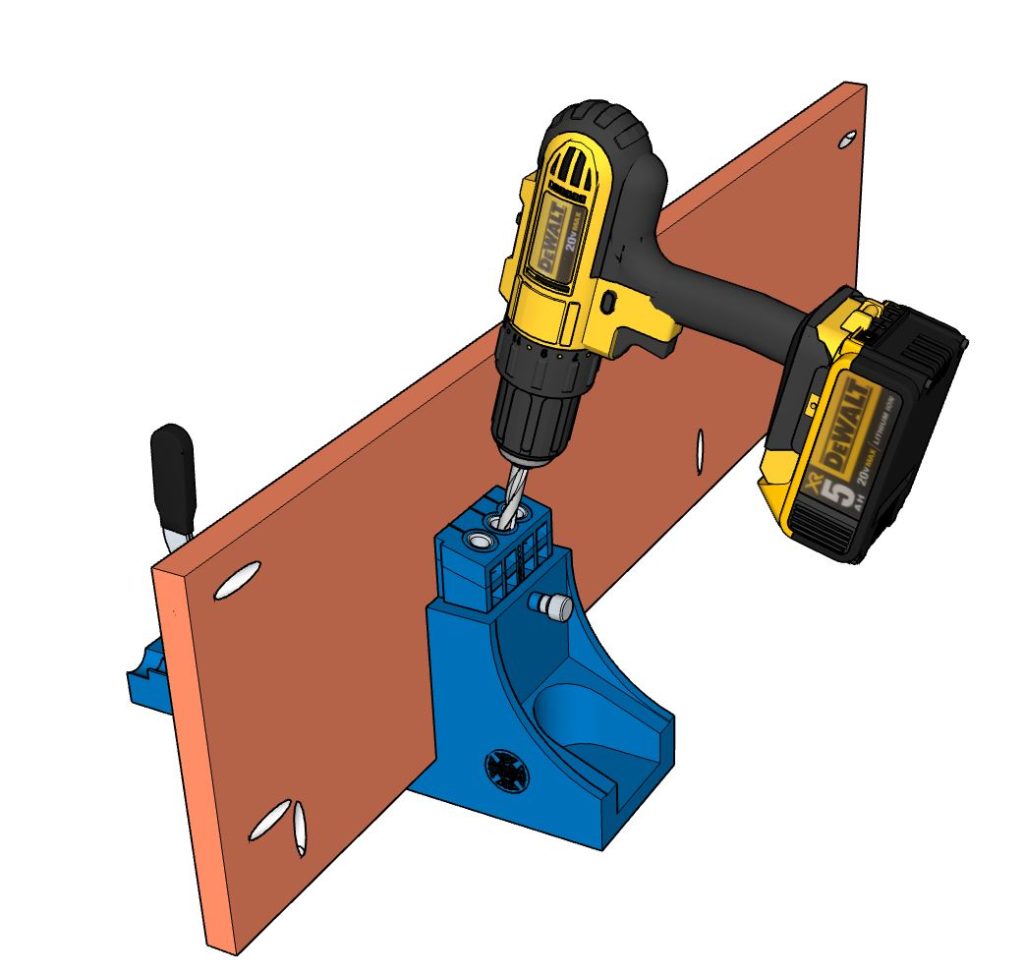
Next, set your Kreg Jig for 3/4″ material thickness. Drill four pocket holes along the front edge of the side panels, as shown in the picture.
When drilling pocket holes, spacing is important. Placing the holes closer together creates a stronger joint, but adding too many unnecessary holes only slows down the cabinet-building process without providing much additional strength. Aim for even spacing that provides solid support while keeping the assembly clean and efficient.
Then drill pocket holes in both the shelf panel and the bottom panel, as shown in the illustration. These pocket holes should face downward during cabinet assembly so they remain hidden after installation.
Step 3: Cut the Back and Base Support Pieces
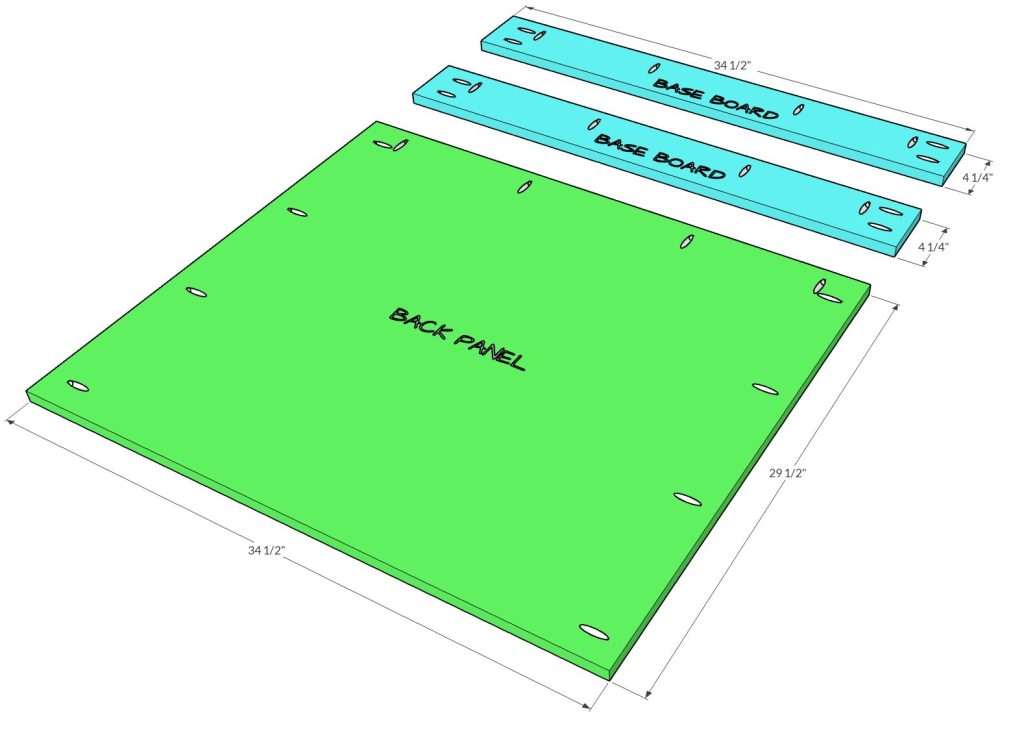
Cut the remaining cabinet components from 3/4″ plywood:
- One back panel: 34 1/2″ x 29 1/2″
- Two base support pieces: 34 1/2″ x 4 1/4″
After cutting the pieces to size, drill the pocket holes as shown in the picture. These parts will help strengthen the cabinet frame and provide additional support during the cabinet assembly process.
Step 4: Assemble the Cabinet Base Frame
When assembling cabinet parts with pocket holes, you can use either pocket hole screws alone or combine them with wood glue. Adding wood glue creates a stronger joint and helps prevent the connection from loosening over time. However, once the glue dries, the parts cannot be disassembled without causing damage, so plan accordingly before assembly.
Since the cabinet box will eventually be secured to the wall and won’t experience much movement, wood glue is generally unnecessary for the main cabinet frame. It is more beneficial for components such as the cabinet doors and drawers where added durability is important.
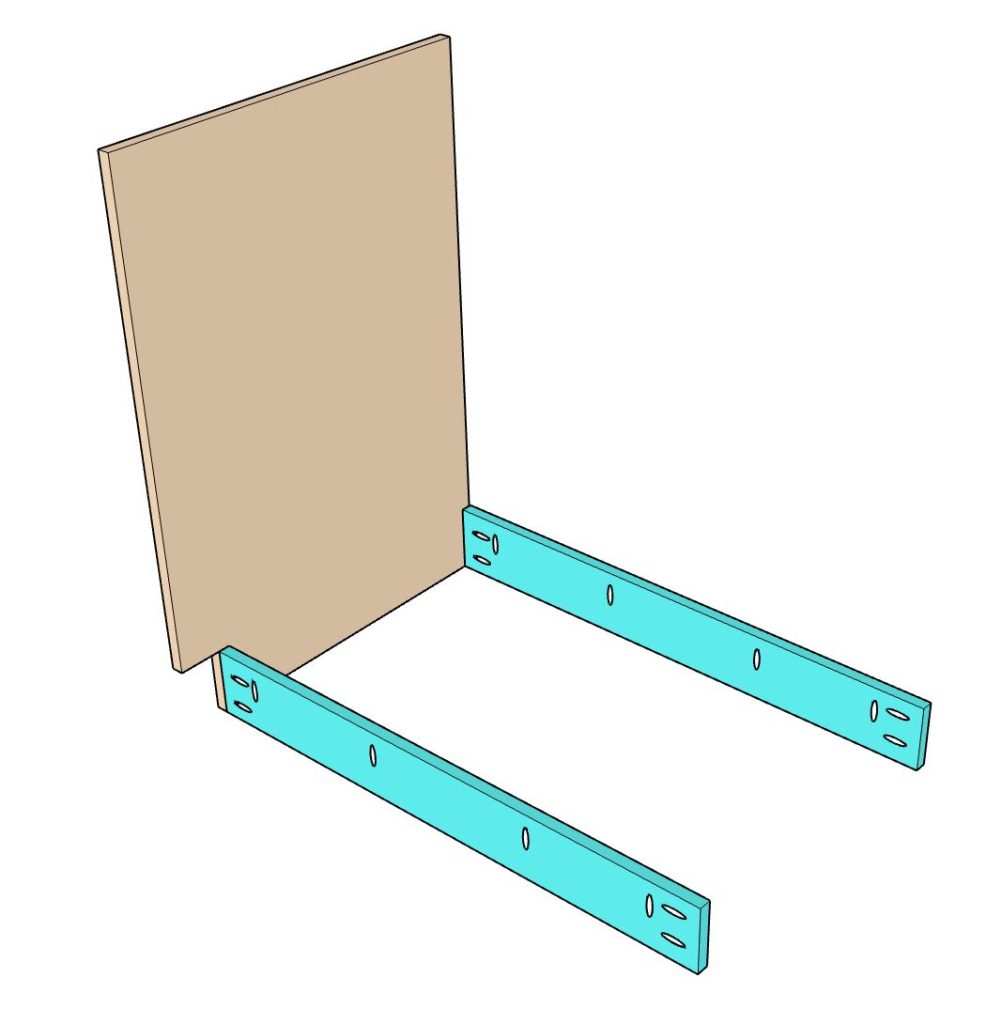
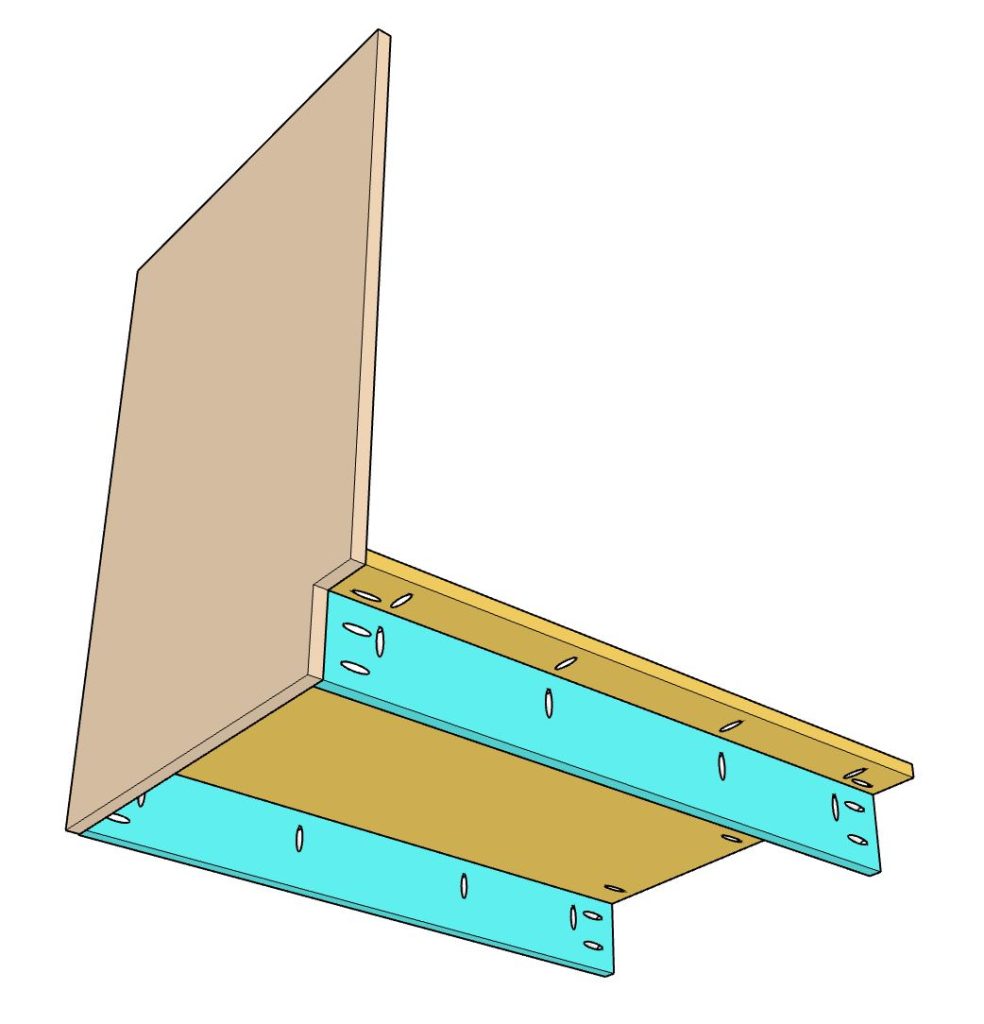
Begin the cabinet assembly by laying the left side panel flat on a work surface. Attach the front base support piece and the back base support piece using 1 1/4″ pocket hole screws.
When driving pocket hole screws, always clamp the boards securely before fastening them together. Proper clamping prevents the plywood pieces from shifting or becoming misaligned during assembly. Even slight movement can affect the overall appearance and squareness of the cabinet.
Step 5: Install the Cabinet Bottom Panel
Next, attach the bottom panel to the left cabinet side panel and the back base support piece using 1 1/4″ pocket hole screws.
Make sure the edges are flush and square before tightening the screws. Keeping the cabinet components aligned during this step is important for proper cabinet construction and will make the remaining assembly process much easier.
Step 6: Attach the Cabinet Back Panel
Take the back panel and attach it to the cabinet frame using the pre-drilled pocket holes. Make sure the pocket holes are facing toward the back of the cabinet so they remain hidden after installation.
Reviews
There are no reviews yet.