
Often a traditional closet would have one wooden rod spanning two walls and a shelf above the rod. Sounds like a lot of wasted space. It’s very challenging to organize a closet effectively with one shelf. No matter how hard you try to keep your closet under control, somehow, things get all over the place. Having the same issue, I decided to build a DIY Closet Organizer with Drawers. See the below tutorial with 3D illustrations on how to build it.
An organized closet helps you streamline your morning routine and eliminate unnecessary clutter. We tried different things to make it more organized, but it never worked. So we decided to change the closet completely. I took everything out, including the closet doors, and built a nice Closet Organizer with Drawers in the middle. The younger son has the lower drawers and shelves, and the older son has the upper drawers. Everything is much more organized.
If you decide to build this closet organizer project, you can easily omit some shelves or add a couple more, depending on your needs. And add a few baskets for a better look.
This project was mainly done with two types of plywood. I used ½” plywood for the drawer boxes and ¾” plywood for the shelves and front of the drawer. It’s very important that this closet system is attached to studs inside the wall because of its weight. You will need to use a stud finder to locate the studs accurately.
Check out the other project I’ve built for organizing kid’s toys and keeping your garage organized with garage cabinets and a pegboard wall.

Closet Organizer with Drawers and Shelves PDF
$8.97
This PDF download includes Cut Diagrams, a List of Supplies, and 3D illustrations with detailed steps to build the project. Measurements are in imperial and not metric. Does NOT include SketchUp/CAD files.
The plans are embedded on the webpage for free, but if you would like to support the website, you can pay a small fee to purchase the printable PDFs.
Thank you for your support!
Other Woodworking Projects
-
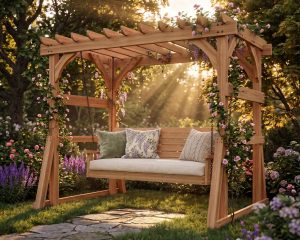
DIY Pergola and Porch Swing Bench Woodworking Plans PDF
$18.97 Add to cart Buy Now -
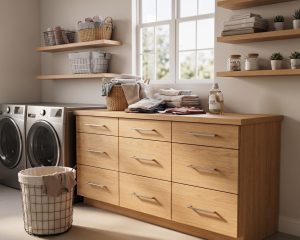
DIY Frameless Base Cabinet 21″ Wide with Three Drawers Slab Style
$12.97 Add to cart Buy Now -
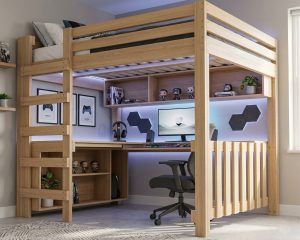
DIY Queen Size Loft Bed with Desk Plans
$18.97 Add to cart Buy Now -
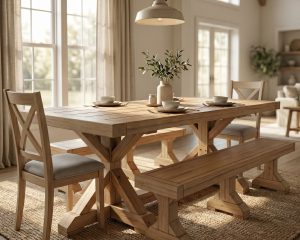
DIY Farmhouse Dining Set Woodworking Plans
$24.97 Add to cart Buy Now
Tools for this project
Material List
- 4’x8′-3/4″ Plywood (x2)
- 4’x8′-1/2″ Plywood (x1)
- 2x4x8′- (x1)
- 1 1/4″ Pocket hole screws
- 1″ Pocket Hole Screws
- 2 1/2″ Wood Screws
- Drawer Rails
- Drawer Handles
- Coat Hanger Dowels
- 1 5/8″ Wood Screws
Note: Lumber dimensions are listed as nominal size. See lumber sizes for actual dimensions vs nominal.
Disclosure: Some of the links on this page as well as links in “tools for this project” and “material list” sections are affiliate links.
Dimensions

Step 1 – Cut Sideboards and 2×4 Supports
First, start with building the center section of the DIY closet system. Once the center is complete, then you could easily add the shelves on both sides.
Take 3/4″ cabinet grade plywood and two side pieces to 64″x16″ using a table saw. Then, at the top of these plywood pieces, trim off 4″ at 45 degrees as shown in the picture. Next, take 2×4 and cut three pieces to 18″ in length. These 2x4s will be connected to the sideboards later on and will be holding the entire closet system on the wall.


Step 2 – Cut Two Shelf Boards for the Center
Between the closet organizer sideboards, we will have drawers on the bottom and a few shelves on the top.
Take 3/4″ plywood and cut two pieces to 18″ x 16″. Then set your Kreg Jig to 3/4″ wood thickness and drill four pocket holes on each shelf board as shown in the picture.

Step 3 – Build Drawer Boxes Using 1/2″ Plywood
Now the drawer boxes will need to be built from 1/2″ plywood. This 1/2″ plywood is strong enough for the boxes and less expensive than 3/4″ plywood. All five drawer boxes will be of the same height, width, and length.
Take 1/2″ plywood and, using a table saw, cut five bottom pieces to 17″ x 14″, five back pieces to 16″ x 7 1/2″, and ten side pieces to 14″ x 7 1/2″.

Step 4 – Assemble the Drawer Boxes
Next, take 3/4″ plywood and cut four cover pieces to 8″ x 20″ for the lower drawers and one 9″ x 20″ piece for the upper drawer. The top drawer box will need to have the front cover 1″ taller to cover the shelf board. If you want the front drawer covers to look nicer, you could use solid wood and apply polyurethane instead of painting it white.
Before assembling the drawer boxes, set your Kreg Jig to 1/2″ wood thickness and drill pocket holes, as shown in the picture. The bottom piece of the drawer box will have three pocket holes, and the side pieces will have two pocket holes. These pocket holes will be used to attach the front cover board.
Place the bottom board on your workbench and then attach the sides using wood glue and 1 1/4 brad nail with a nail gun. Then attach the backboard. Repeat the process until you have all five drawer boxes complete.
Now take the front covers and attach them to the drawer boxes using wood glue and 1″ pocket hole screws. Make sure the drawer cover is perfectly aligned in the center of the drawer box. The upper drawer box will have the front cover 1″ taller than the box itself.


Step 5 – Connect Side Pieces with 2x4s
Before connecting the side pieces together, first, paint them with a paint roller. It’s easier to paint the pieces as separate boards than when everything is already assembled. Paint the side pieces, shelf board, and front of drawers. Apply at least two coats of paint.
Once the paint is completely dry, connect the side pieces together with 18″ long 2x4s. See the picture for exact 2×4 locations. Attach these 2x4s with 1 1/2″ wood screws.


Step 6 – Attach the DIY Closet Organizer with Drawers to the Back Wall
Find the center of the closet and mark it on the wall. Then find the center of the 18″ – 2×4 pieces on the DIY closet organizer and mark it with a pencil. So when attaching the DIY closet organizer to the wall, the mark on the wall should match with the mark on the closet organizer.
Using a stud finder, locate the studs and mark them on the wall. Then lift the DIY closet organizer frame 12″ from the floor. Make sure the center of the closet lines up with the center of 2×4. Then drive in the screws through 2x4s into the stud location with 2 1/2″ wood screws. It’s important to hit the studs in the wall with screws. If you attach this frame to the drywall only, this closet system will not hold.


Step 7 – Secure Drawer Slides to the Side Pieces
Now it’s time to attach drawer slides. Take a pair of 14″ drawer slides and attach the first set of 2″ from the bottom. Make sure they are leveled and parallel to each other. Then cut a 7″ tall scrap piece and use it as a guide to attach the remaining sliders.
Place the 7″ tall guide piece on the first slider, then place the next slider up and attach it with screws. Repeat the process for other sliders.

Step 8 – Install Drawers to the DIY Closet Organizer
To install the drawers so that they work properly, it’s important to have the same 1/4″ gap between each drawer going up. Starting from the bottom, install the drawer so that it’s flush with the bottom of the DIY closet organizer sides. You could temporarily attach a guide board from the bottom and remove it once the bottom drawer is attached.
Once the bottom drawer is installed and works properly, take a 1/4″ scrap plywood piece and cut it full width and length of the drawer box. Place this 1/4″ plywood on top of the first installed drawer. Then place the next drawer on top of the 1/4″ plywood and mark the location of where the drawer slides should be attached. Now attach the drawer slides. Repeat the process going up for the remaining of the drawers.
Once the drawers are installed and inserted, now it’s time to attach the lower shelf. Take a pencil and lightly mark the elevation of the top of the upper drawer on the closet organizer sides. Then remove the upper drawer and install the shelf board just below the pencil mark. Make sure the pocket holes are on the bottom. Use 1 1/4″ pocket holes to attach this shelf board. Next, install the upper shelf 12″ higher than the lower shelf.


Step 9 – Cut and Attach Support Blocks for the Shelf Boards
Take the remaining 3/4″ plywood and cut six shelf support blocks to 14″ x 1 1/2″ and two blocks to 12″ x 1 1/2″. These pieces will be attached to the left and right walls of the closet. Then the shelves will be placed on top of these blocks.
Again using a stud finder, locate the studs on the left and right closet walls and mark them on a wall. Then mark the elevation of each shelf. Ensure that the bottom shelf is the same elevation as the bottom of the side piece of the closet system. The rest of the shelves could be placed at any elevation (I placed the shelves about 12″ apart for better storage space). Attach the shelf support blocks using wood screws into the studs.
The very top shelf will lay down on the top of the closet system spanning the whole width of the closet. This shelf needs to be 12″ wide. The length of each shelf piece might be different depending on how big your closet is. But for my closet, the top shelf was 72 1/2″ in width, and the smaller shelves on the sides were 25 3/4″.
Once all the shelf boards are measured and cut, drill pocket holes on the smaller shelves only on one side. The side that will be against the middle shelf system will need pocket holes, and the side against the wall will lay on the support blocks.
Paint the closet shelves before installing them inside the closet using pocket hole screws.

Step 10 – Finish Installing Handles and Coat Hanger Dowels
Take closet dowel rod holders and install them at the elevation you’d like depending on what clothes you will have hanging on them. Then measure and cut the dowel rod to the correct length and insert it into the rod holders. Finish installing drawer handles. You’re all done with this DIY closet organizer with drawers.


Frequently Asked Questions
There are many benefits to having a closet organizer with drawers. Drawers provide a place to store folded clothes, shoes, and other items neatly out of sight. They can also help prevent clothing from becoming wrinkled or damaged. Additionally, drawers make it easy to find what you are looking for, since everything is organized and in one place.
There are a few things to keep in mind when choosing a closet organizer with drawers. First, consider the size of your closet and the amount of storage space you need. Then, think about what types of items you want to store in the drawers – folded clothes, shoes, accessories, etc. Finally, choose a style that fits your personal taste and the overall look of your home.
Installing a closet organizer with drawers is relatively easy. First, measure your closet and choose a location for the organizer. Then, assemble the organizer according to the instructions. Finally, attach the organizer to the wall using screws or nails.
Caring for your closet organizer with drawers is easy. Simply wipe the surface with a damp cloth when necessary. Avoid using harsh chemicals or cleaners, as these may damage the finish.
Yes, a closet organizer with drawers can still be useful even if you have a small closet. Choose a compact organizer that fits your space constraints. Additionally, use the drawers to store items that you don’t need to access on a daily basis, such as seasonal clothing or extra bedding.