DIY Farmhouse Chair Woodworking Plans PDF
$14.97
Digital PDF download — Complete woodworking plans to build a DIY farmhouse dining chair. Includes step-by-step instructions, full cut list with measurements, material list, tools list, and 3D illustrated assembly diagrams. Instant download. No physical product shipped.
Build a sturdy, upholstered farmhouse chair with an X-back design using common lumber. Beginner-to-intermediate friendly. Imperial measurements. Printable on any device.
Description
Build Your Own Farmhouse Dining Chair — No Guesswork Required
Finding solid wood dining chairs that are both attractive and affordable is harder than it should be. Store-bought options are often expensive, poorly made, or just don’t fit the style of your home. These DIY farmhouse chair woodworking plans give you everything you need to build a beautiful, sturdy, upholstered dining chair from scratch — using common lumber sizes and basic woodworking tools.
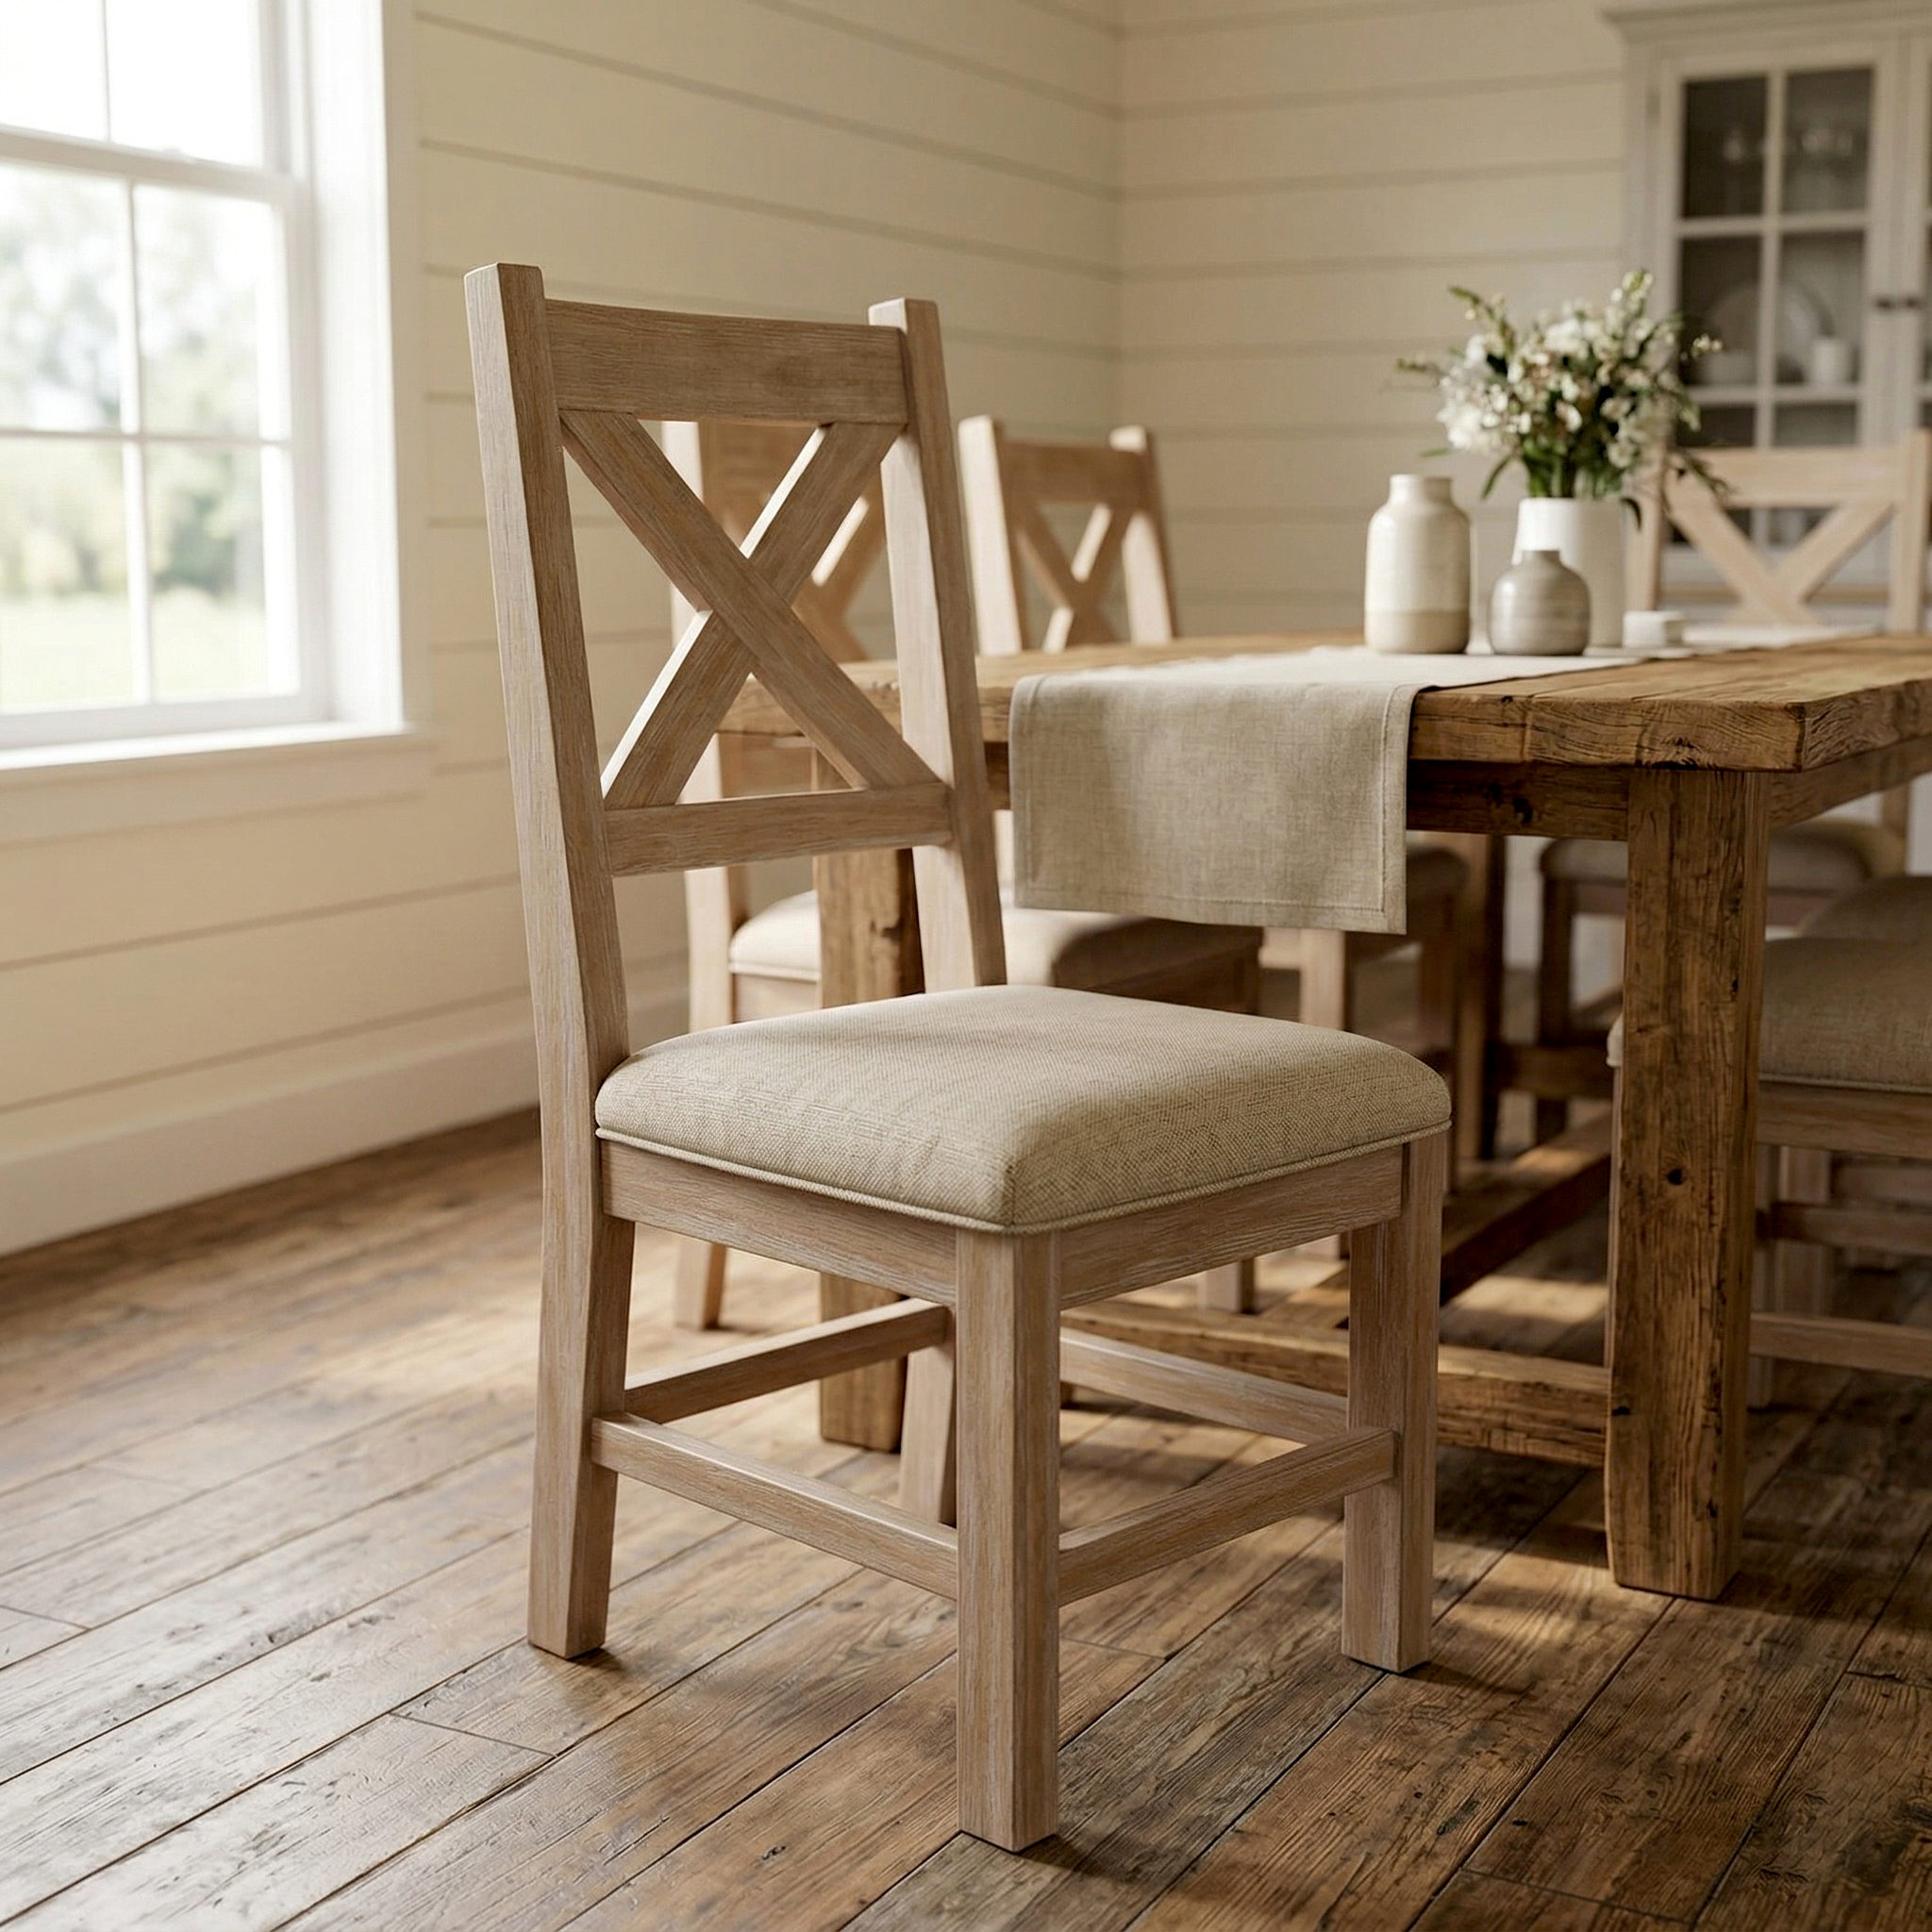
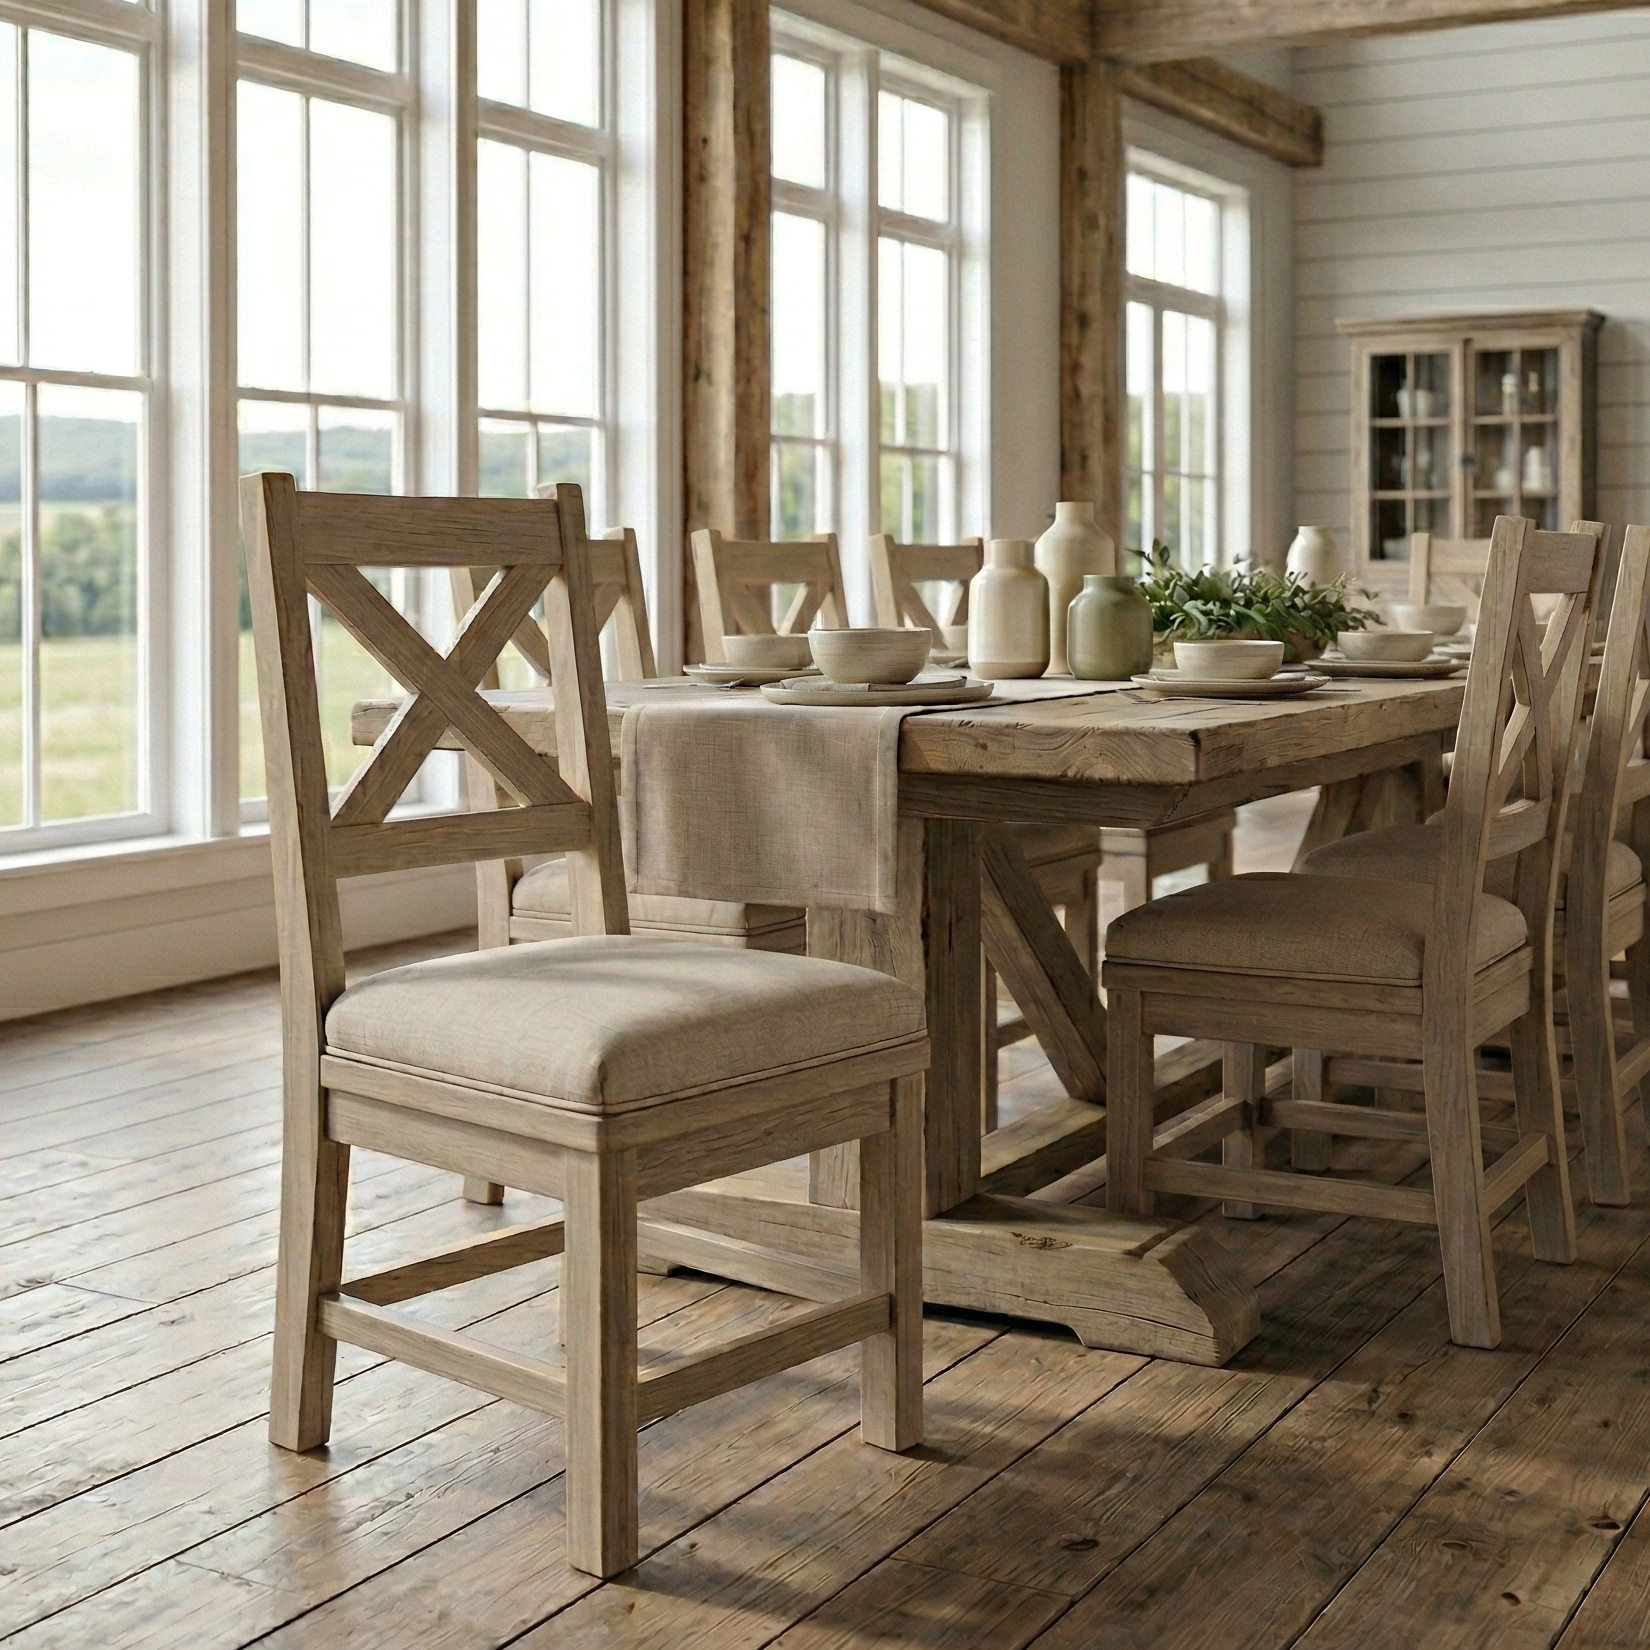
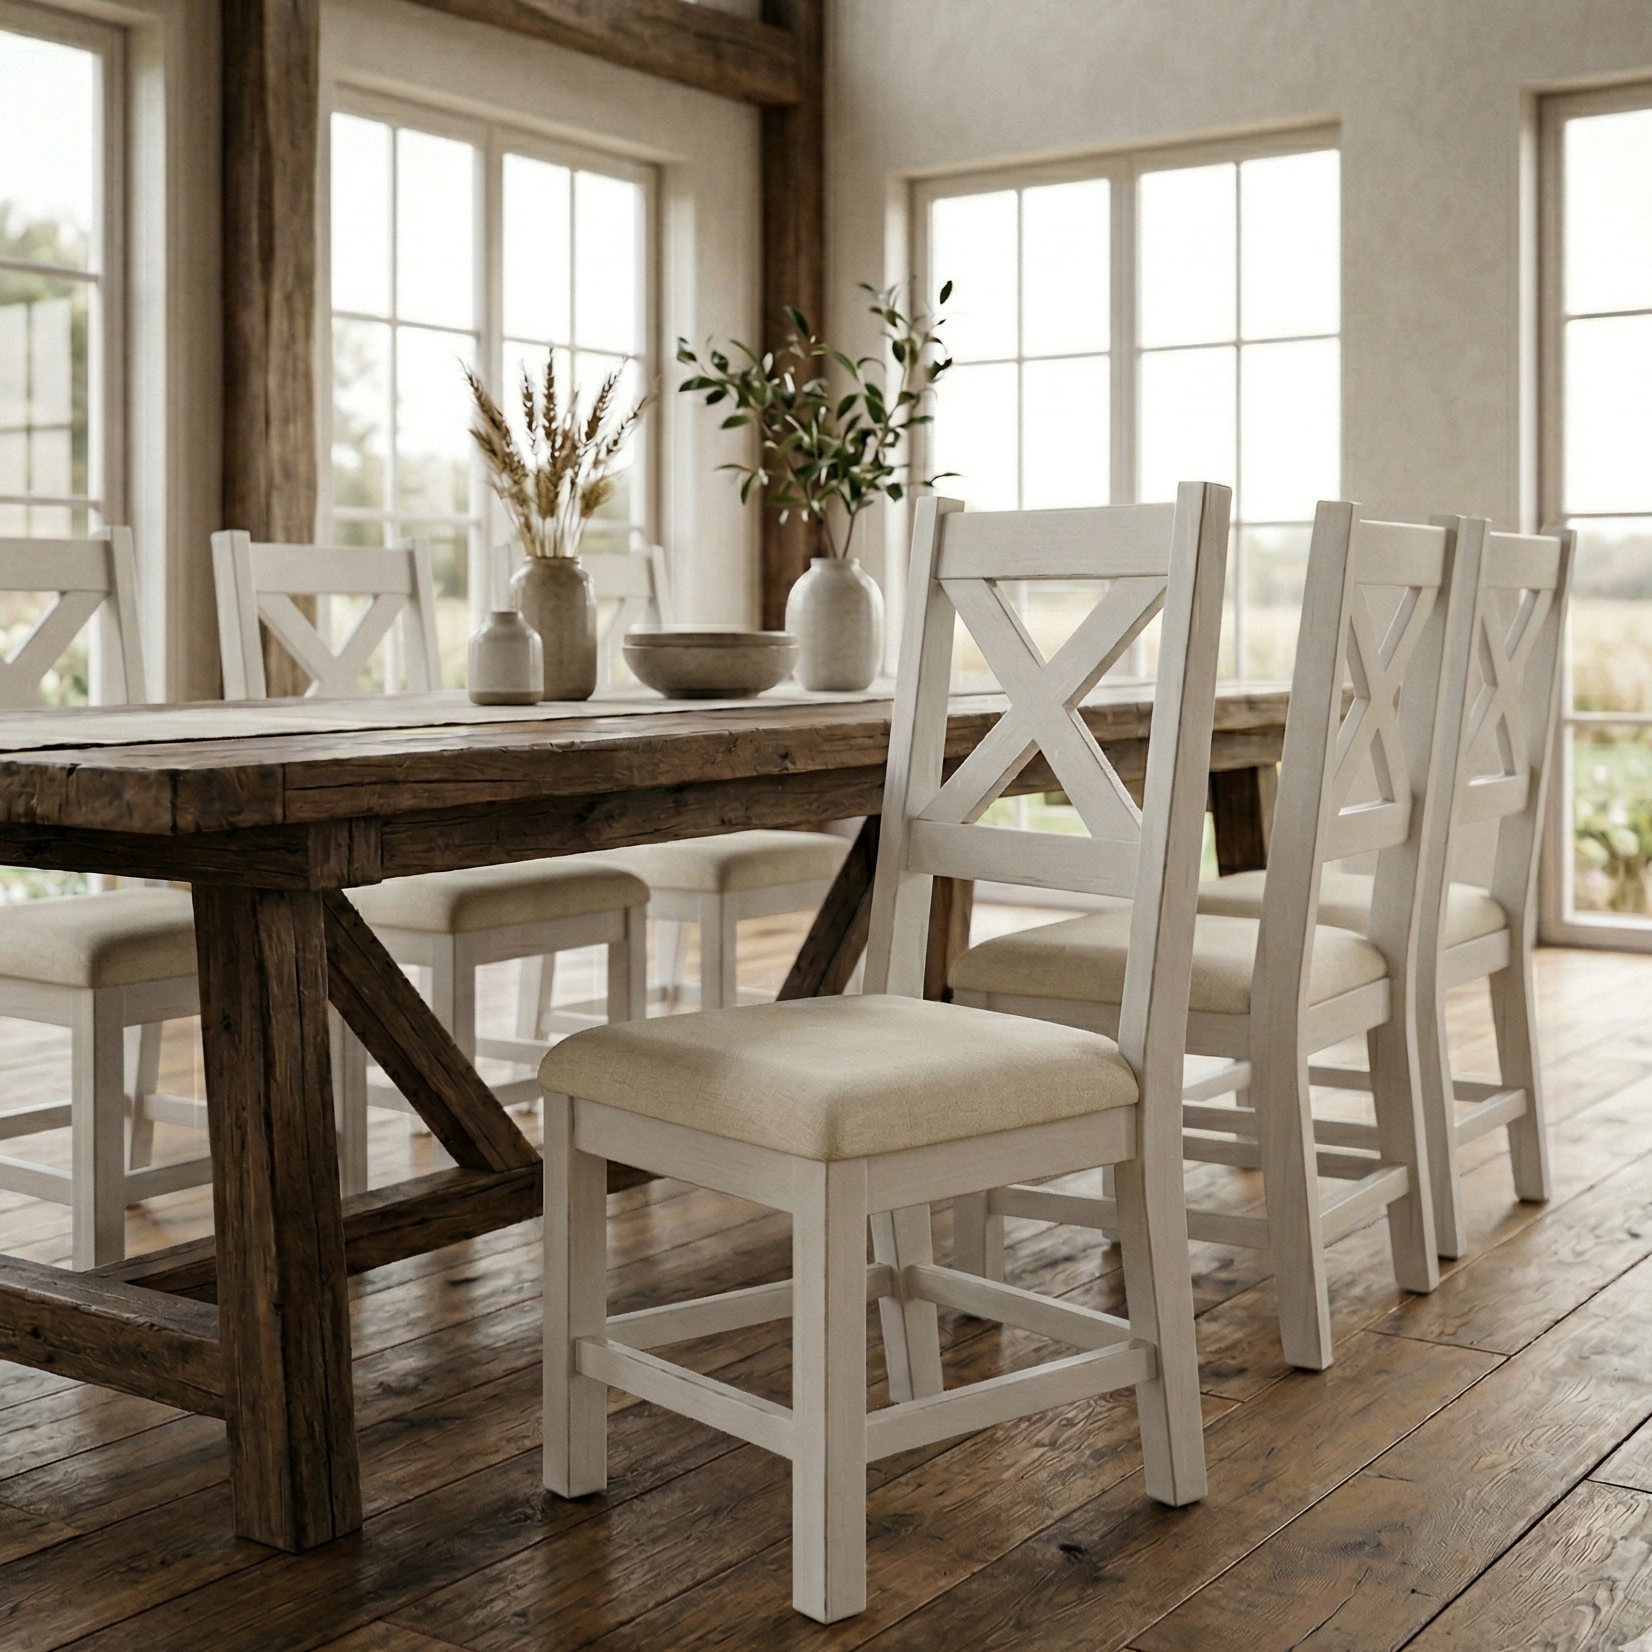
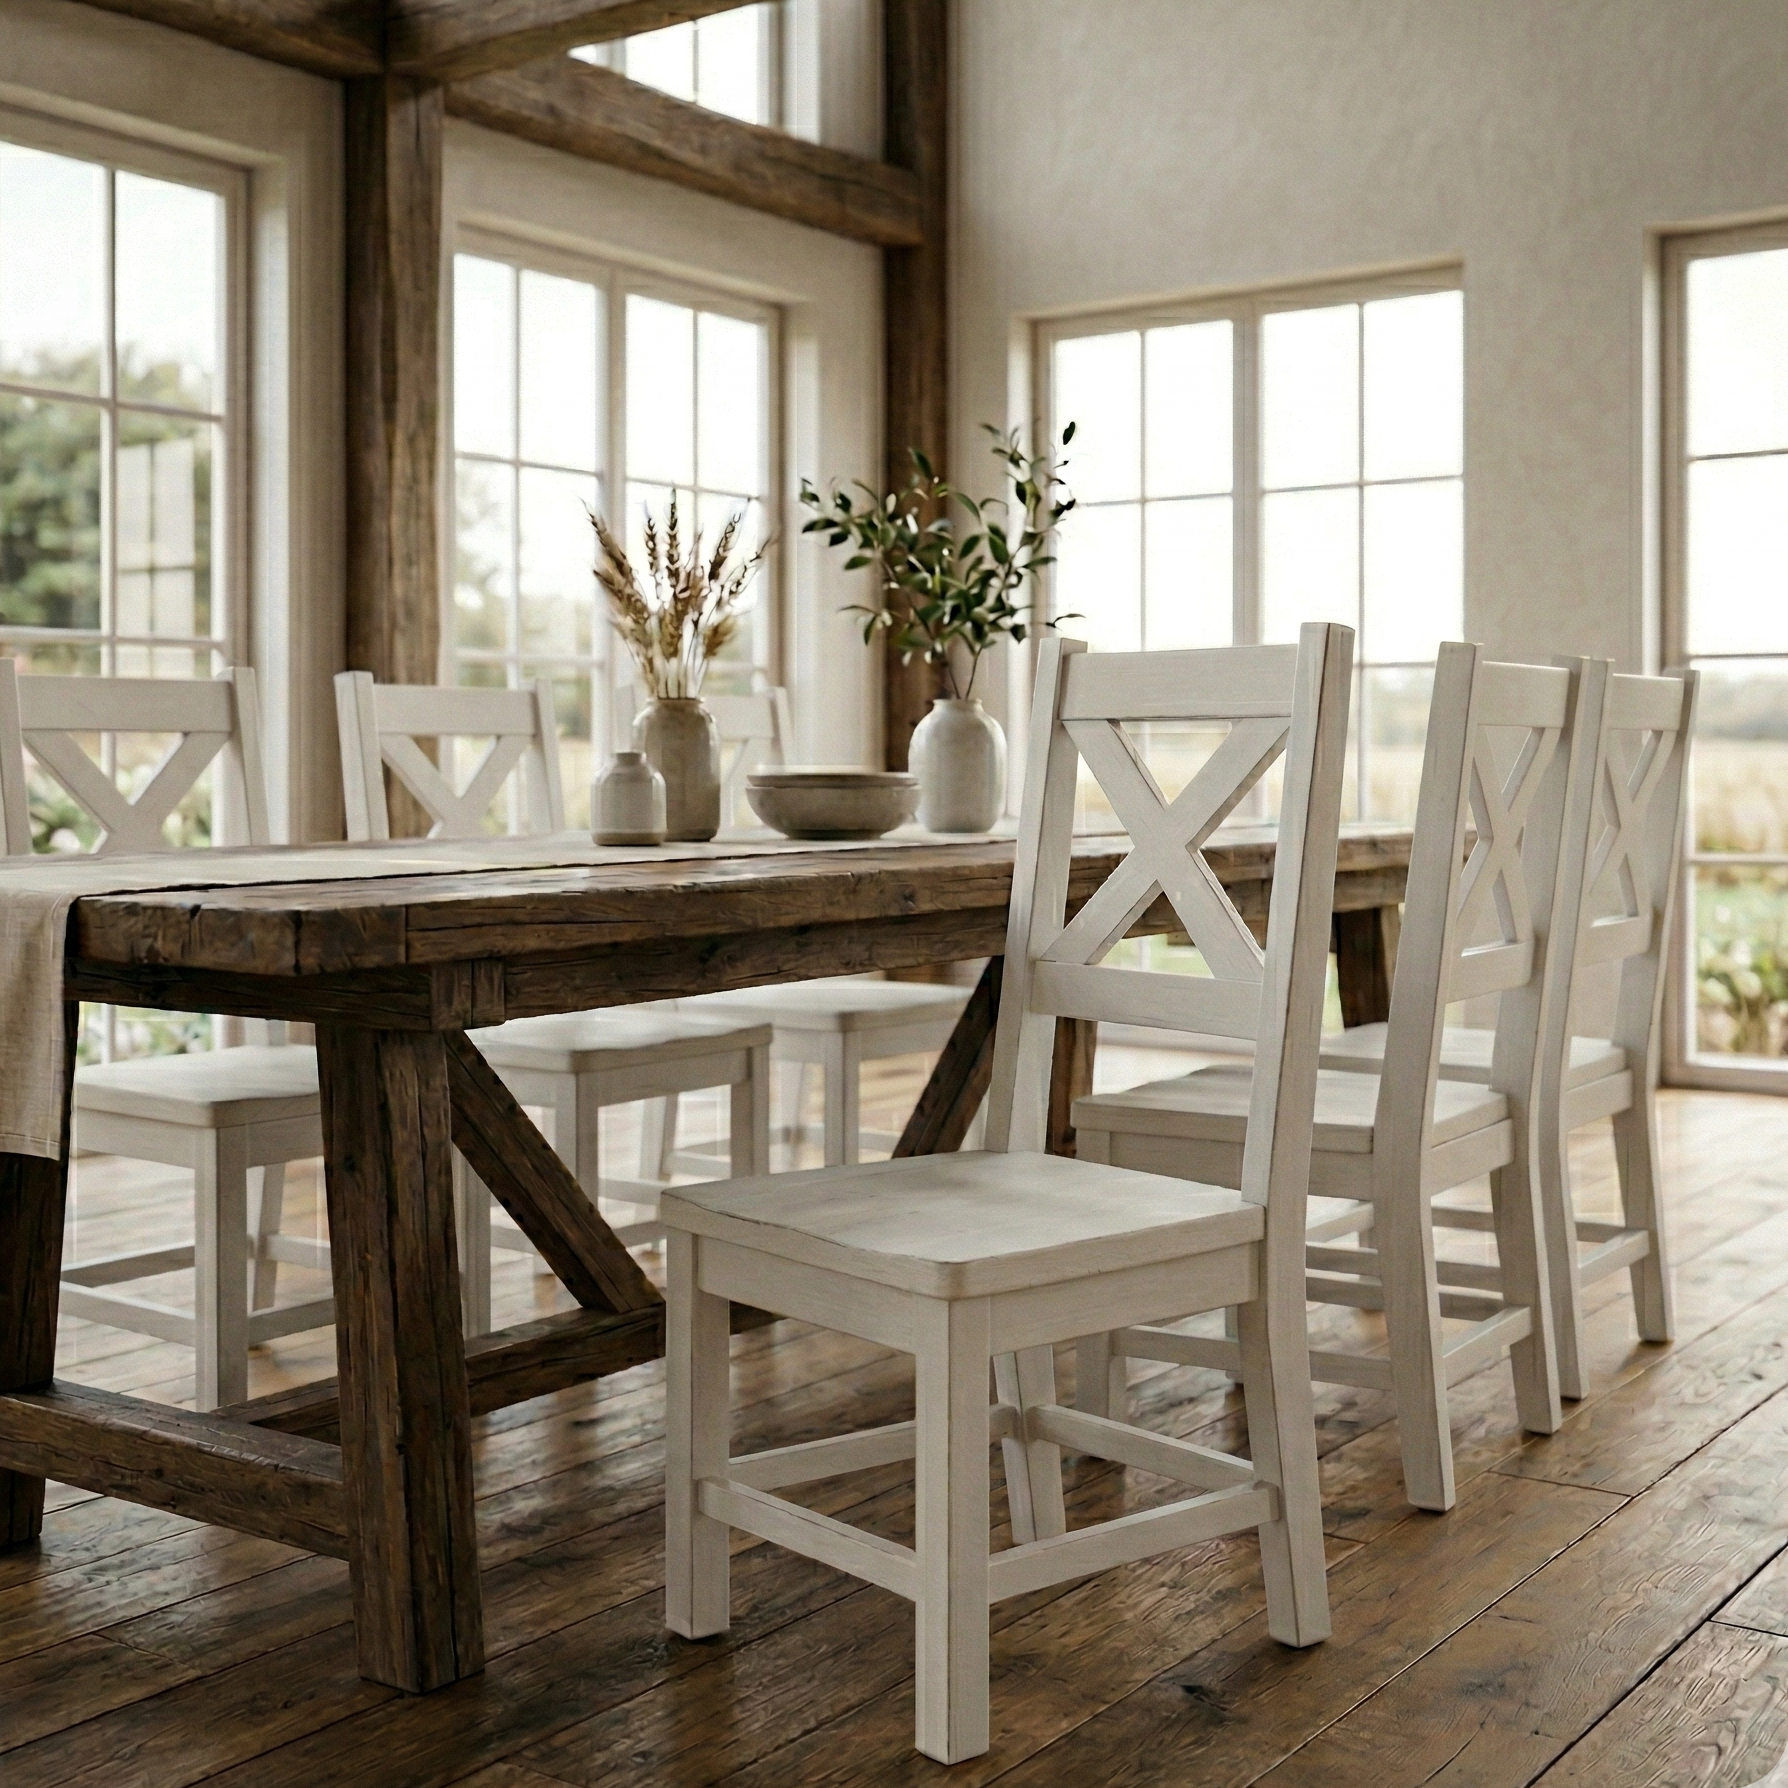
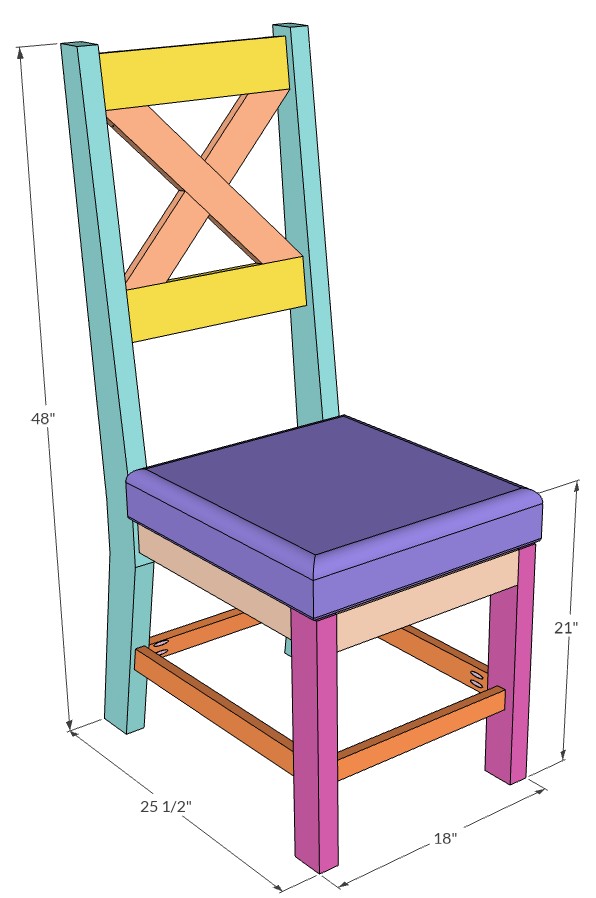
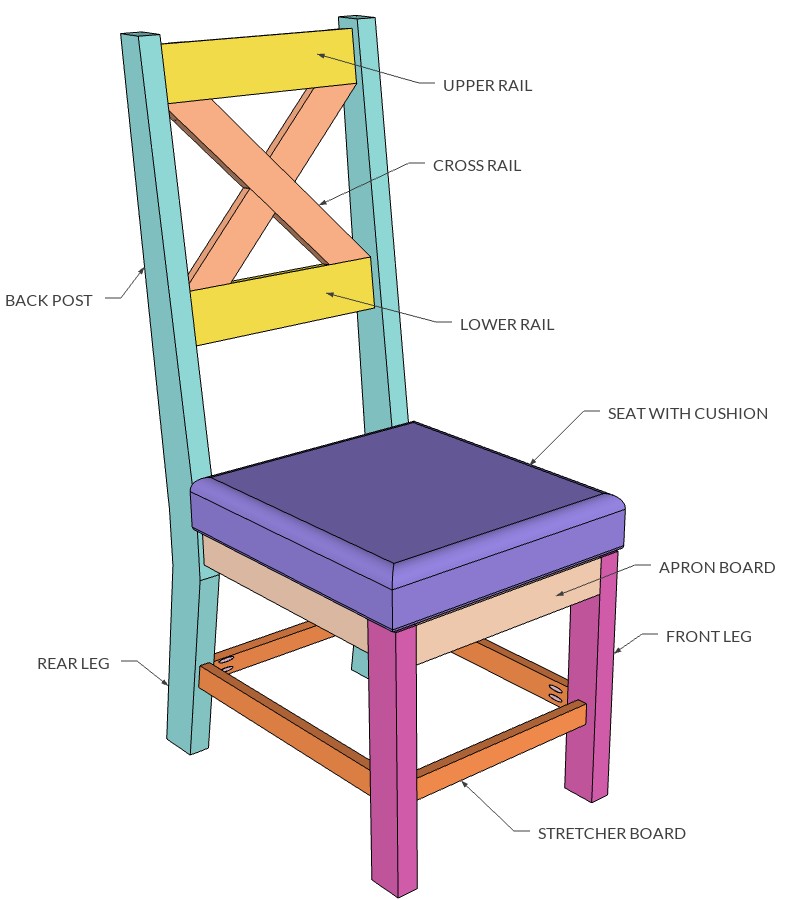
The finished chair features a classic X-back design, angled rear legs with a shaped profile, a solid wood frame assembled with pocket hole joinery, and a comfortable upholstered seat cushion. It’s a functional, heirloom-quality piece of furniture you built yourself — at a fraction of retail cost.
These plans are perfect for building a complete farmhouse dining set. The chair pairs directly with the matching Farmhouse Dining Table and Farmhouse Bench plans available in the TheDIYPlan shop.
Who These Plans Are For
These woodworking plans are designed for beginner to intermediate woodworkers and DIY homeowners who want to build real furniture without relying on vague tutorials or incomplete instructions.
These plans are a great fit if you:
- Are building a farmhouse dining room set from scratch
- Want to replace worn-out or mismatched dining chairs
- Are looking for a satisfying weekend woodworking project
- Prefer building with construction lumber to keep costs low
- Want a customizable chair — paint color, fabric, and dimensions can all be adjusted to suit your space
What’s Included in the PDF
This is a complete, printable PDF woodworking plan. After purchase, you’ll receive instant access to download a file that includes:
- Step-by-step building instructions — 7 detailed steps covering every phase of the build
- Full cut list with measurements — every component listed with exact dimensions in imperial units
- Complete material list — lumber sizes, plywood, foam, fabric, screws, and fasteners
- Tools required list — so you know exactly what you need before you start
- 3D illustrated assembly diagrams — clear visual references for each stage of the build
- Cut diagrams — showing how to lay out and cut parts efficiently
- Printable PDF format — optimized for printing in the shop or viewing on any device
- Imperial measurements — all dimensions in inches and feet
Note: Does not include SketchUp or CAD files.
Project Details
| Detail | Info |
|---|---|
| Difficulty Level | Beginner – Intermediate |
| Estimated Build Time | 1–2 weekends |
| Seat Height | Standard dining height |
| Back Post Height | 48 inches (rear legs / back posts) |
| Seat Base | 18″ × 20″ plywood |
| Foam Cushion | 20″ × 22″ × 4″ (approximate) |
| Measurements | Imperial (inches) |
| Estimated Cost | Budget-friendly using construction lumber |
Tools You’ll Need: Miter saw, circular saw, jigsaw, drill/driver, Kreg Jig (pocket hole jig), nail gun, staple gun, table saw, wood chisel, speed square, tape measure, clamps, random orbital sander
Materials Used: 2×6, 1×4, 1×3, 2×3 lumber; 3/4″ plywood; upholstery fabric; 4″ thick foam cushion; pocket hole screws; wood glue; brad nails; primer and paint
What You’ll Learn How to Build
Following these plans, you’ll work through each phase of the chair build:
- Cutting and shaping the rear legs — using a circular saw and jigsaw to cut the angled profile
- Building the X-back cross rail — including notching and interlocking the two rail pieces
- Assembling the chair sides — connecting front legs, rear legs, side aprons, and stretchers with pocket hole joinery
- Connecting the full chair frame — front and rear aprons, stretchers, and installing the X-back assembly
- Upholstering the seat cushion — cutting foam, wrapping fabric, and securing to the plywood seat base
- Finishing the chair — primer coat, white paint, and optional dowel plug concealment for a clean, professional look
Why Use a PDF Plan Instead of Working From the Blog Post Alone?
The full blog post is available free on TheDIYPlan — but the PDF plan is designed for the shop. Working from a printable plan means you can:
- Keep the full cut list and diagrams in front of you while you build
- Avoid scrolling through a webpage on your phone between cuts
- Stay organized with all dimensions, materials, and steps in one document
- Reduce the chance of measurement errors and wasted material
- Work faster with a clear reference at every stage of the build
If you’ve ever started a project and lost your place mid-build, a printed plan at the workbench makes a real difference.
Digital Download Information
This is a digital product. No physical item will be shipped.
- Instant PDF download delivered immediately after purchase
- Compatible with desktop, tablet, and mobile devices
- Print at home or save to your device — works however you prefer
- Standard PDF format — no special software required beyond a PDF reader
- Measurements in imperial units (inches and feet)
Build Something You’re Proud Of
A well-made dining chair is one of those projects that gets used every single day. These plans give you the confidence to build it right the first time — with clear instructions, accurate measurements, and illustrated diagrams that take the guesswork out of the process.
If you’re ready to add a custom, handcrafted farmhouse chair to your home, download the plans and get started.


Reviews
There are no reviews yet.