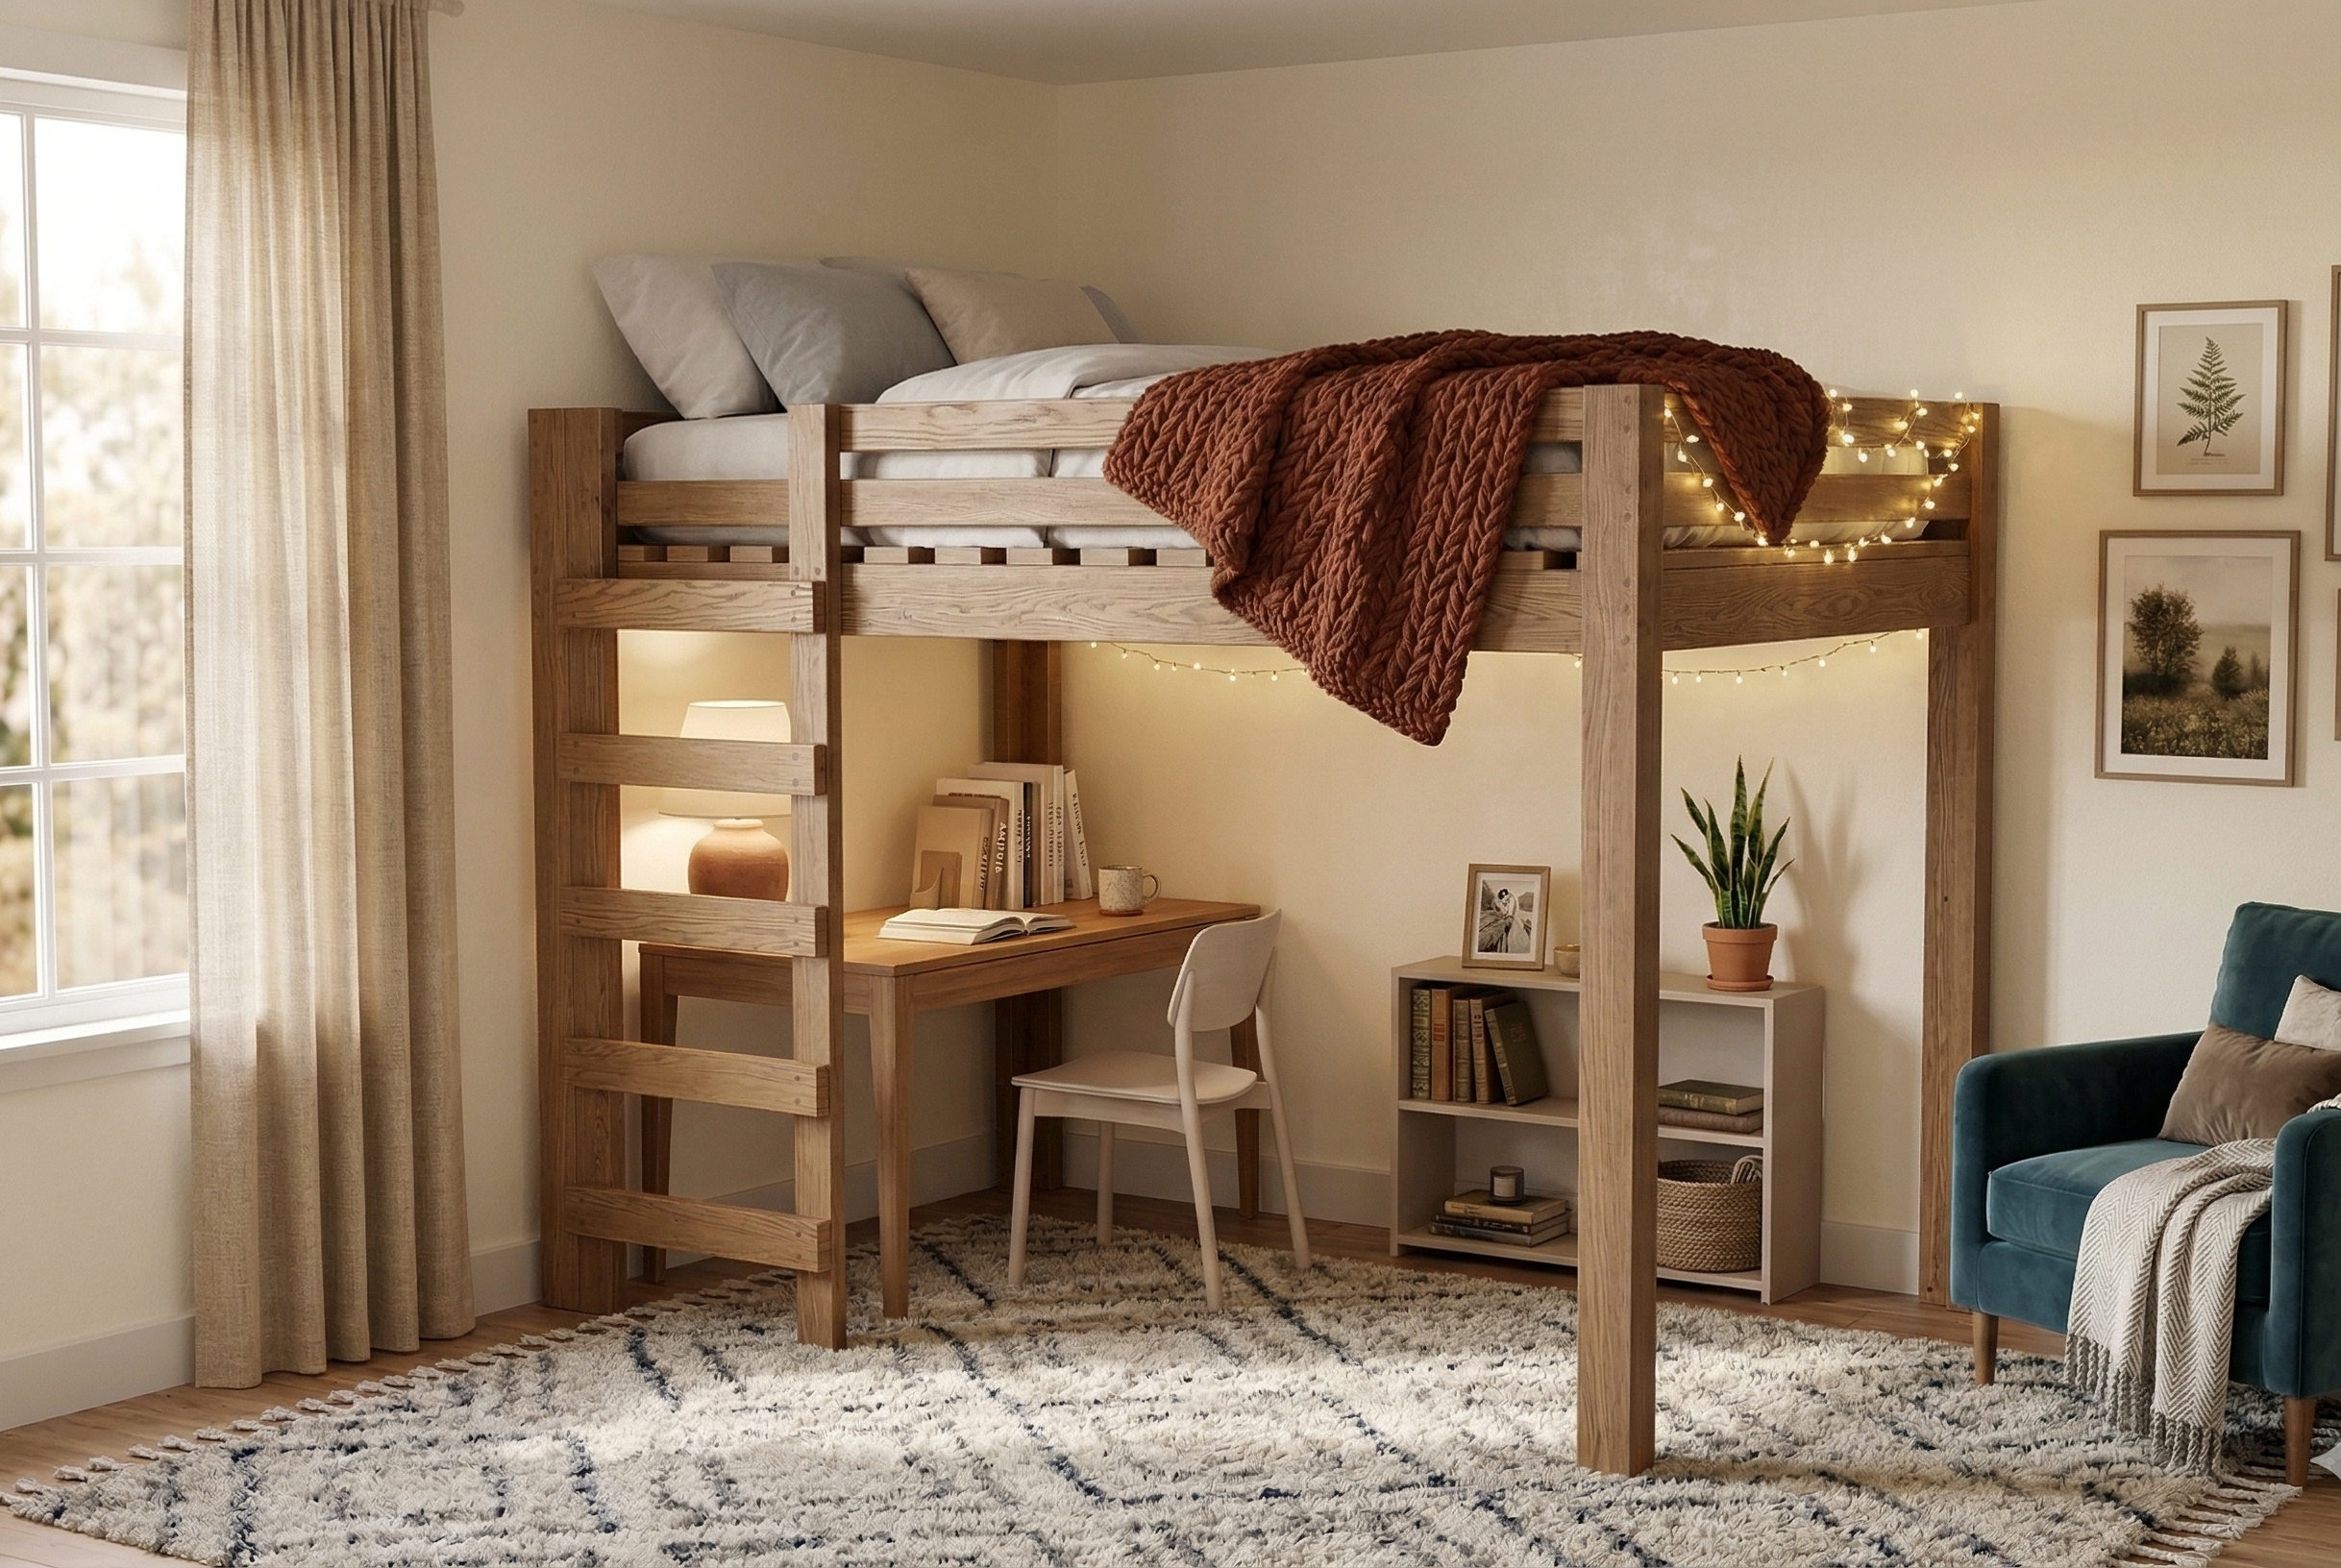
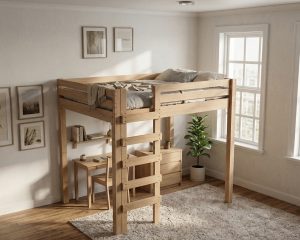
Building your own DIY full-size loft bed with a ladder is one of the most rewarding woodworking projects you can take on. Not only does it save space, but it also gives you a strong, custom-built bed that can fit perfectly in a bedroom, studio apartment, or guest room.
In this guide, you will learn exactly how to build a sturdy loft bed from scratch using basic lumber and simple tools. This project is designed to be beginner-friendly, but still strong enough for daily use.
By the end, you will have a complete full-size loft bed that includes:
- Strong framing designed for safety and stability
- A raised sleeping platform
- Heavy-duty support structure
- Built-in ladder
Why Build a DIY Loft Bed?
A loft bed is perfect when you want to:
- Save floor space in a small bedroom
- Create storage or desk space underneath
- Build a custom piece of furniture instead of buying expensive store-bought options
- Add value to a guest room or rental space
Store-bought loft beds can cost $800–$2,000 or more, while this DIY version can be built for a fraction of the price and made stronger than most commercial options.
What is the Difference Between Queen-Size and Full-Size Beds?
The bed size difference between a queen-size bed and a full-size bed is six inches. A queen-size bed is 60 inches wide by 80 inches long, while a full-size bed is 54 inches wide by 75 inches long. The extra width of a queen-size bed can make all the difference for couples who are trying to get a good night’s sleep. A queen-size bed is definitely the way to go if you have extra space in your bedroom.
How Much Weight Can a Full-Size Loft Bed Support?
There are a few reasons why it’s important to know the weight capacity of a loft bed. First, if the bed is not able to support the weight of the person sleeping in it, there is a risk of the bed collapsing. This could lead to serious injury.
Second, if the bed is not able to support the weight of all the bedding and blankets, there is a risk of the bed becoming uncomfortable or even unsafe to sleep in.
A full-size loft bed made from 2x4s and 2x6s should be able to support at least 500 pounds. Here’s an example of a loft bed with a similar constructability technique that supports 1000 pounds.
You also might be interested in a DIY Bunk Bed and DIY Queen Size Loft Bed with a Desk.
Time to Complete
10 hours
Total Cost
$280
Skill Level
Beginner to Intermediate
Download Printable Plans in PDF


DIY Full-Size Loft Bed Plans
$14.97
Digital PDF Download — Build your own full-size loft bed with these complete DIY woodworking plans. Includes step-by-step instructions, full cut list with measurements, material list, tools list, assembly diagrams, and estimated cost. Instant download. Print-ready. No physical product shipped.
Description
Free Up Your Floor Space — Build a Full-Size Loft Bed This Weekend
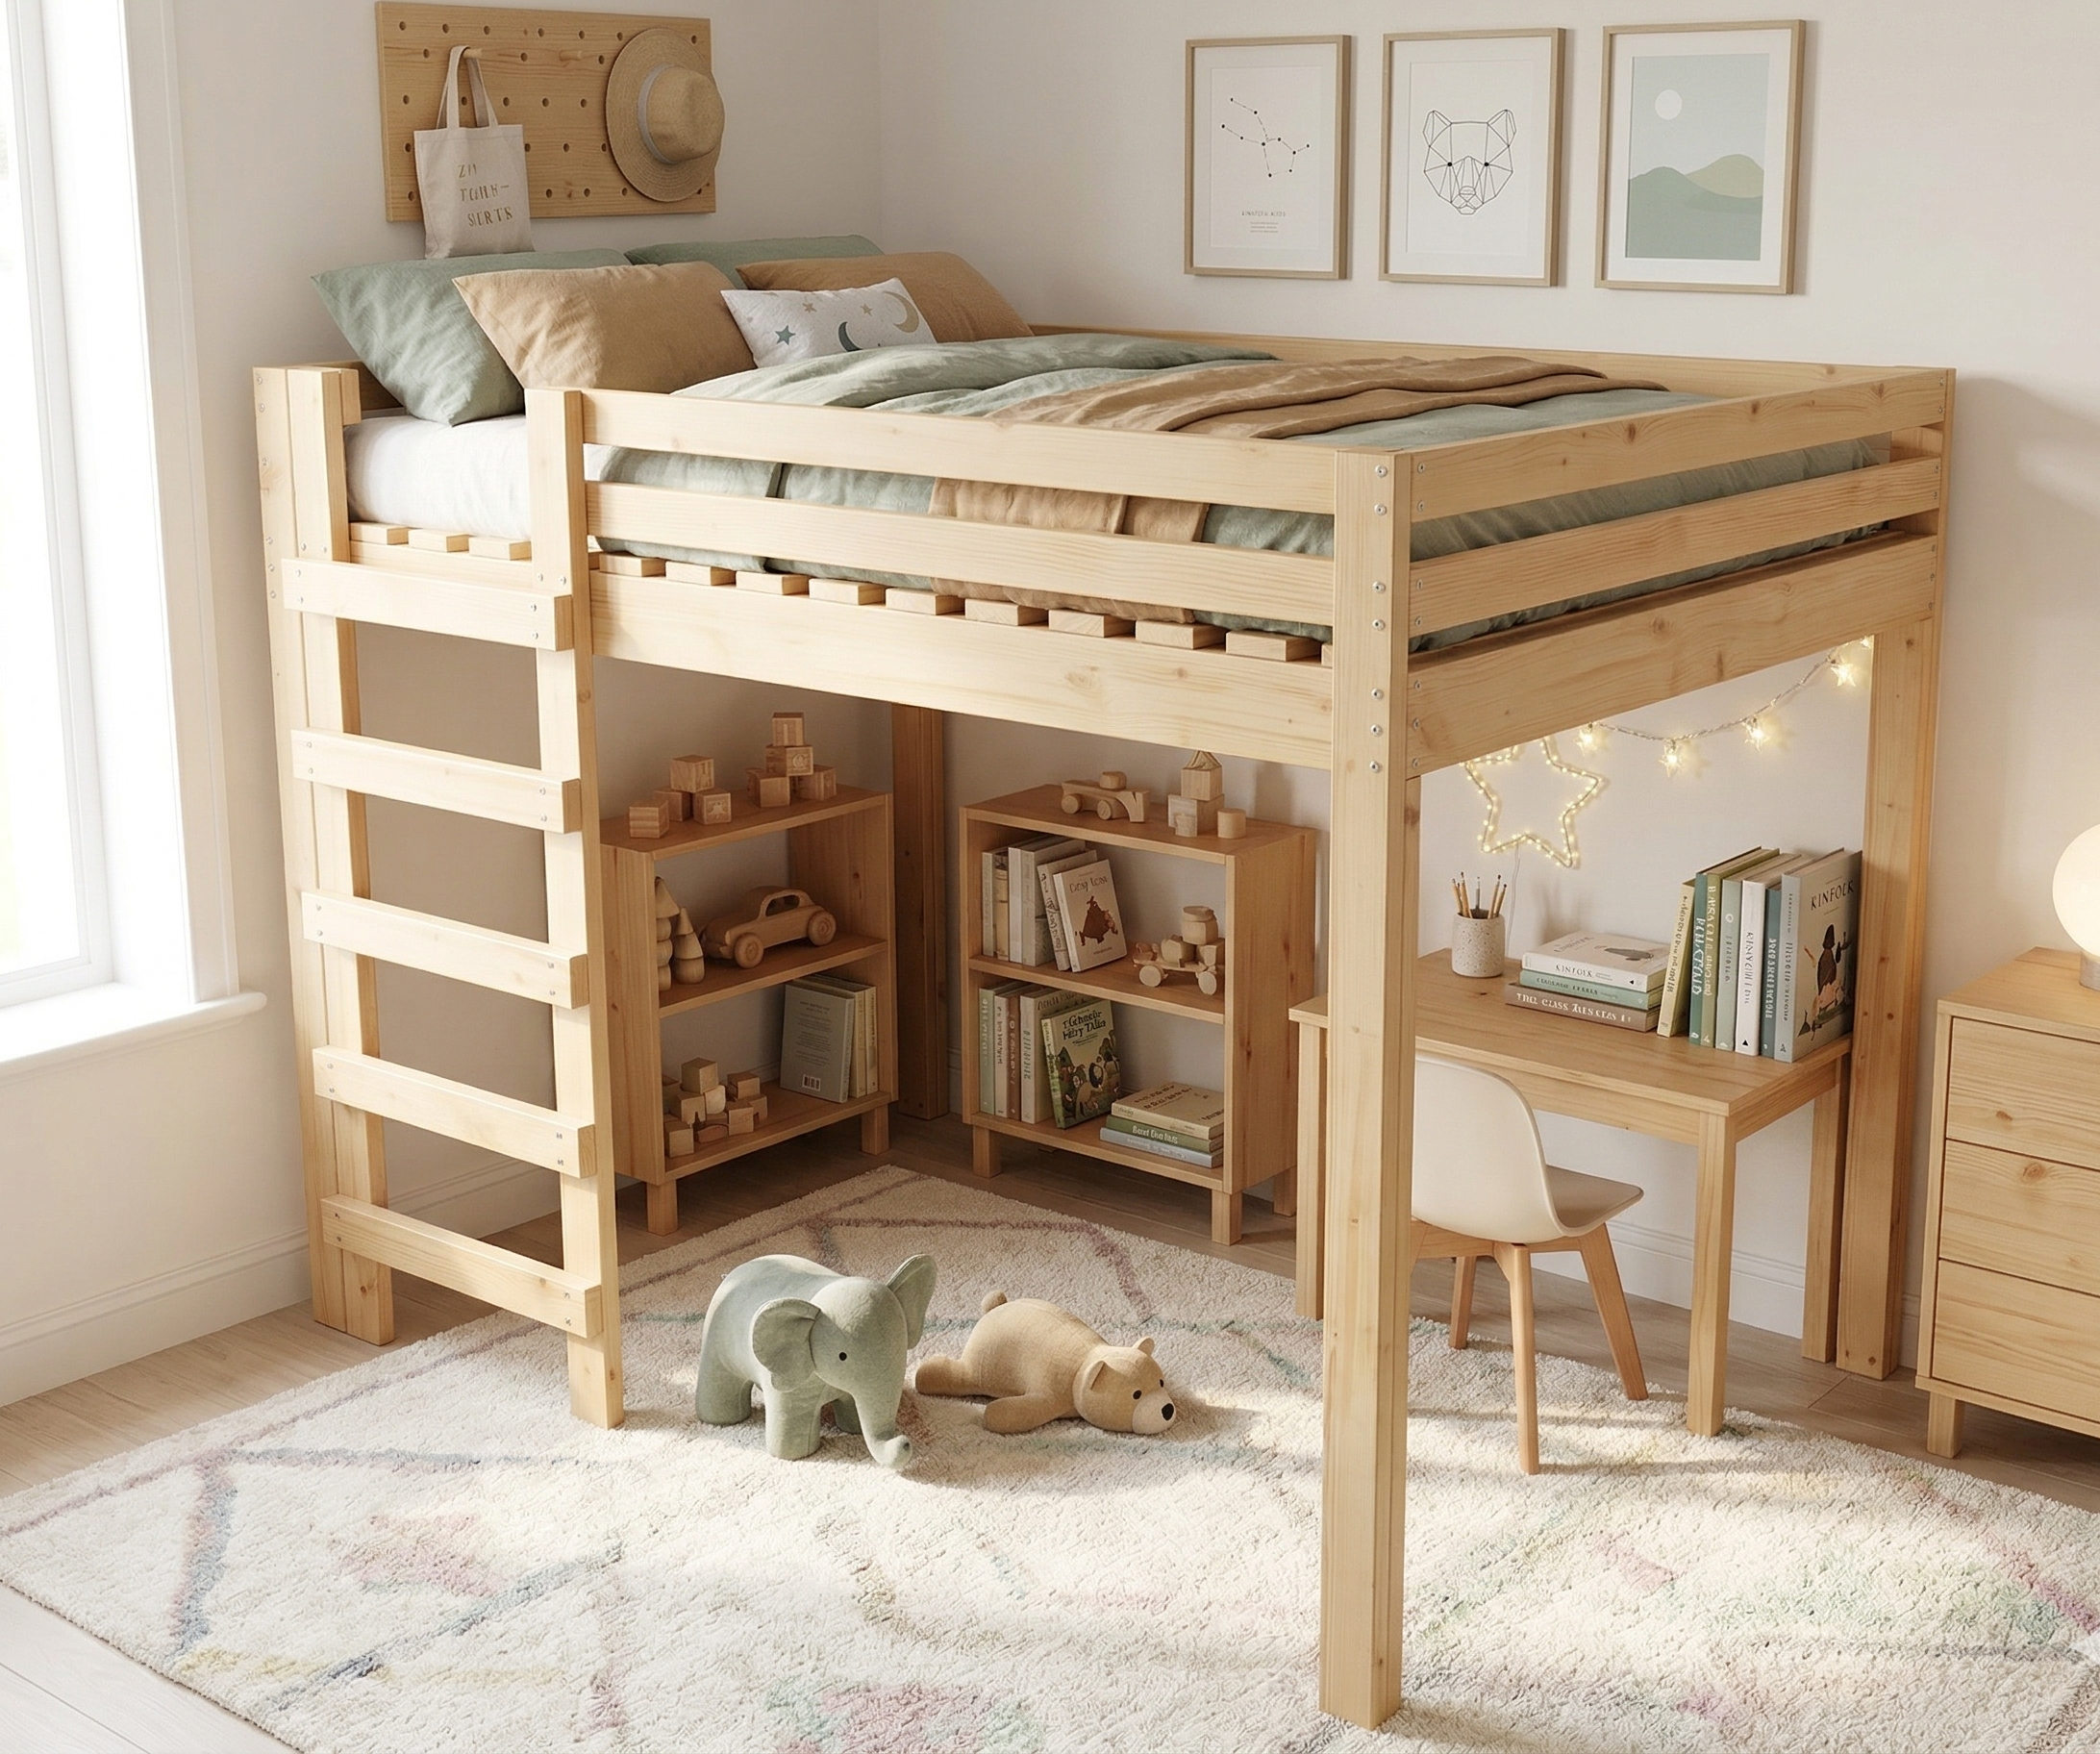
A full-size loft bed is one of the smartest furniture projects you can build. It transforms a cramped bedroom into a functional, open space — giving you a comfortable sleeping area up top and valuable room below for a desk, dresser, bookshelves, or extra storage. Whether you’re outfitting a kid’s room, a college apartment, a guest room, or a small bedroom, this project delivers real results without a big budget.
These DIY full-size loft bed woodworking plans walk you through every stage of the build — from cutting your first 2×4 to attaching the final safety rail. Built primarily from 2×4 and 2×6 lumber with standard hardware, this is a sturdy, attractive loft bed that can support 500+ lbs and is designed to last for years.
Best of all? It can realistically be completed in a single weekend for around $280 in materials.
Who These Plans Are For
These woodworking plans are written for beginner-to-intermediate DIYers who want clear, reliable instructions without guesswork. You’ll do great with these plans if you are:
- A homeowner looking to build functional bedroom furniture on a budget
- A parent building a space-saving bed for a child’s or a teen’s room
- A renter or college student maximizing a small room
- A DIY woodworker wanting a satisfying weekend project
- Someone who has basic carpentry experience and access to common power tools
No advanced joinery or specialized woodworking skills required. If you can measure, cut, and drive a screw, you can build this bed.
What’s Included in the PDF
After purchase, you’ll receive an instant download of the full printable PDF plan, which includes:
- ✅ Step-by-step building instructions — All 10 steps explained in detail, with clear guidance on cuts, assembly, spacing, and fastening
- ✅ Full cut list with measurements — Every board dimension you need listed in one place (imperial measurements)
- ✅ Complete material list — Know exactly what lumber and hardware to buy before you go to the store
- ✅ Tools required list — Tape measure, drill, miter saw, and random orbital sander
- ✅ Estimated build time — Approximately 6 hours
- ✅ Estimated total project cost — Approximately $280
- ✅ 3D assembly diagrams and illustrations — Visual guides for every major step
- ✅ Cut diagrams — Clearly laid out so you can cut efficiently and minimize waste
- ✅ Printable PDF format — Print at home or at any copy shop
- ✅ Instant digital download — No waiting, no shipping
Project Details
| Detail | Specs |
|---|---|
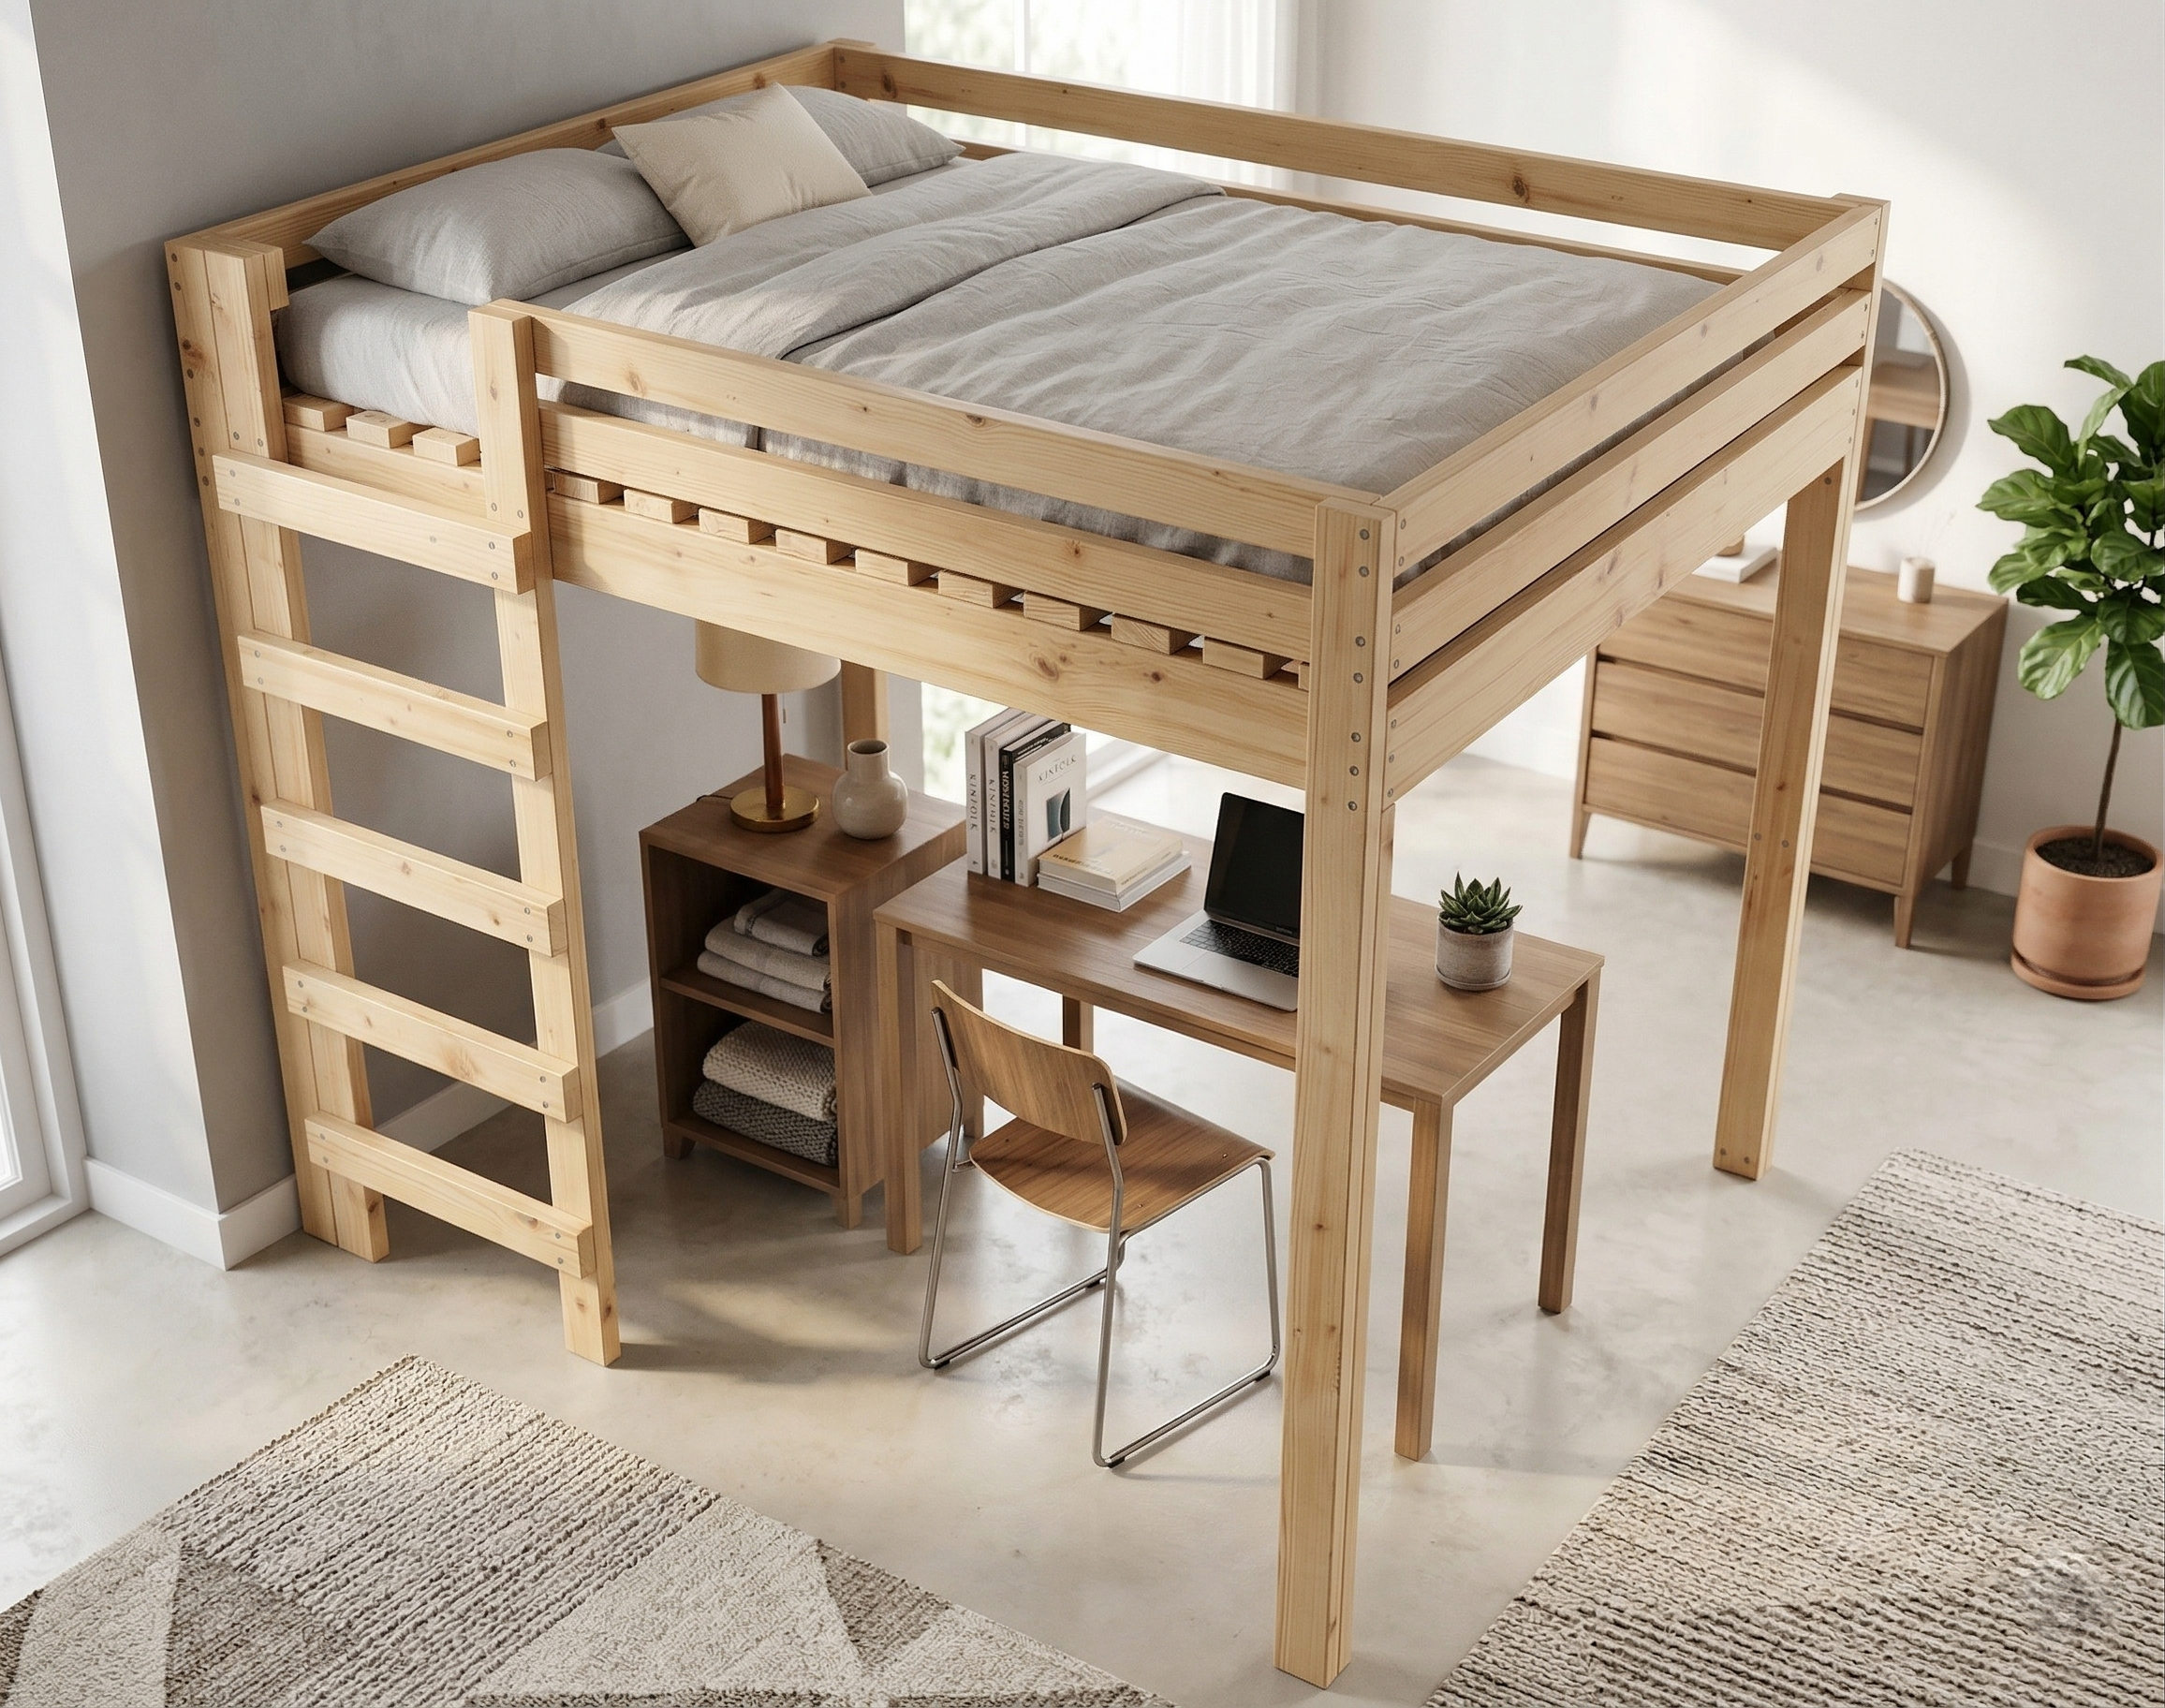
| Bed Size | Full (54″ W × 75″ L) |
| Leg Height | 72″ tall legs (6 feet) |
| Primary Materials | 2×4 and 2×6 lumber |
| Estimated Build Time | 6 hours |
| Estimated Cost | ~$280 |
| Difficulty Level | Intermediate |
| Measurements | Imperial (inches) |
Key structural dimensions from the plans:
- Four legs cut from 2×4 at 72″ and 56″
- Side rails from 2×6 at 74-1/2″
- End rails from 2×6 at 57-1/2″
- 15 mattress support boards cut to 57-1/2″ with ~2″ spacing
- Integrated ladder on left or right side (two 72″ verticals, five 25″ rungs)
- Upper safety rails on all sides
- Center support board under the mattress platform to prevent sagging
Recommended Tools:
- Tape Measure
- Drill (with driver bits)
- Miter Saw
- Random Orbital Sander
Why Build with a Plan Instead of Winging It?
Building furniture from a reliable PDF plan saves you time, money, and frustration. Here’s what you get when you follow a tested set of instructions instead of piecing it together from YouTube comments:
- No costly measurement mistakes — Every cut is pre-calculated and laid out
- Efficient lumber shopping — The material list tells you exactly what to buy
- Structural confidence — The design is built around 2×4 and 2×6 lumber for a frame that supports 500+ lbs
- Faster build time — No stopping to figure out the next step; everything is sequenced for you
- A bed that actually fits a full-size mattress — Dimensions are designed specifically for a standard 54″ × 75″ full-size mattress
- Printable instructions you can take to the workshop — No phone or laptop needed while you’re cutting and building
Digital Download Information
This is a digital product. No physical item will be shipped.
- After completing your purchase, you will receive an instant download link to your PDF plan
- The PDF is compatible with desktop, tablet, and mobile devices
- Print it at home or at your local print shop for easy use in the workshop
- Files are in standard PDF format — no special software required
- CAD or SketchUp files are not included
Build It This Weekend
A full-size loft bed is one of those projects that genuinely changes how a room feels and functions. With solid plans in hand, the right lumber, and a free weekend, you can build something that would cost $400–$800+ to buy at a furniture store — for around $280 in materials.
Download the PDF plans today and start building with confidence.
Other Woodworking Projects

Tools for this project
Material List
- Available with the purchase of PDF plans.
Note: Lumber dimensions are listed as nominal size. See lumber sizes for actual dimensions vs nominal.
Disclosure: Some of the links on this page, as well as links in “tools for this project” and “material list” sections, are affiliate links.
Dimensions
Step 1 – Cut the Four Legs of the Loft Bed
Start by cutting the legs for the loft bed.
Use 2×4 lumber for this step. Cut:
- Four (4) pieces at 72 inches long
- Four (4) pieces at 56 inches long
The 72-inch boards will form the main height of each leg. The 56-inch boards will be attached later to strengthen the legs and help support the total weight of the loft bed, including the mattress and anyone sleeping on it.
Make sure all cuts are straight and accurate. Clean, square cuts will help the frame fit together properly in later steps.

Step 2 – Connect the 2x4s to Make Four Legs
Take one 72-inch 2×4 and one 56-inch 2×4. Place them side by side.
Align both boards so the bottoms are perfectly flush. This is very important. All legs must sit evenly on the floor later.
Once aligned, attach the boards together using 2 1/2-inch wood screws. Drive the screws through one board into the other to secure them tightly.
Repeat this process until you have built all four legs.
You can also use nuts and bolts instead of screws. Both methods work.
- Wood screws are faster and easier to install
- Nuts and bolts take longer but give a more industrial look
Choose based on your design preference, but screws are more efficient for this build.
When installing screws, pay close attention to how close they are to the edge of the wood. If screws are too close to the edge, the board can split. This is more likely with dry lumber.
Lumber from the store can vary:
- Some 2x4s are dry and light
- Some 2x4s are still wet and heavier
Wet lumber is less likely to split when driving screws near the edge. However, it has a disadvantage. As it dries over time, it can warp or twist, which may affect the stability of the loft bed.
If you are using dry 2x4s, it is strongly recommended to pre-drill pilot holes before driving in screws. Dry wood splits easily, especially when using longer screws like 2 1/2 inches. Pre-drilling helps guide the screw and prevents cracking in the wood.
Once finished, you will have four strong, double-layered legs ready for the loft bed frame.

Step 3 – Cut End and Side Rails of the Loft Bed
The side rails are a key structural part of the loft bed. They support the mattress support boards and the full weight of the mattress. Because they carry heavy loads, you must use 2×6 lumber instead of 2x4s.
Cut the Side Rails
Take 2×6 boards and cut:
- Two (2) side rails at 74 1/2 inches
These side rails will carry the main weight of the bed. Make sure the cuts are accurate and straight so the frame assembles correctly later.
Cut the End Rails
The end rails do not carry direct mattress weight. However, they are still important for the overall structure and frame alignment.
To keep the bed frame balanced and symmetrical, also use 2×6 lumber for the end rails.
Cut:
- Two (2) end rails at 57 1/2 inches
Installation Note
The end rails will be installed at the same height as the side rails. Together, all four rails will form a level rectangular frame that supports the loft bed structure evenly.

Step 4 – Attach the Side Rail to the Leg Sets
The 2×6 side rail will sit directly on the shorter 2×4 section of each leg. This design transfers the weight of the loft bed into the legs, instead of relying only on screws for support.
Start by laying the legs on the floor. Place them parallel to each other with the shorter 56-inch sections facing upward. Check that both legs are aligned properly.
Measure the distance between the legs at both the top and bottom. These measurements must match. This confirms the legs are parallel. The correct outside width between the legs should be 77 1/2 inches.
Next, position the 2×6 side rail on top of the leg assemblies. Center it so there is a 1 1/2-inch edge distance on both sides. This spacing ensures proper alignment and a strong connection.
Once the rail is in position, secure it by driving in 2 1/2-inch wood screws through the rail into the legs. Make sure the rail is tightly fastened and fully supported.
Repeat the same process to attach the second side rail to the other set of legs.

Step 5 – Attach End Rails to the Legs
Now that the side rails are installed, you will attach the end rails to complete the main frame structure.
Stand both leg assemblies upright. It is recommended to have someone help you hold them in place. This will keep the frame stable while you work.
Position the end rail between the two leg sets. Place it so it fits into the 1 1/2-inch edge distance on the shorter 2×4 sections of the legs. Make sure the end rail lines up evenly with the side rails. All rails must sit at the same height to keep the frame level.
Before securing anything, check that the legs are still parallel. Measure the distance between the legs at both the top and the bottom. Both measurements should match. This confirms the frame is square.
Once everything is aligned, attach the end rails using 2 1/2-inch wood screws. Drive the screws through the end rail into the legs on both sides.
Repeat this process for the opposite end of the bed frame until all end rails are securely attached.

Step 6 – Cut and Attach the Mattress Boards
Take 2×4 lumber and cut:
- Fifteen (15) boards at 57 1/2 inches in length
These boards will form the mattress support surface.
Next, place all fifteen boards on top of the 2×6 side rails. Space them evenly across the frame. You should leave about a 2-inch gap between each board. This spacing allows proper support while reducing material use and weight.
Make sure the boards are aligned straight and evenly distributed before fastening.Once positioned correctly, attach each board to the side rails using 2 1/2-inch wood screws. Secure both ends of every board into the side rails so they do not move or shift over time.

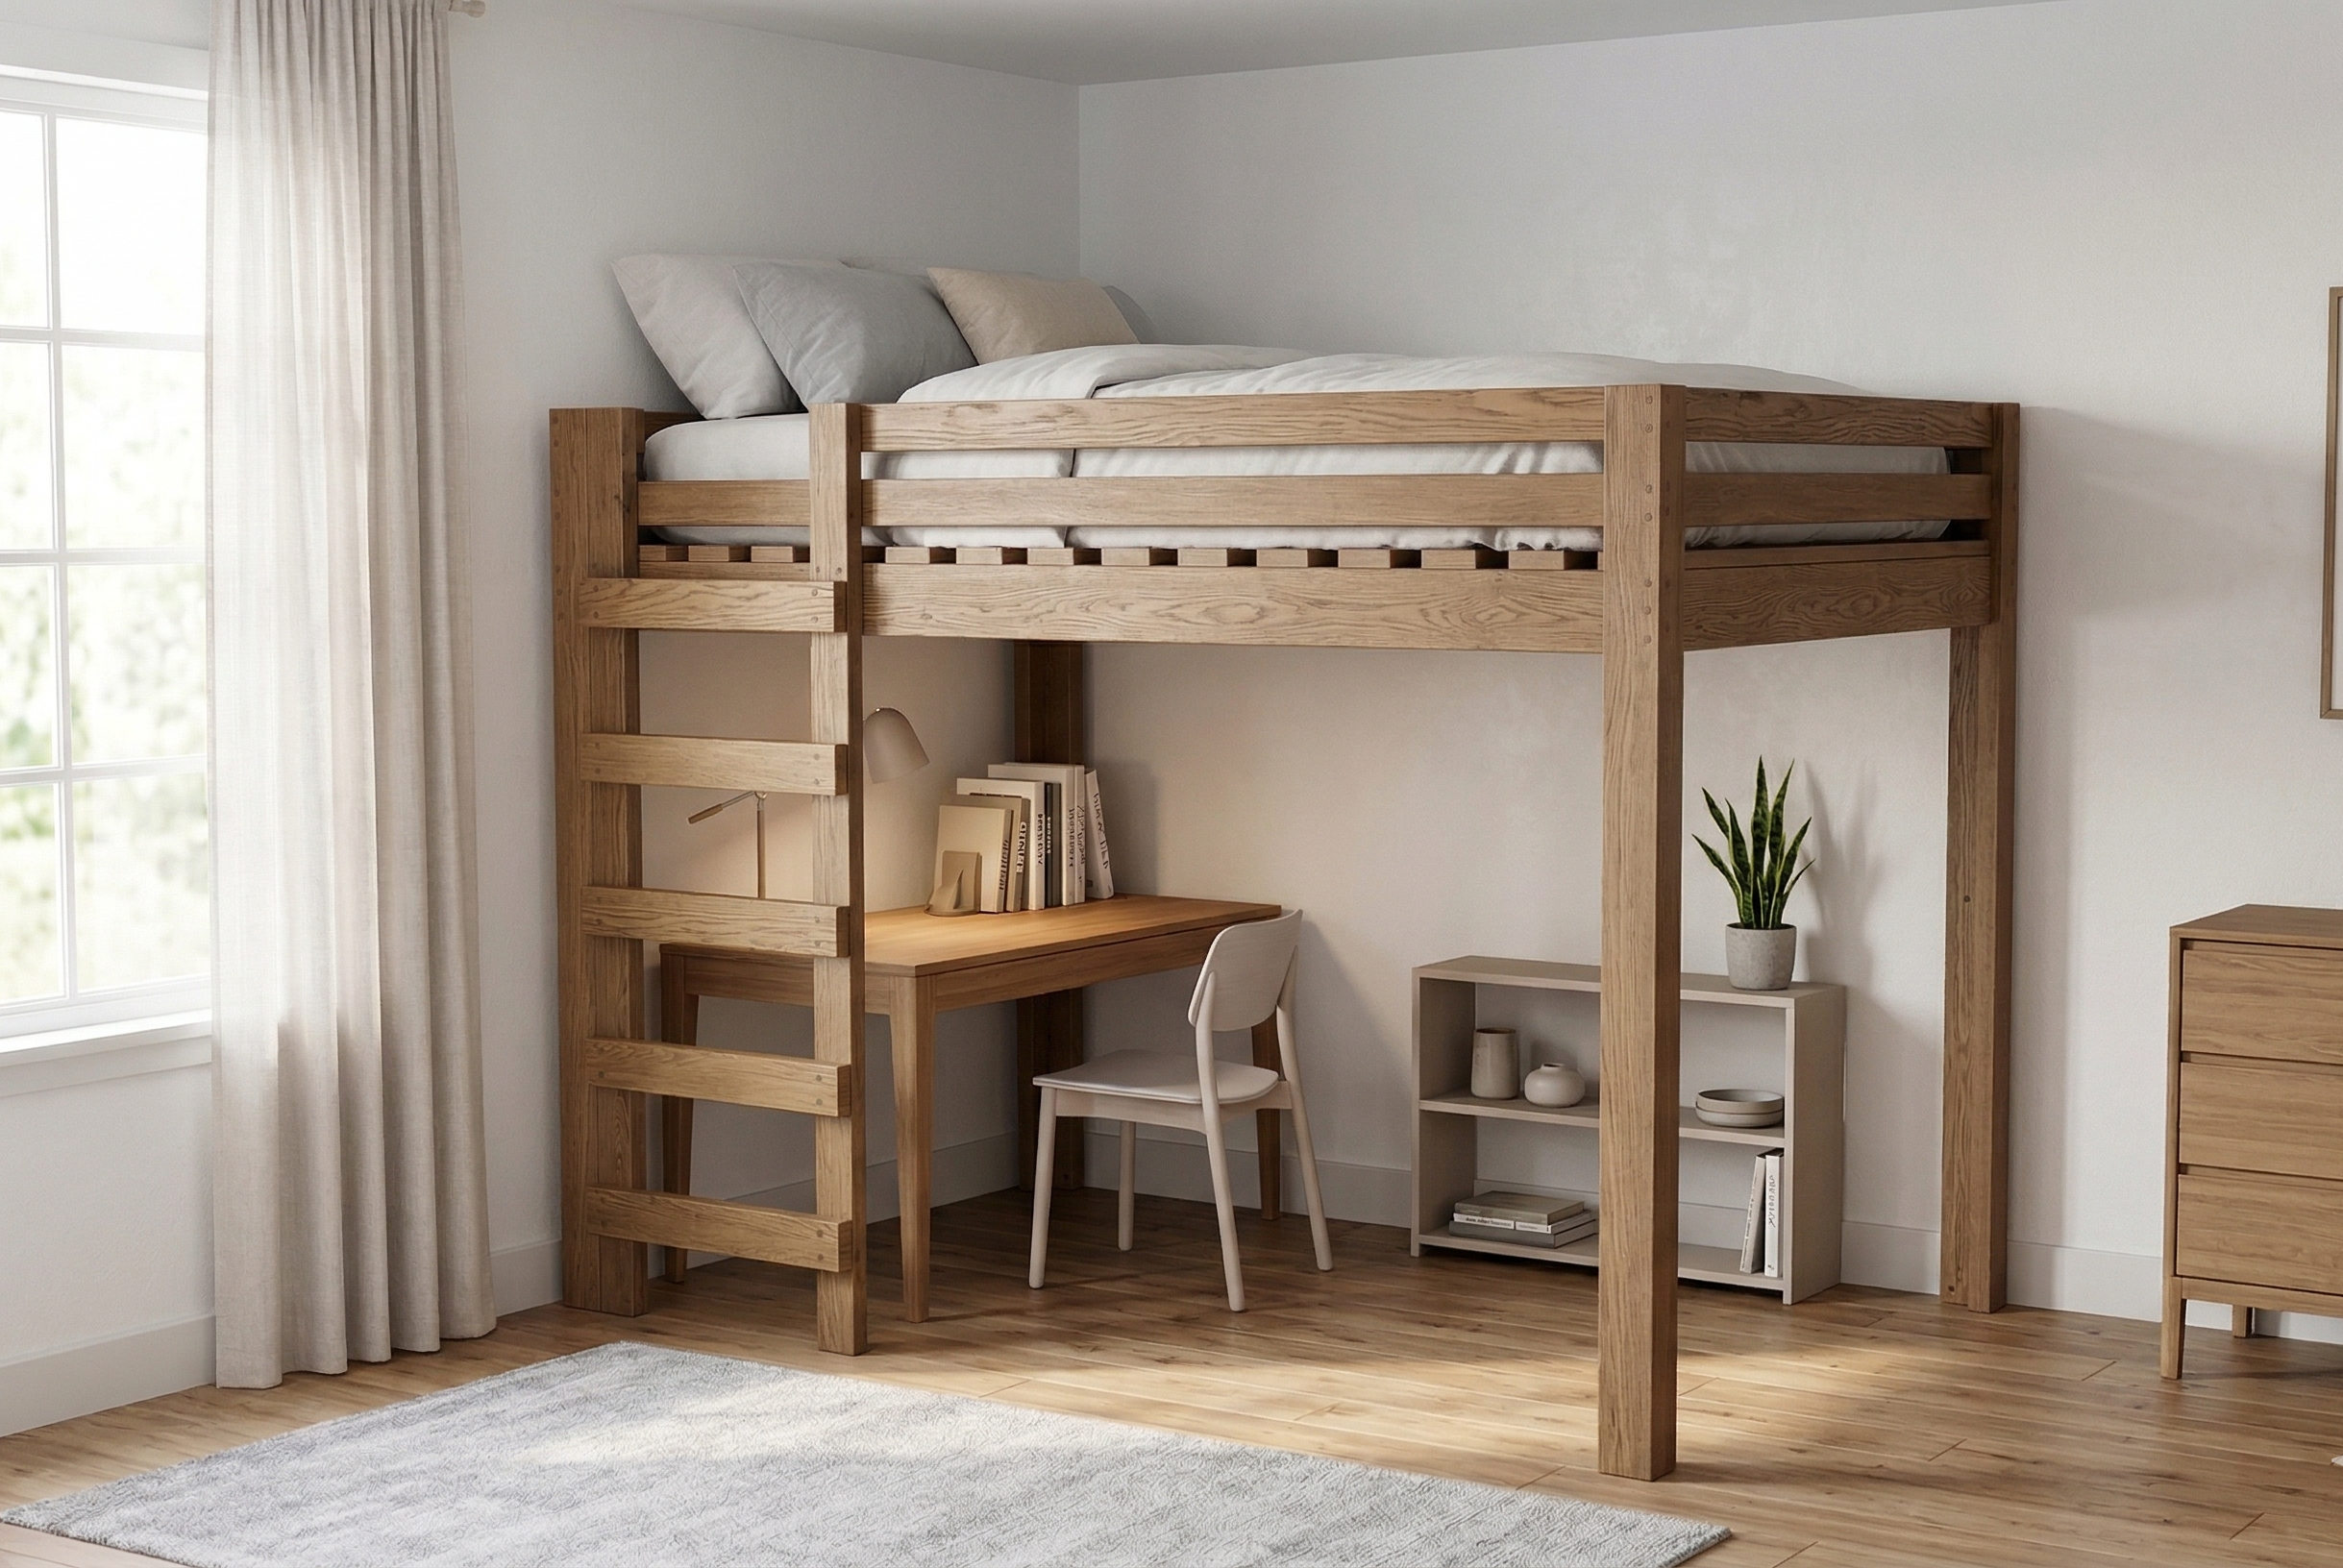
Step 7 – Build and Install a Ladder
The ladder can be installed on either the left or right side of the loft bed, depending on your preference. In this build, the ladder is installed on the left side.
Cut the Ladder Pieces
Use 2×4 lumber and cut:
- Two (2) vertical boards at 72 inches
- Five (5) horizontal rungs at 25 inches
These pieces will form the full ladder structure.
Assemble the Ladder
Place the two vertical boards flat on the ground. Space them 25 inches apart. Make sure both boards are parallel and aligned evenly from top to bottom.
Start attaching the rungs from the bottom.
Measure 8 inches from the bottom of the ladder. Install the first horizontal rung at this point using 2 1/2-inch wood screws.
Then install the remaining rungs. Space each one 8 1/2 inches apart. Keep spacing consistent to ensure the ladder is comfortable and safe to climb.
Install the Ladder on the Loft Bed
Once the ladder is fully assembled, position it against the left side of the loft bed frame.
Attach the top of the ladder to the side rails using 2 1/2-inch screws.
For the connection between the ladder and the left leg, use 4-inch screws. These longer screws are important because they anchor the ladder directly into the leg structure. This prevents movement and stops the ladder from swinging.
Make sure the ladder is tight, stable, and fully secure before moving on.
Step 8 – Cut Remaining Upper Rails
Use 2×4 lumber for this step.
Cut the following pieces:
- Three (3) side rail pieces at 74 1/2 inches in length
- Four (4) end rail pieces at 57 1/2 inches in length
- One (1) piece at 51 inches in length
- One (1) piece at 5 1/2 inches in length
Make sure all cuts are straight and accurate. These upper rail pieces will be used to build and reinforce the top section of the loft bed frame in the next steps.

Step 9 – Attach Upper Side Rails to the Full-Size Loft Bed
Start by placing two of the 74 1/2-inch side rail boards on top of the mattress support boards. These rails match the length of the lower 2×6 side rails. They will sit in the same position but above the mattress support layer.
Make sure the placement is correct. Maintain the same 1 1/2-inch edge distance used in the lower frame. This keeps the structure aligned and evenly spaced.
Once positioned, attach the boards to the legs using 2 1/2-inch wood screws. Secure them tightly so they do not move.
Next, take the third 74 1/2-inch side rail board. Install it at the very top of the back legs. Again, maintain a 1 1/2-inch edge distance on both sides before fastening. Use 2 1/2-inch screws to secure it to the legs.
Now move to the front section of the loft bed. Attach the two remaining pieces:
- One (1) board at 51 inches
- One (1) board at 5 1/2 inches
These pieces connect the front structure. One end will attach to the ladder, and the other end will attach to the front leg. Secure both pieces firmly so the upper frame is fully supported and stable.

Step 10 – Attach Upper End Rails to the Full-Size Loft Bed
Now take the remaining 57 1/2-inch end rail boards. Install them at the same height as the upper side rails. This keeps the top frame level and properly aligned.
Secure each end rail using 2 1/2-inch wood screws. Make sure each connection is tight and fully supported by the legs.
Add the Center Support Beam
Next, cut one 2×4 board to 74 1/2 inches.
Install this board in the center under the mattress support boards. Position it so it runs lengthwise along the middle of the bed frame.
Attach it securely to the structure. This center beam is important because it prevents the mattress support boards from bending or sagging over time.
For additional support, you can add diagonal braces at a 45-degree angle. These braces should run from the legs up to the mattress support boards. This will help prevent the bed from swaying and will increase overall stability.
Final Finishing Steps
Once the structure is fully assembled, you can finish the bed.
- Sand all surfaces using a random orbital sander
- Smooth any rough edges or corners
- Remove splinters for safety
- Apply paint, stain, or protective finish if desired
After this step, the DIY full-size loft bed with ladder is complete and ready for use.
Conclusion
You now have a complete DIY full-size loft bed with ladder built from standard lumber. This project gives you a strong, space-saving bed that can last for years when built correctly.
Not only did you save money, but you also created a custom piece of furniture that fits your space perfectly. The open area underneath can now be used for storage, a desk, or even a small workspace.
If you followed each step carefully, you now have a professional-quality loft bed that is:
- Strong
- Stable
- Space-saving
- Fully custom-built

Reviews
There are no reviews yet.