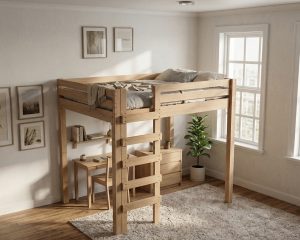
There are many reasons why you might want to build your own DIY queen-size loft bed. Maybe you’re short on space in your bedroom and need to make better use of the vertical space. Perhaps you want a unique bed that no one else has. Or maybe you just enjoy woodworking and building things yourself. Whatever the reason, building your own queen-size loft bed can be a fun and rewarding project.
Loft beds can also be more aesthetically pleasing than traditional beds. You can create a loft bed with a personal touch. This will add character to your bedroom and make it more personal.
Loft beds are the perfect solution for anyone who wants to sleep closer to the ceiling. They’re also great for people who want to maximize their floor space since they free up a lot of room that would otherwise be taken up by a bed frame.
If you happen to have a pet that likes to sleep on your bed, a loft bed is a great way to keep them off the floor (just make sure they can’t get up there on their own!). But really, loft beds are just good for anyone who wants to sleep in a bed that’s slightly elevated. So if that’s you, then don’t hesitate to check out these loft bed plans!
Why use Printable PDF Plans for a DIY Loft Bed?
If you’re thinking about DIY-ing a loft bed for your home, the first step is downloading and printing out the plans. Having good DIY plans is essential for any project. My plans will include step-by-step instructions and clear 3D diagrams, so you can see exactly what you need to do at each step of the process.
Once you’ve printed the plans, the next step is to gather all the materials and tools you’ll need to build the bed. Then, it’s just a matter of following the instructions and putting everything together. With a little bit of effort, you’ll be able to build a beautiful loft bed that will last for years to come.
You also might be interested in a DIY bunk bed, and DIY toddler-size bed.
Time to Complete
6 hours
Total Cost
$280
Skill Level
Intermediate
Download Printable Plans in PDF
DIY Queen Size Loft Bed Plans
$14.97
Digital PDF download: step-by-step DIY woodworking plans to build a queen size loft bed for adults. Includes cut list with measurements, material list, tools list, 3D diagrams, and printable instructions. Instant download. No shipping. Build it yourself for around $280 in about 6 hours.
Description
Build a Queen-Size Loft Bed for Adults — Complete DIY Woodworking Plans
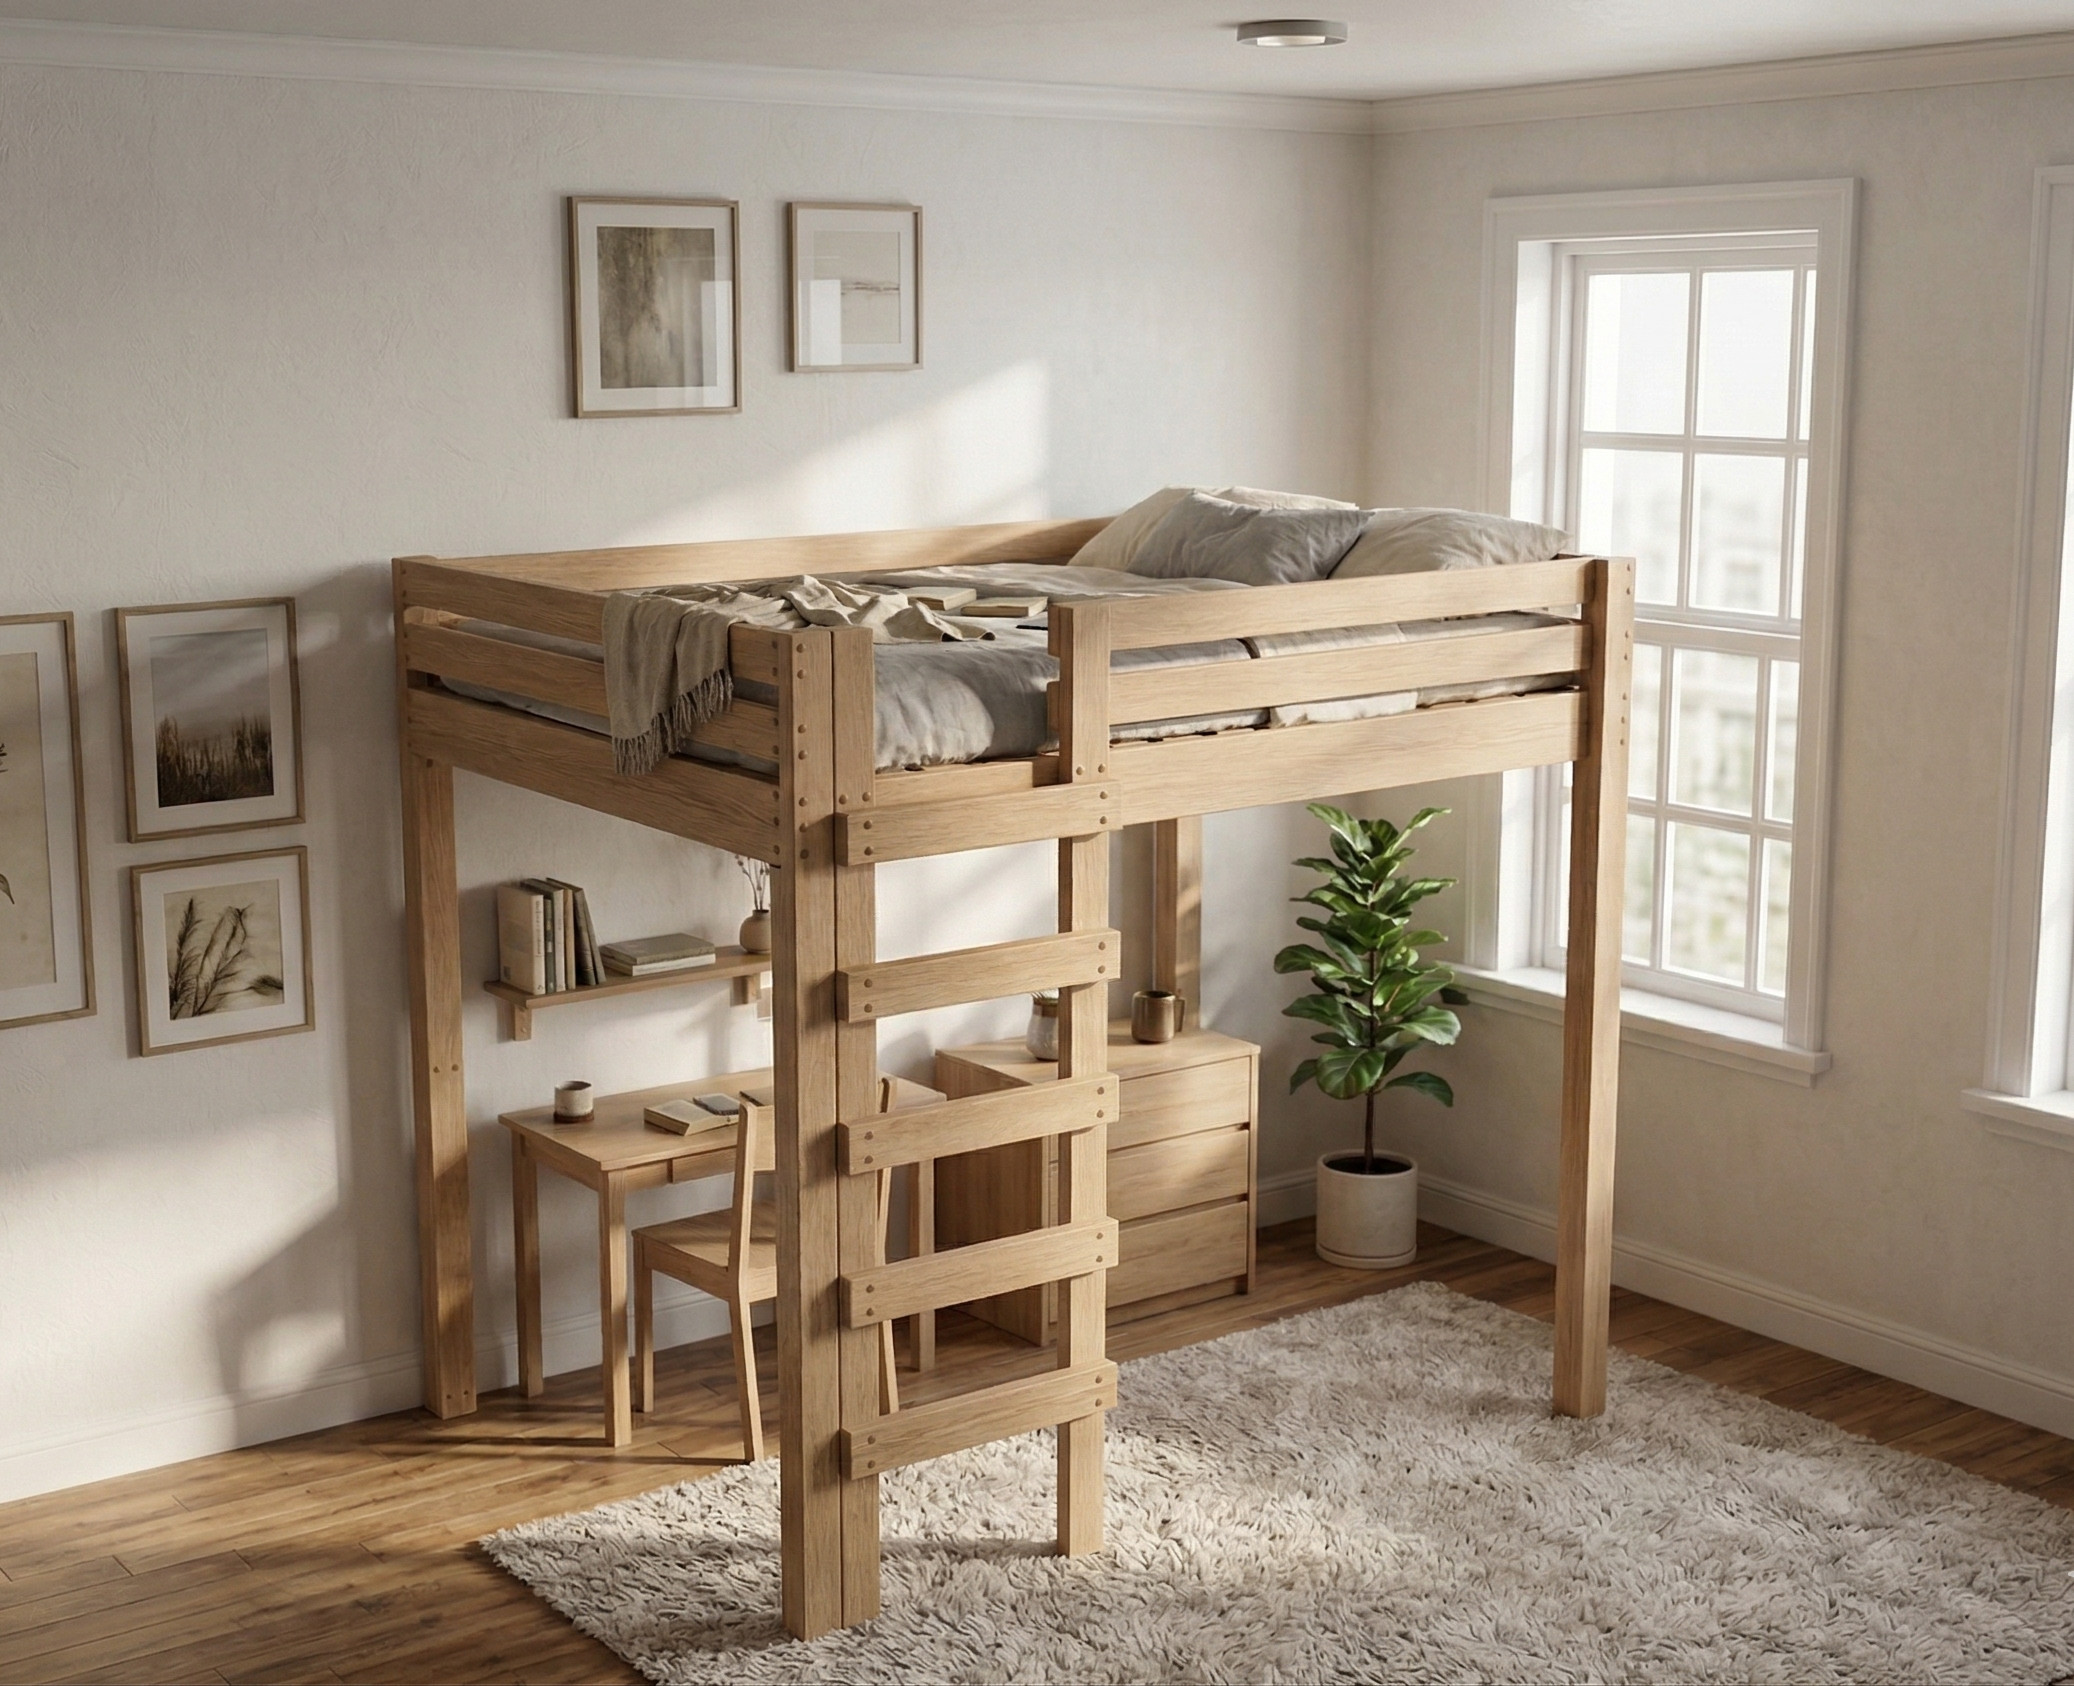
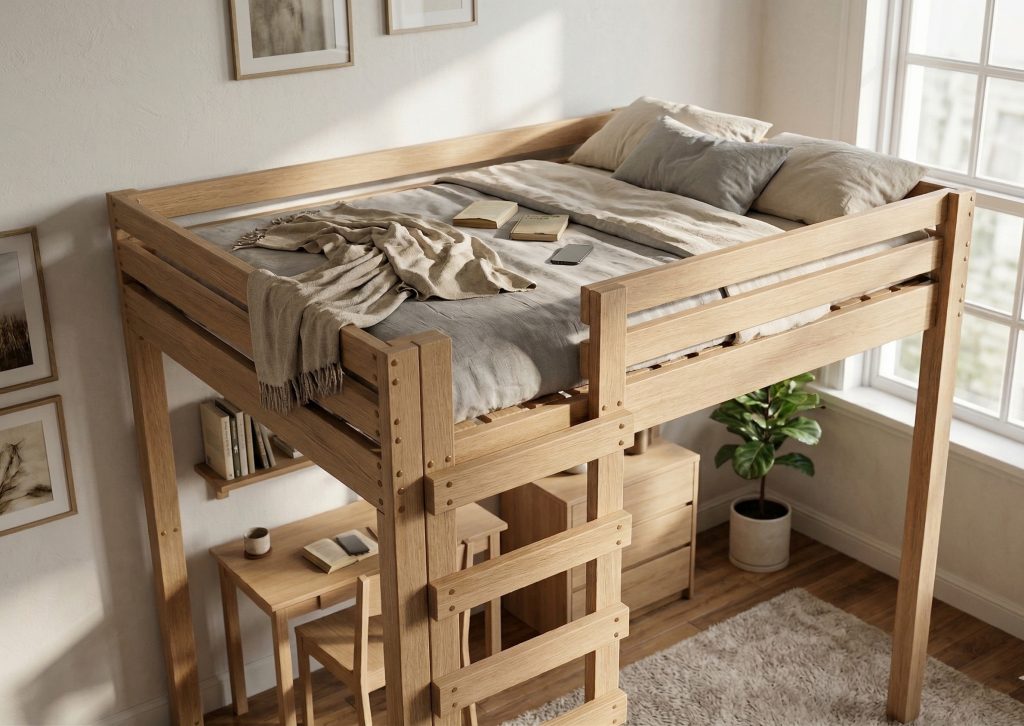
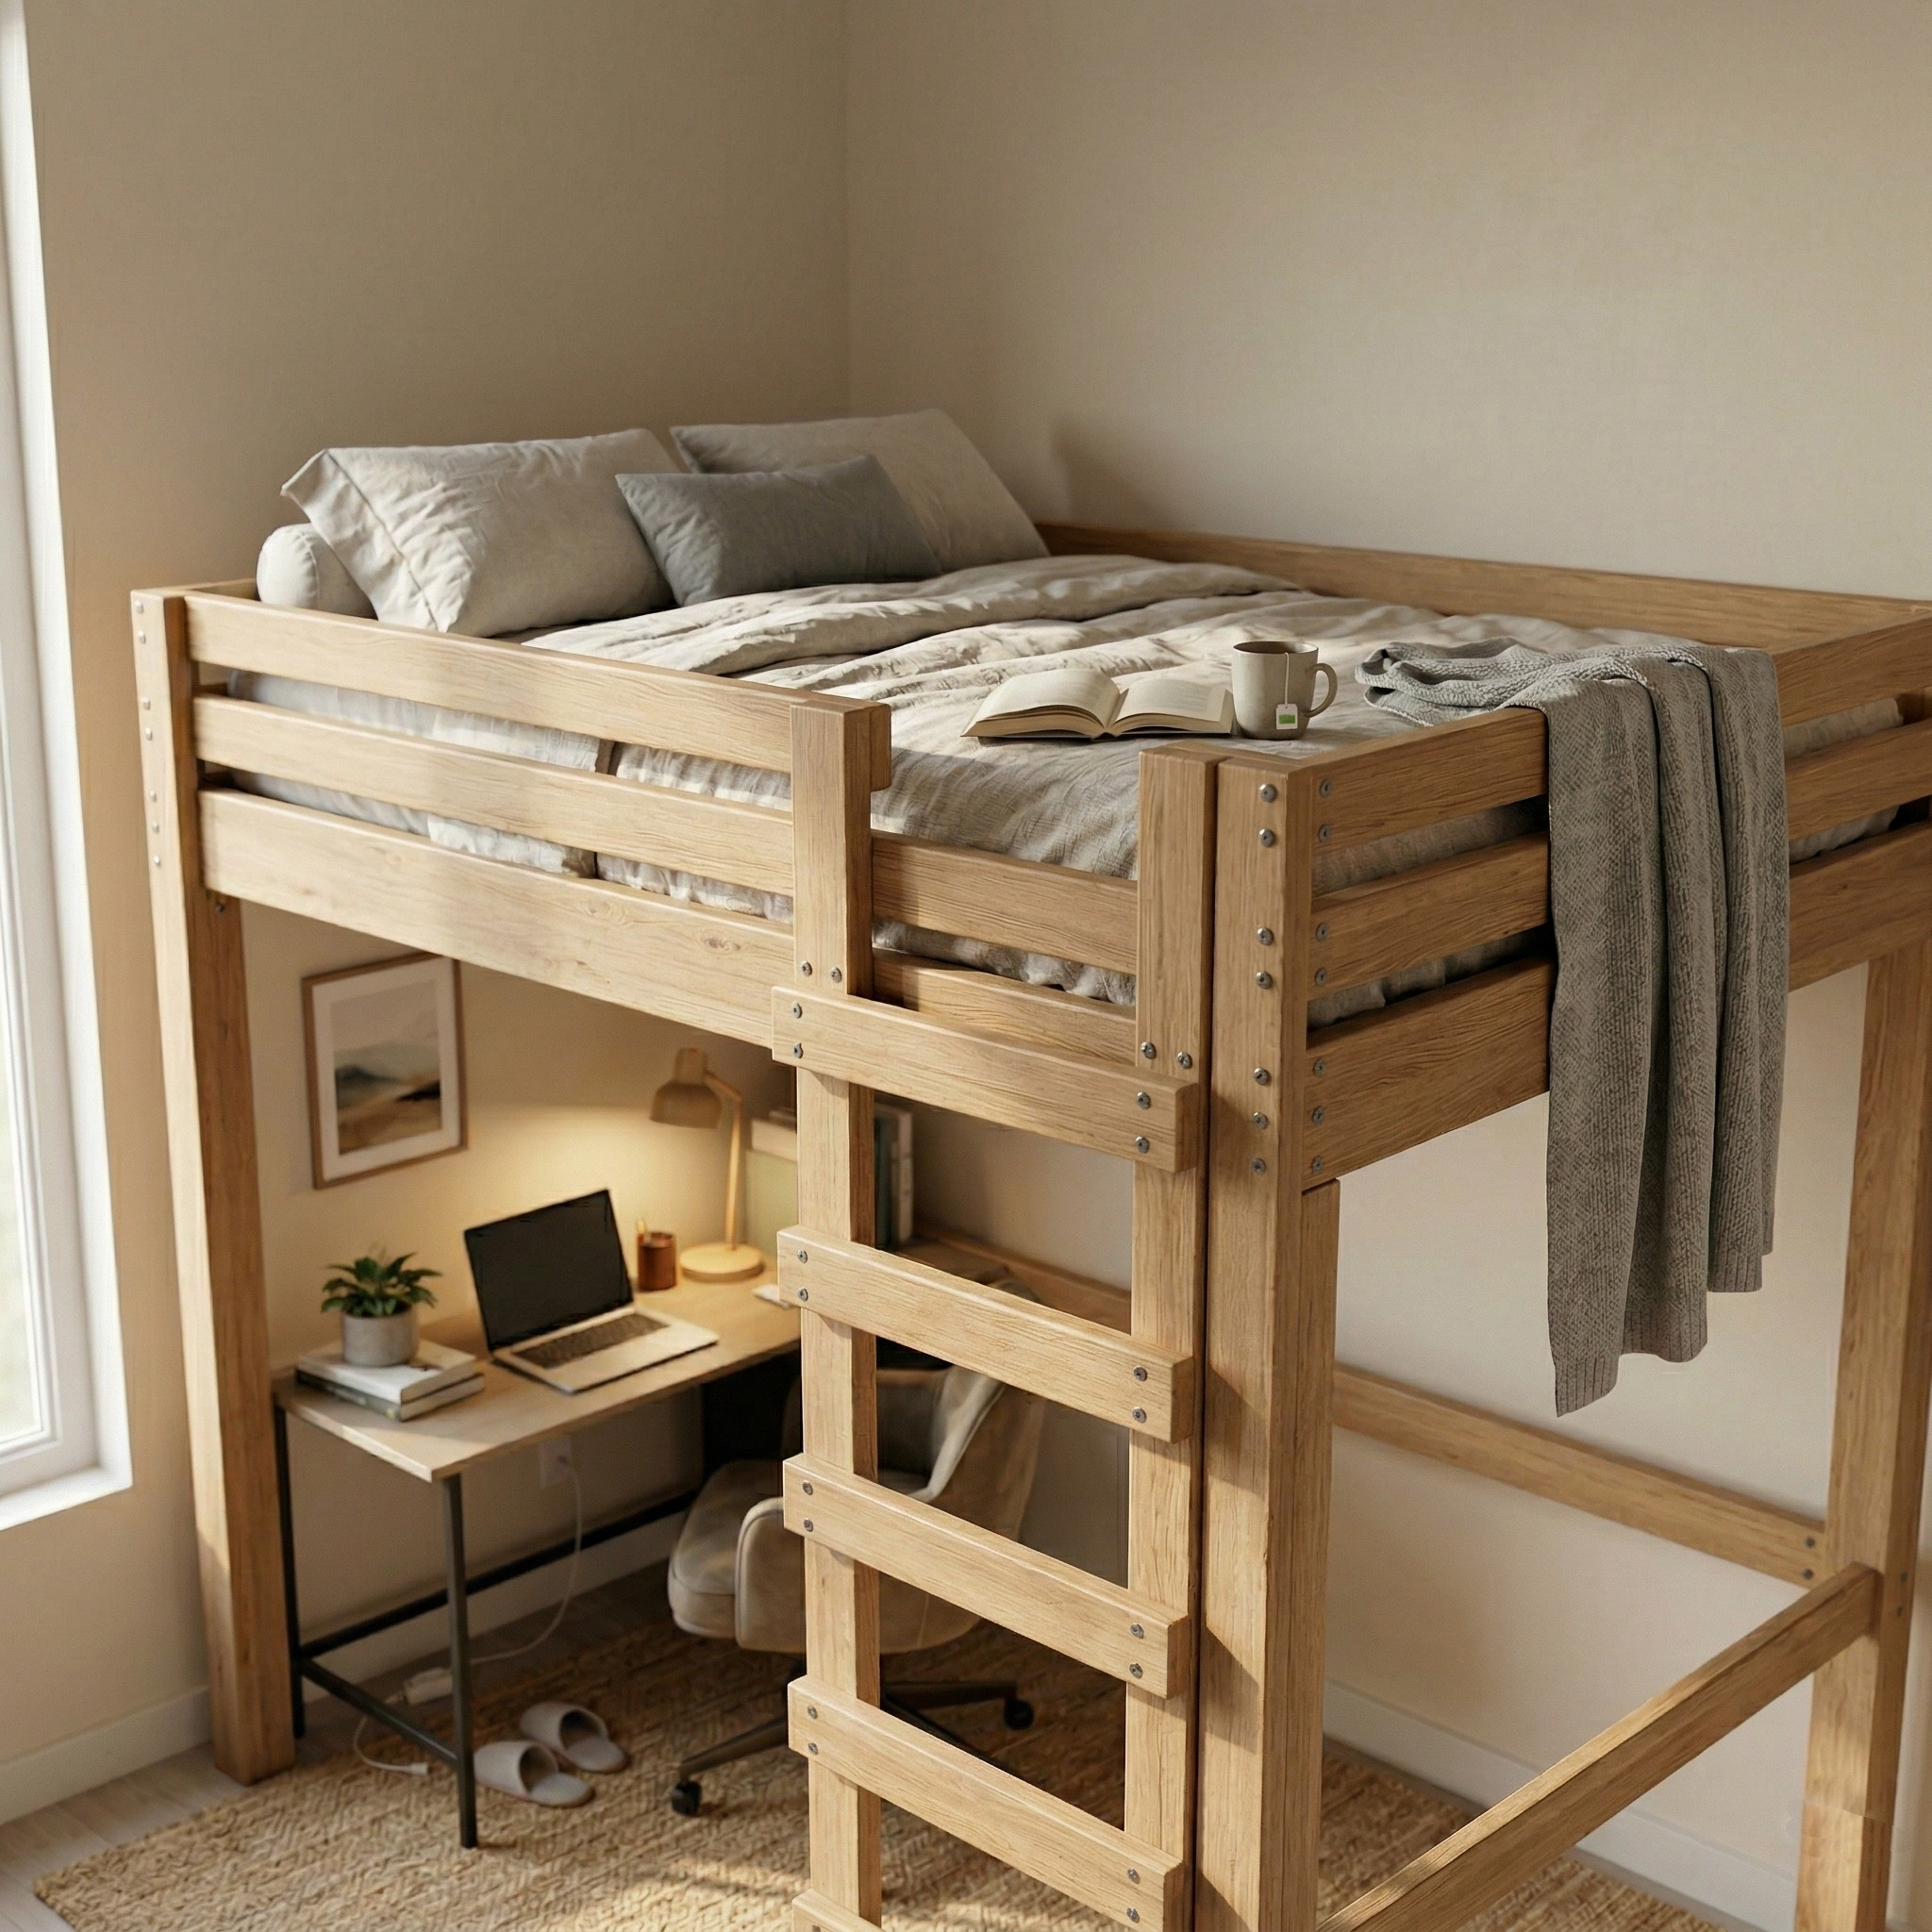
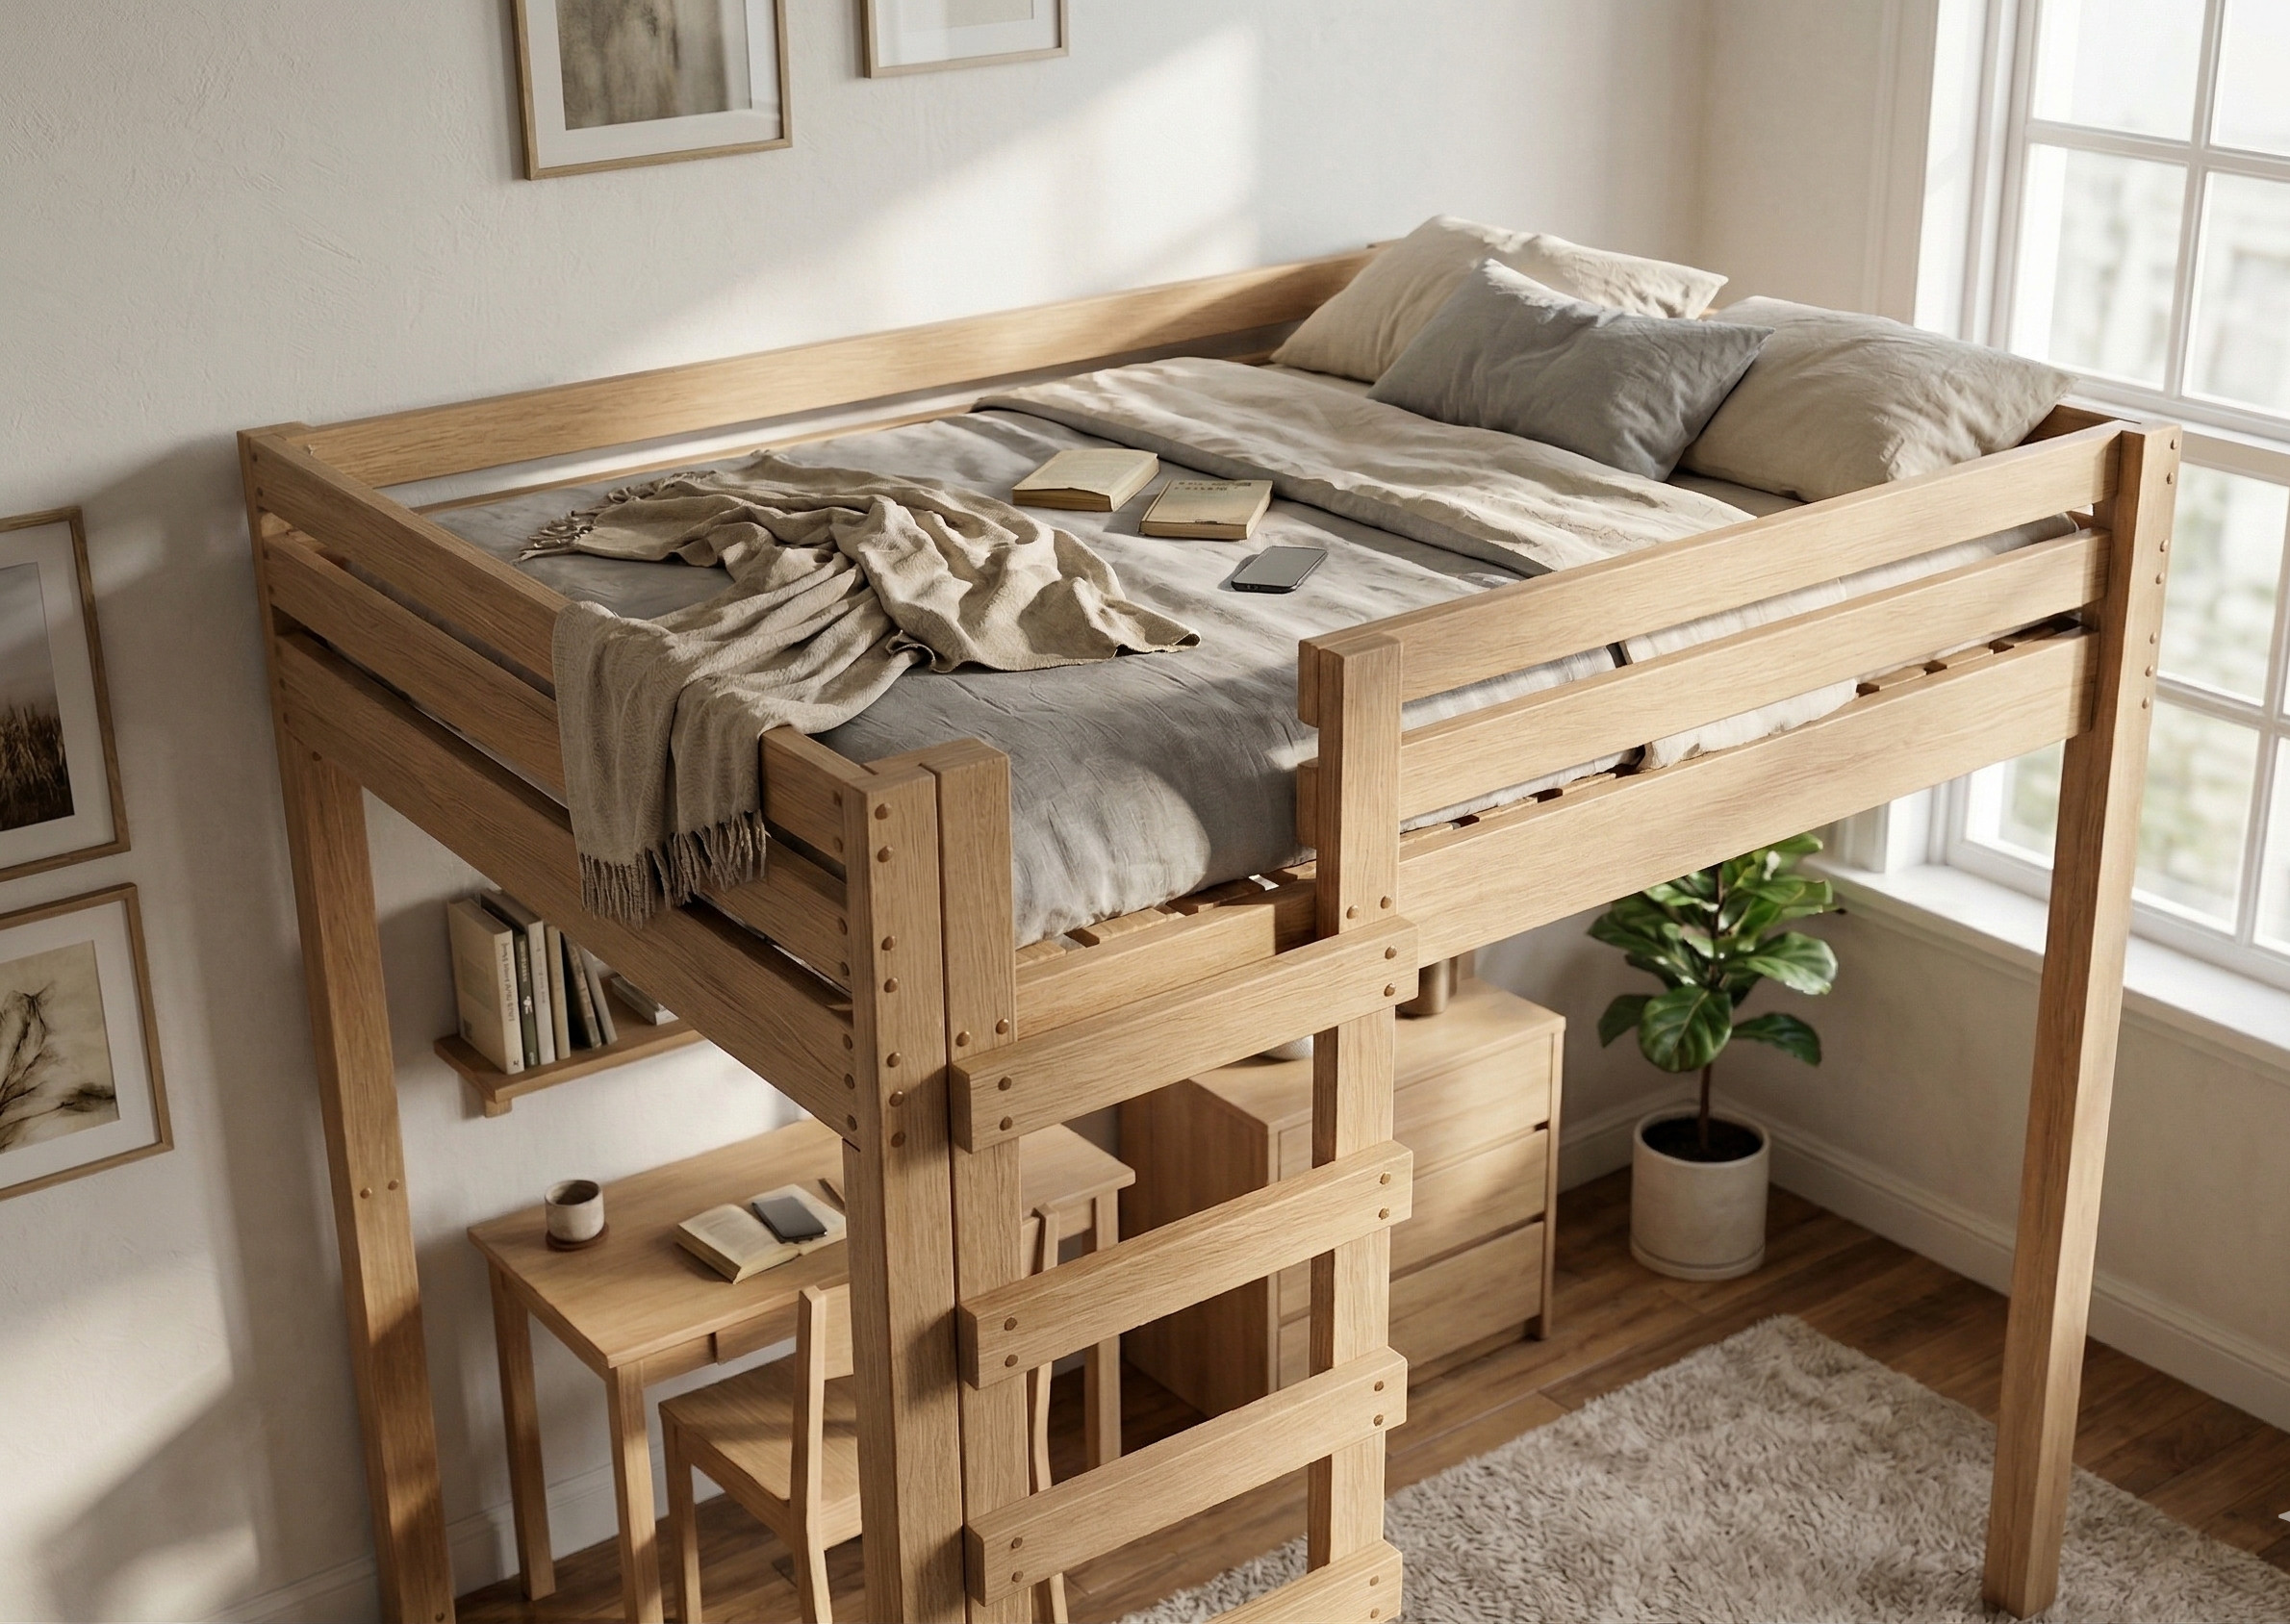
If you’re looking to maximize floor space in your bedroom without sacrificing a comfortable queen-size sleeping area, building your own loft bed is one of the smartest projects you can take on. This DIY Queen Size Loft Bed PDF gives you everything you need to go from raw lumber to a finished, solid wood loft bed — with a built-in ladder and full mattress support — in around 6 hours.
Whether you’re working with a small bedroom, a studio apartment, or just want a bed with a personal touch, a loft bed frees up valuable floor space underneath while giving you a sturdy, custom-built sleeping platform sized for a standard queen mattress.
These plans are based on a fully tested, 10-step build process designed for beginner-to-intermediate woodworkers. No guesswork, no hunting for measurements scattered across a blog post — just a clean, printable PDF you can bring right to your workshop.
Who These Plans Are For
These woodworking plans are ideal for:
- DIY homeowners looking to build custom bedroom furniture on a budget
- Beginner to intermediate woodworkers who want a confidence-building furniture project
- Anyone short on bedroom floor space who needs a practical, good-looking solution
- Parents and adults wanting a loft bed sized for a full queen mattress
- Workshop hobbyists who enjoy building functional furniture from scratch
If you’ve used a miter saw and a drill before, you have the skills to build this bed.
What’s Included in the PDF
Your instant download includes:
- Step-by-step building instructions — 10 clearly written steps covering every stage of the build, from cutting the legs to attaching the ladder
- Full cut list with measurements — every board length and quantity you need, listed in imperial measurements
- Complete material list — know exactly what to buy before you set foot in the hardware store
- Tools required list — tape measure, drill, miter saw, and random orbital sander
- 3D assembly diagrams and illustrations — visual references at each step so you always know what the finished assembly should look like
- Estimated build time — approximately 6 hours
- Estimated total project cost — approximately $280 in materials
- Printable PDF format — print the full plan at home or at a print shop
- Instant download after purchase — no waiting, no shipping
- Works on desktop, tablet, and mobile devices
⚠️ Note: Plans use imperial measurements (inches). SketchUp/CAD files are not included.
Project Details
| Detail | Info |
|---|---|
| Skill Level | Intermediate |
| Estimated Build Time | ~6 hours |
| Estimated Material Cost | ~$280 |
| Mattress Size | Queen (standard) |
| Bed Height | 72″ legs (floor to top of leg) |
| Side Rail Length | 80.5″ |
| End Rail Length | 63.5″ |
| Mattress Support Boards | 15 boards at 63.5″, evenly spaced |
| Ladder | Built-in, 5 rungs, attachable left or right side |
| Primary Material | 2×4 and 2×6 dimensional lumber |
| Measurement System | Imperial (inches) |
Recommended Tools:
- Tape measure
- Power drill
- Miter saw
- Random orbital sander
- 2½″ and 4″ wood screws
Why These Plans Make Building Easier
Free tutorials and blog posts give you a general idea of how to build a loft bed — but they scatter measurements across photos, leave out the cut list, and rarely include a proper material list. That means more trips to the hardware store, more measuring mistakes, and more wasted time.
These PDF plans solve all of that:
- Everything in one printable document — no scrolling through a webpage at the jobsite
- Accurate measurements ready to transfer — cut list is laid out so you can mark boards and cut without re-reading instructions twice
- 3D diagrams at every step — you can see exactly how each assembly should look before you commit to drilling
- Material list lets you pre-shop — buy everything in one trip and start building the same day
- Tested build sequence — the 10-step order is designed to minimize rework and keep the build moving efficiently
- Printable format — bring it to the garage, workshop, or lumber yard without needing your phone or laptop nearby
Digital Download Information
This is a digital product only. No physical item will be shipped.
- ✅ Instant PDF download delivered immediately after purchase
- ✅ Access your file anytime — redownload as needed
- ✅ Print at home or at any print shop
- ✅ Compatible with desktop, tablet, and mobile devices
- ✅ No subscription required
- ❌ No physical plans mailed
- ❌ No SketchUp or CAD files included
Ready to Build Your Loft Bed?
For around $280 in lumber and an afternoon of work, you can build a queen-size loft bed that opens up your bedroom floor, looks great, and holds up for years. These plans give you the complete roadmap — measurements, cut list, materials, diagrams, and instructions — so you can spend less time figuring it out and more time building.
Download the PDF today and start your build this weekend.
Other Woodworking Projects

Tools for this project
Material List
- Available with purchase of PDF plans.
Note: Lumber dimensions are listed as nominal size. See lumber sizes for actual dimensions vs nominal.
Disclosure: Some of the links on this page, as well as links in “tools for this project” and “material list” sections are affiliate links.
Dimensions

Step 1 – Cut Four Legs of the Loft Bed
First, start with cutting the legs. Using 2x4s, cut four pieces to 72″ in length. Then cut another four 2×4 pieces to 56″ in length. These shorter pieces will support the weight of the loft bed, including the mattress.

Step 2 – Connect the 2x4s to Make Four Legs
Next, take one 72″ piece and one 56″ piece and attach them together side by side. Make sure that both 2x4s are flush at the bottom. Repeat this step to build four legs with 2 1/2″ wood screws.
When connecting the boards, you could either use 2 1/2″ wood screws or nuts and bolts. I prefer to use screws because you could get the job done quicker. Some people like to use nuts and bolts because the loft bed has that industrial look if that’s what you’re aiming for. But it takes much longer to build when using nuts and bolts.
When driving in the screws, you need to pay attention to how close you get to the edge of the board. If the screw gets too close to the edge, it might split the wood, especially if lumber is very dry.
Sometimes when purchasing lumber at the hardware store, you will get 2x4s that are not completely dry. You will notice that these boards are much heavier. Wet lumber will not split even if you drive the screw at the edge of the board.
The disadvantage of using lumber that is not completely dry is that over time it will start to warp or twist.
For using dry 2x4s, it’s a good idea to pre-drill the pilot holes before driving in the screws. Dry wood will split very easily, especially with longer screws.

Step 3 – Cut End and Side Rails of the Loft Bed
The side rails are an essential part of the loft bed. They will hold the mattress support boards and the mattress itself. Since these rails will support a lot of weight, use 2×6 boards instead of 2x4s.
Take 2×6 boards and cut two side rails to 80 1/2″.
The end rails will not be supporting any weight. But to keep the layout symmetrical, use 2×6 boards for end rails as well. Cut two 2×6 end rails to 63 1/2″ in length. The end rails will be attached at the same elevation as the side rails.

Step 4 – Attach the Side Rail to Leg Sets
The 2×6 side rail will sit on the shorter board of the leg. This transfers the weight of the loft bed on the 2×4 legs instead of just on a few screws.
Lay the legs on the floor parallel to each other with short legs facing up. Making sure the measurements at the bottom of the leg and the top are the same; confirms that the legs are parallel. You should have an 83 1/2″ dimension from the outside of the legs.
Place the 2×6 side rail on the legs with a 1 1/2″ edge distance on both sides. Then drive in the screws to secure the rail to the legs.
Repeat this step to build the other leg set.

Step 5 – Attach End Rails to the Legs
Now that the side rails are attached, it’s time to attach the end rails.
Stand up the leg sets that you’ve built. Have someone help you hold the legs while you attach the end rails. Place the end rail on the shorter legs into the 1 1/2″ edge distance space. Both end and side rails should be at the same elevation. Make sure the legs are parallel to each other by checking the distance at the top and bottom of the leg. Then secure the end rails with 2 1/2″ screws.

Step 6 – Cut and Attach the Mattress Boards
Take 2x4s and cut fifteen boards to 63 1/2″ in length. Then, space these fifteen pieces evenly on top of the 2×6 rails. You should have about a 2″ gap between the boards. Now attach all these boards to the side rails with 2 1/2″ wood screws.

Step 7 – Build and Install a Ladder
The ladder could be installed on the left or the right side of the bed; it’s your preference. For this tutorial, I’ll have it on the left side.
Take 2×4 and cut two vertical boards to 72″ and five horizontal pieces to 25″ in length. Place the two vertical boards flat on the floor 25″ apart. Make sure they are parallel to each other.
Next, measure 8″ from the bottom of the ladder and attach your first horizontal boards with 2 1/2″ wood screws. The remaining horizontal ladder boards should be attached 8 1/2″ apart.
Once the ladder is complete, place it against the left leg of the loft bed. Attach it to the side rails with 2 1/2″ screws. You will need to use 4″ screws to attach the ladder to the left leg. This will keep the ladder from swinging.

Step 8 – Cut Remaining Upper Rails
Using 2×4, cut three side rail pieces to 80 1/2″ in length and four end rails pieces to 63 1/2″. Then cut one piece to 57″ in length and one piece to 5 1/2″.

Step 9 – Attach Upper Side Rails to the Loft Bed
First, place two side rail boards 80 1/2″ long on top of the mattress support boards. Since these side rails are the same length as the lower 2×6 rails, they will go in the same space but above the mattress support boards.
Ensure you have the same edge distance of 1 1/2″ as the lower rails and attach them with 2 1/2″ wood screws to the legs.
Now take the third side rail board 80 1/2″ long and attach it at the very top of the back legs. Again, make sure you have 1 1/2″ edge distance on both sides.
Then, attach 57″ and 5 1/2″ long pieces to the front end of the loft bed. One side will be attached to the ladder and the other to the leg.

Step 10 – Attach Upper End Rails to the Queen Size Loft Bed
Next, take the remaining 63 1/2″ end rail boards and attach them at the same elevation as the side rails with 2 1/2″ wood screws.
Finally, cut one 2×4 to 80 1/2″ in length and attach it in the center under the matters support boards. This will keep the support boards from sagging.
Now you could sand the boards with a random orbital sander and paint the bed. You are done with the DIY queen-size loft bed with a ladder.

Reviews
There are no reviews yet.